Xcode
We give a step-by-step guide on how to connect a device to Xcode using Corellium. Click the blog to get started with your iOS testing & development processes.
To use Xcode, you need to have USBFlux set up first, check out the Connect to a Virtual iOS Device with USBFlux article if you haven't already.
Sync Caches Faster
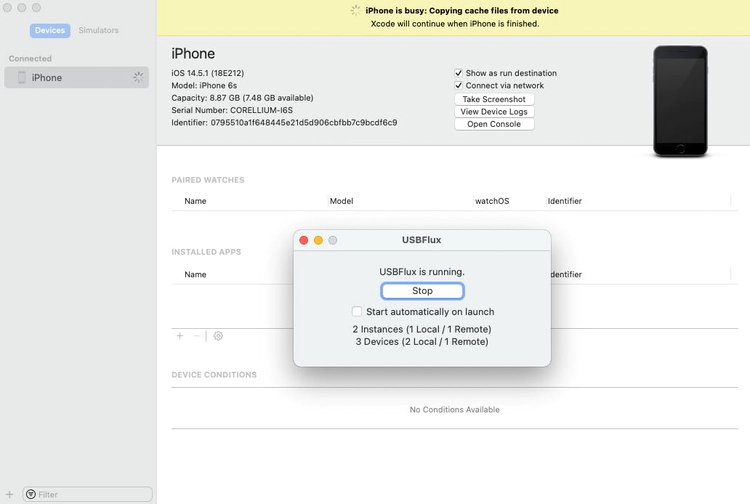
If this is your first time connecting to the device, Xcode will begin copying a cache from the device. Whenever you connect a new device to Xcode, a dyld_shared_cache is downloaded from the device to Xcode in preparation for development. These files can be up to 3 GB, and downloading these files over Wi-Fi Sync or USBFlux can take a very long time. To expedite this process, you can use this free tool.
This tool first generates a list of devices connected via USB. Then, it enables you to locally download the appropriate caches for Xcode and install them in the correct location, rather than copying the caches from the device itself. This tool substantially speeds up the download process.
USBFlux
Once you have USBFlux set up and running, open Xcode
Select "Devices and Simulators" under the "Window" menu in the top navigation bar.
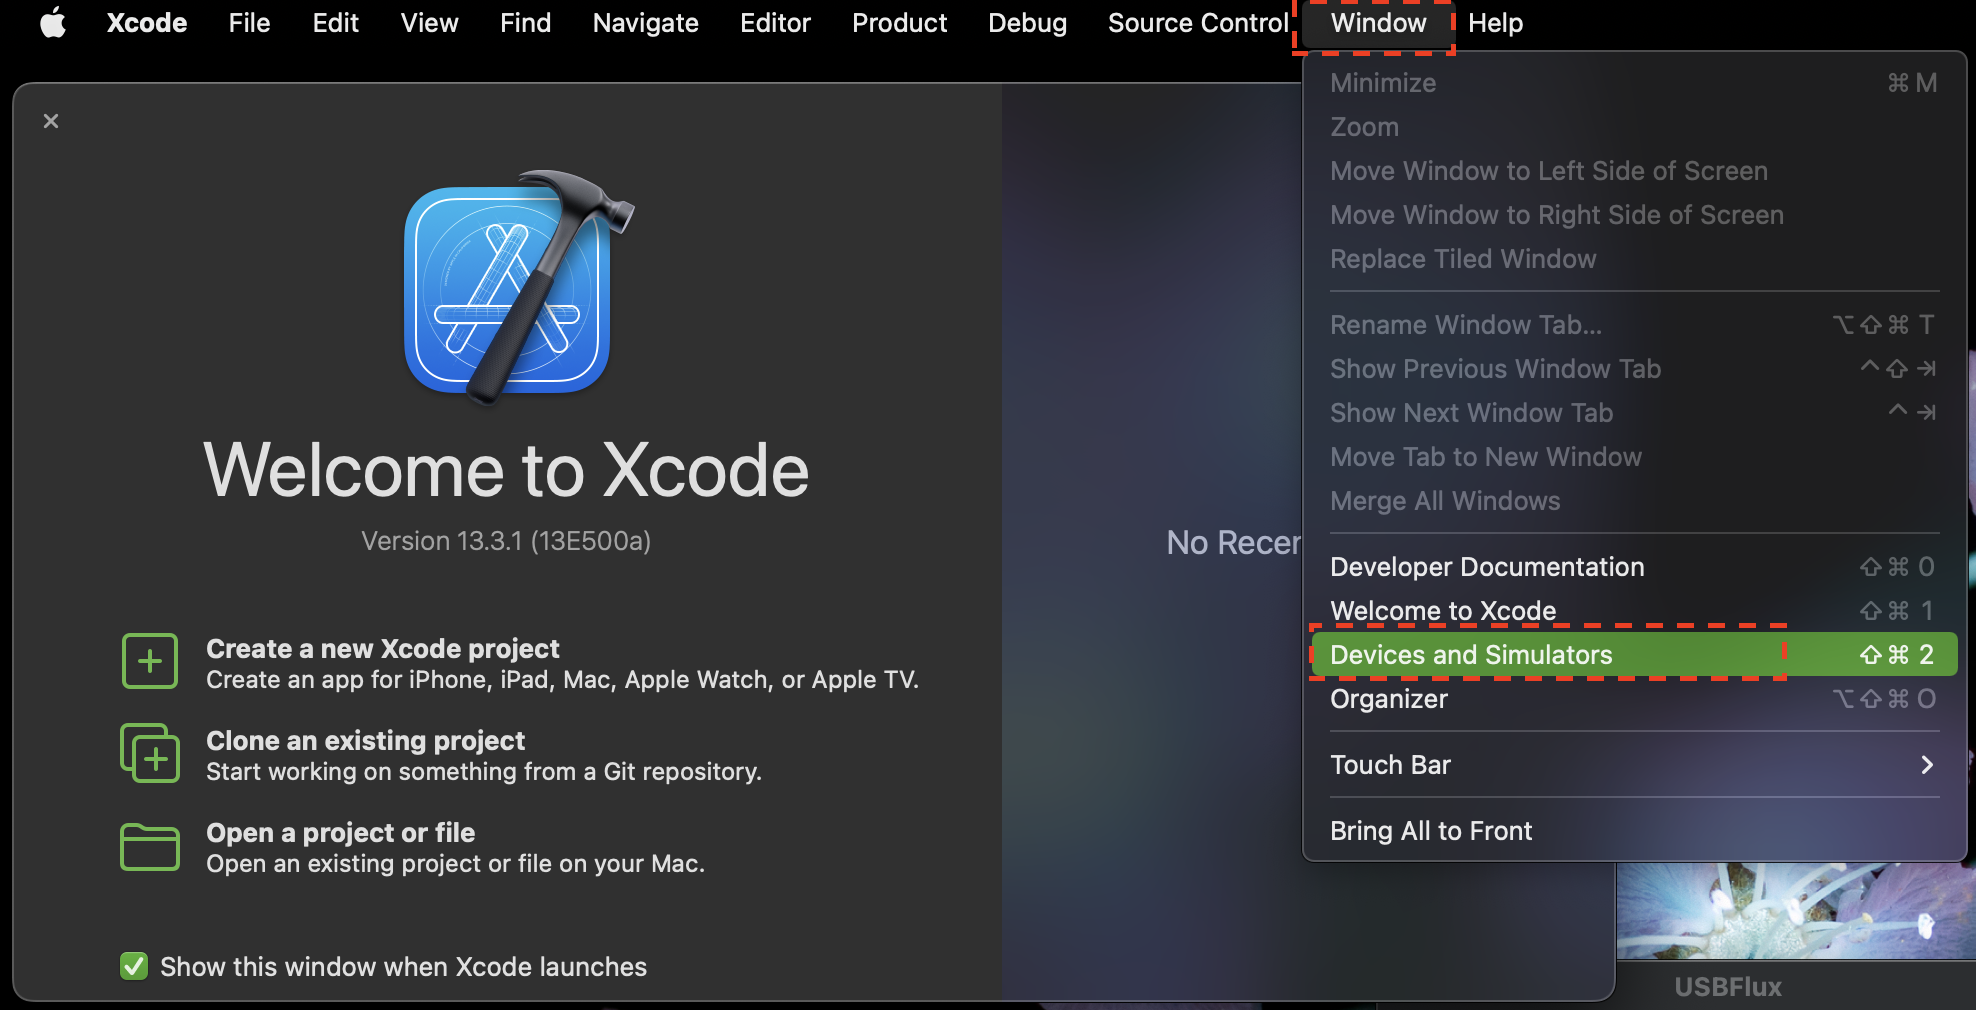
Your virtual device will automatically appear as a Connected Device in the left-hand panel. You'll see a "CORELLIUM" serial number in the main window, as well as the iOS version and device model.
Wi-Fi Sync - Cloud Only
To pair your virtual device with Xcode using Wi-Fi Sync, you will first need to enable IPv6 for your VPN configuration profile in your VPN client. If you are using Viscosity, you can do this by selecting the VPN profile, clicking "Edit," and checking the box for "Enable IPv6."
Before proceeding, ensure that you are connected to the correct VPN configuration profile for your Project. It is recommended to have only one virtual iOS device in your Project. Multiple devices can cause Xcode to error.
Continuing from the tutorial above, in the main screen of the Xcode device window, check the box for "Connect via Network."
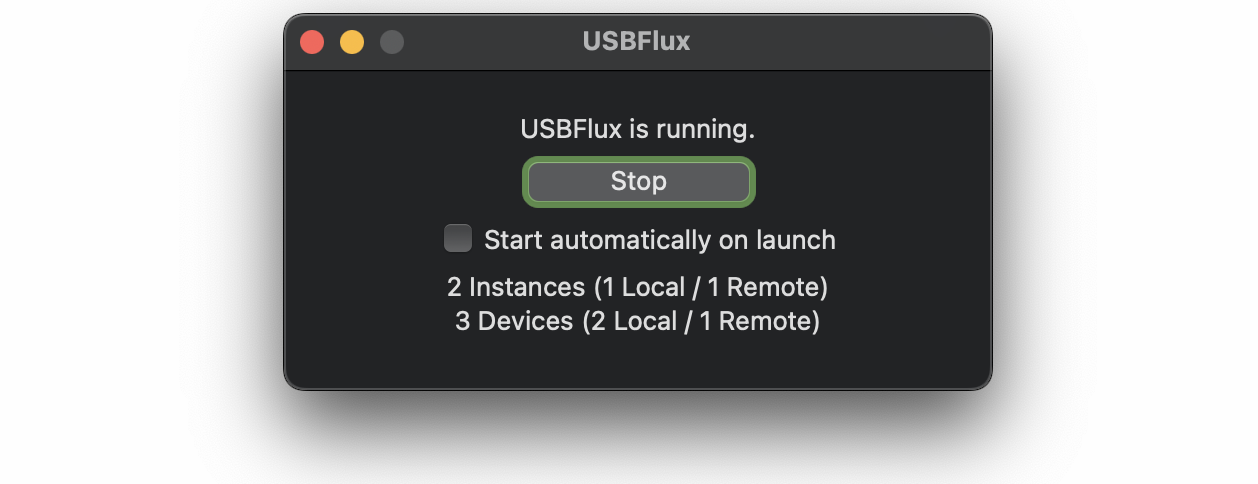
On the USBFlux app, click "Stop."
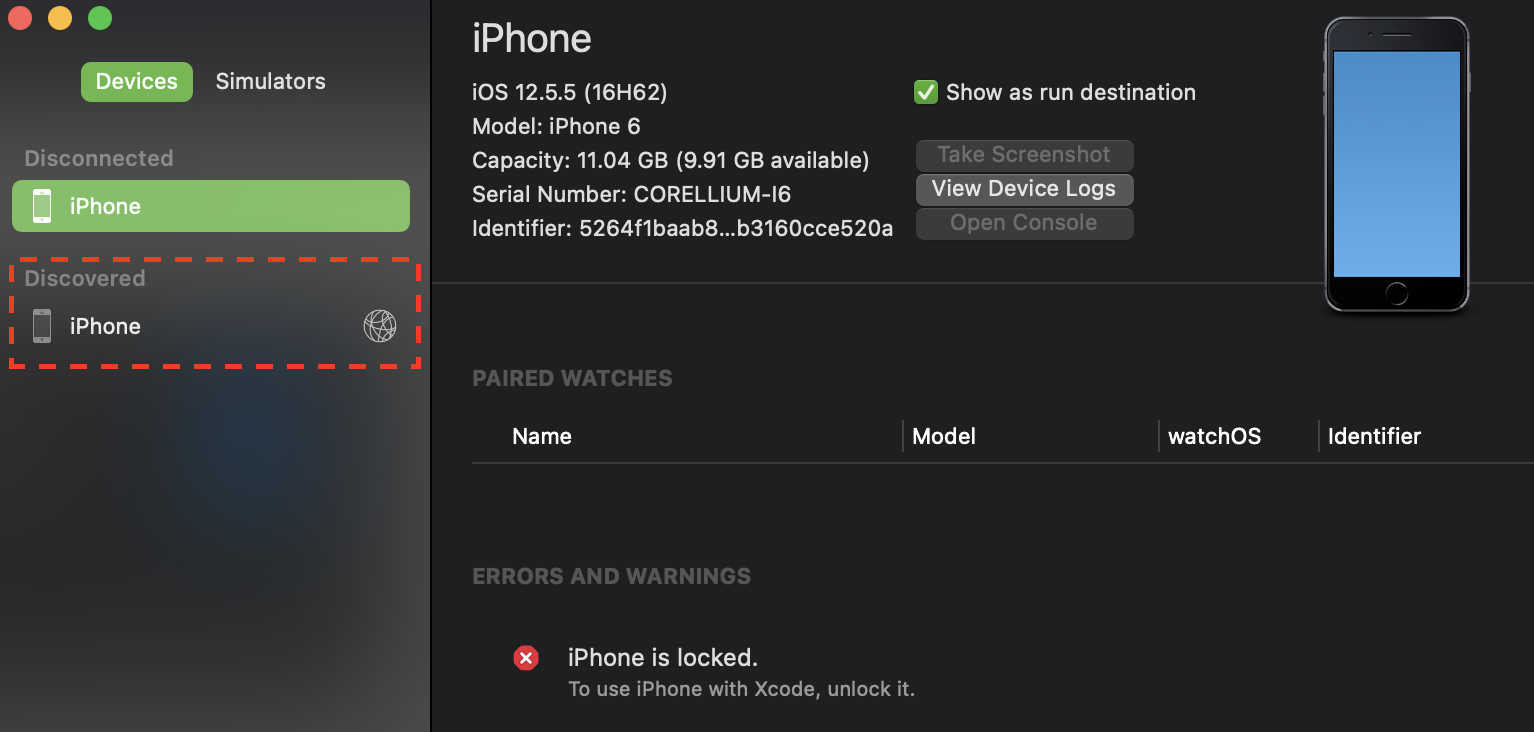
- In Xcode, your device should now appear as a Discovered Device with a sphere icon in the left-hand panel.
- If it does not appear, you may need to quit and reopen Xcode, and relaunch the "Devices and Simulators" window.
Click on your device, and then click the "Pair with iPhone" button. The code is 000-000. Click "Connect."
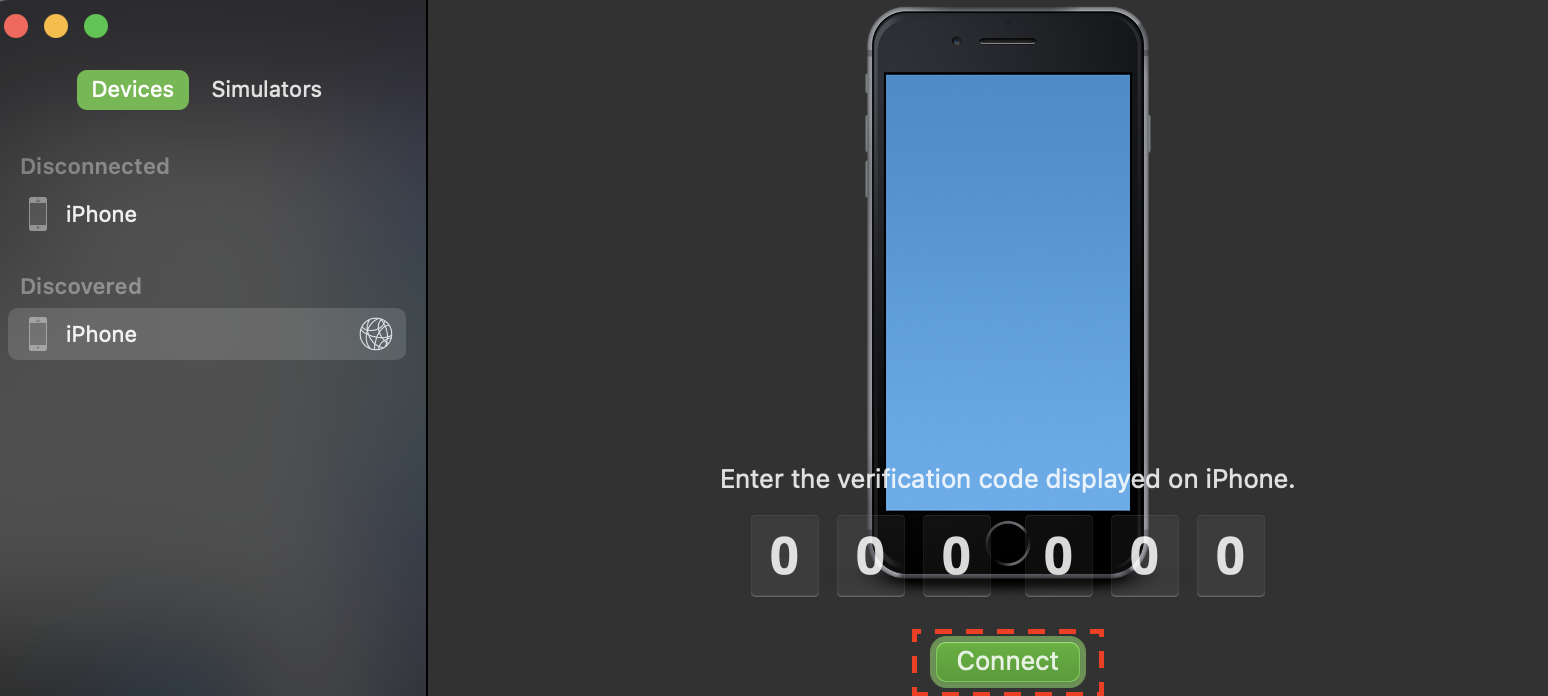
Your device should now appear as a Connected Device. It may take a minute for Xcode to update the device status. If it does not reappear, you may need to quit and reopen Xcode, and relaunch the "Devices and Simulators" window.
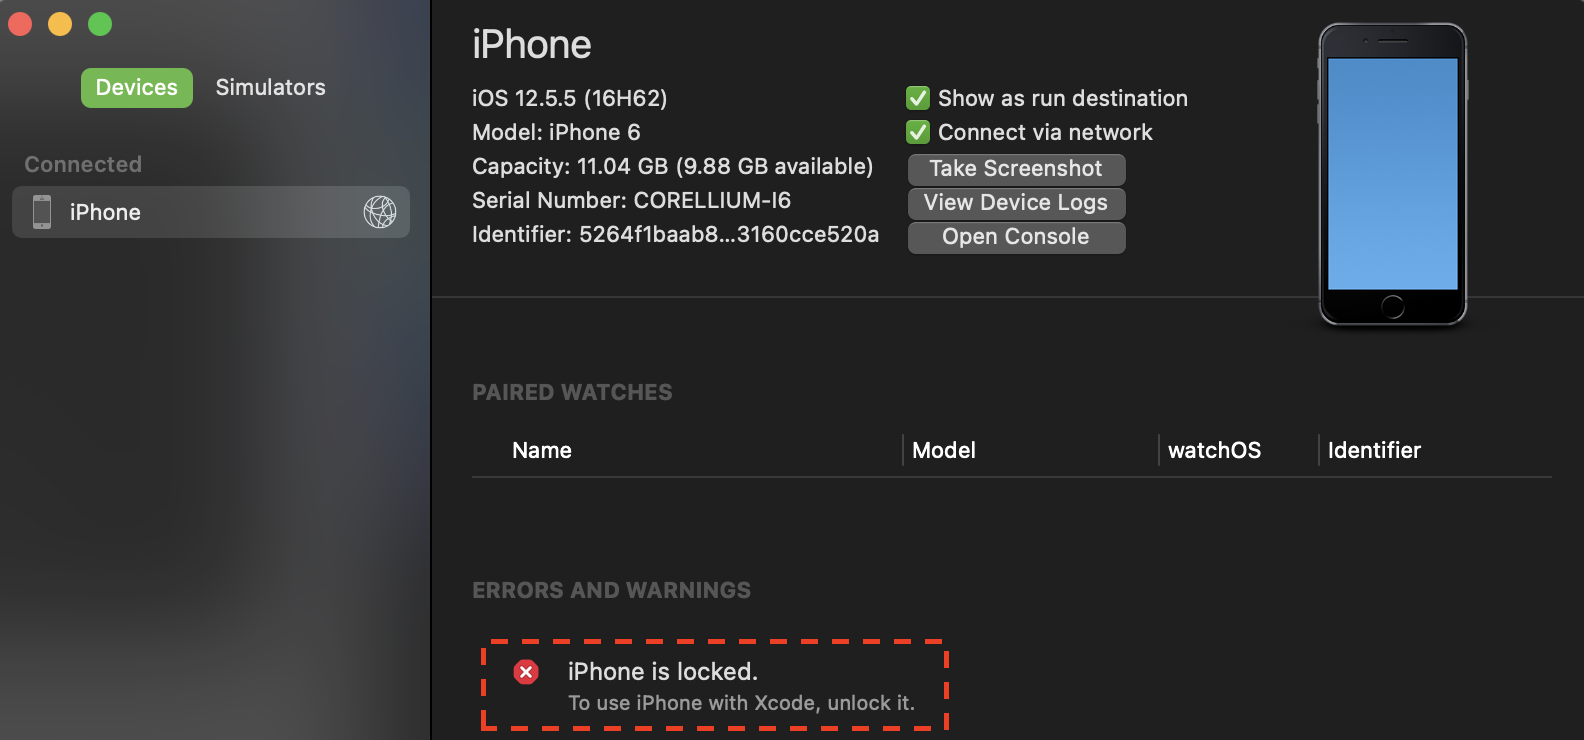
- Once connected, the Xcode device window may say Error: iPhone is locked. This error message does not prevent the use of
the device and can be ignored.
Troubleshooting Tips
- If you are in the cloud, always ensure you are connected to the VPN with the correct configuration profile.
- For Wi-Fi Sync, "Error: iPhone is locked" can be ignored.
- If a device is not detected properly, try closing and reopening Xcode.
- It is not recommended to have multiple virtual devices running at once for this process. If you need to switch between
virtual devices, you may need to force stop and restart
usbmuxd.