OpenID Connect
OpenID Connect is an interoperable authentication protocol for single sign-on used by Auth0, Okta, Azure AD B2C, and Ping Identity (among others).
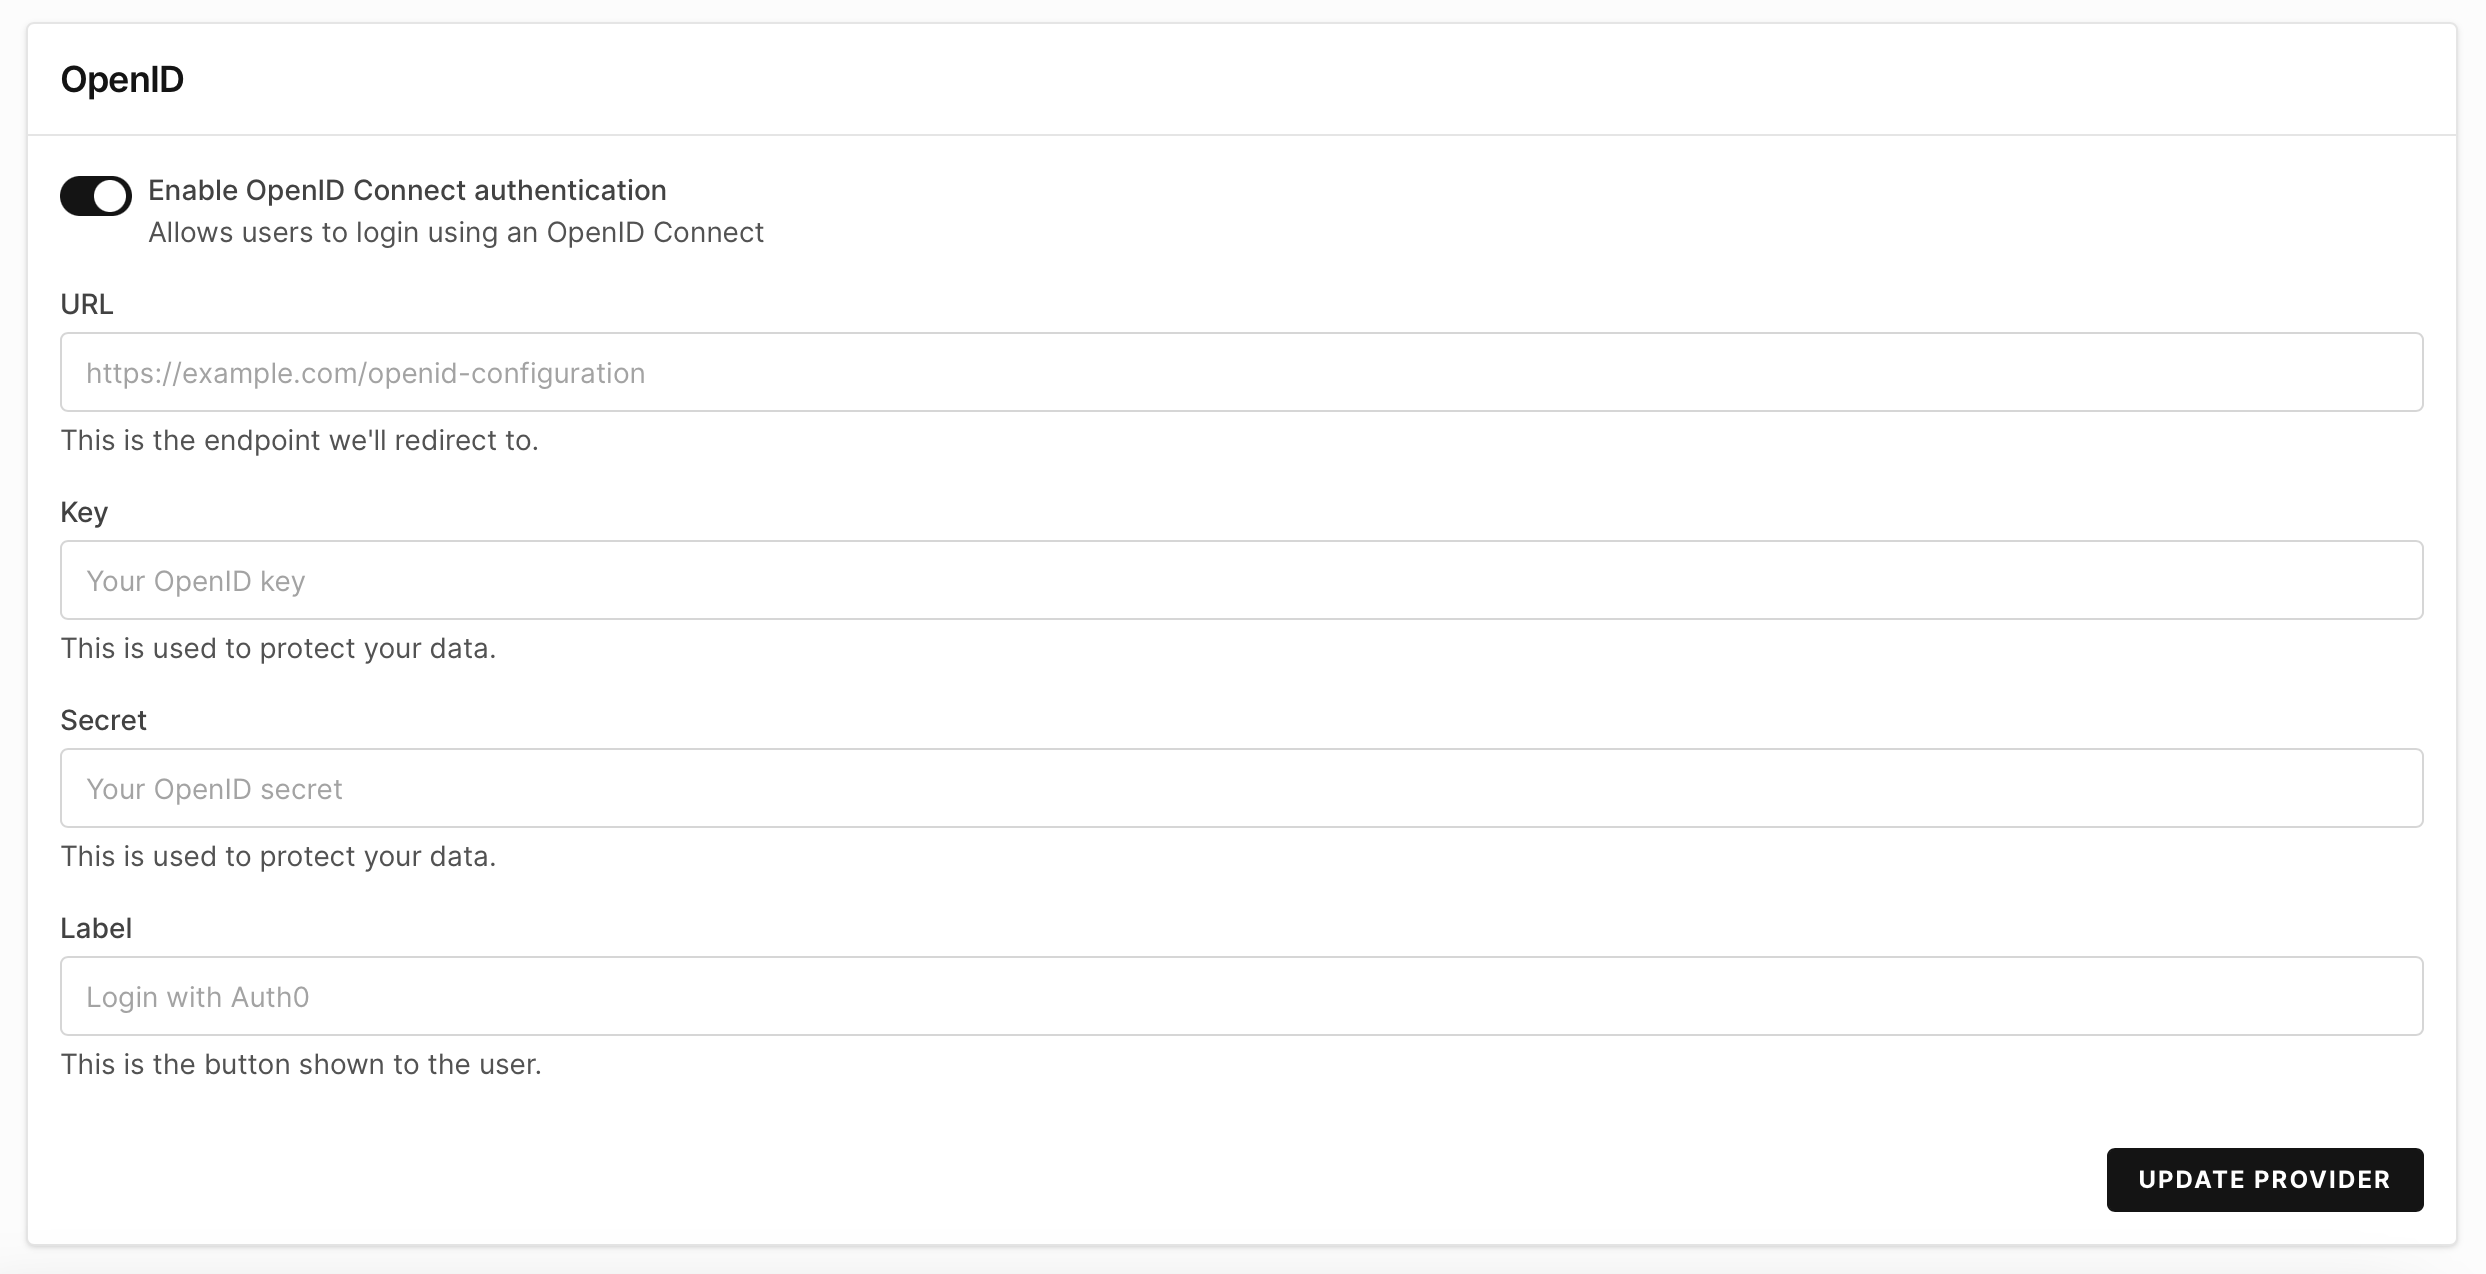
You need three required fields to configure the OpenID with Corellium:
- URL, the endpoint that Corellium will redirect to
- Key, often called the Client ID
- Secret, often called the Client Secret
Different flavors of OpenID may refer to these fields differently. Corellium supports any SSO provider that uses OpenID Connect, such as Auth0, Okta, Azure ActiveDirectory B2C, and Ping Identity.
Set Up Auth0 SSO
Let's go ahead and set up our Corellium SSO login using Auth0 (Okta):
-
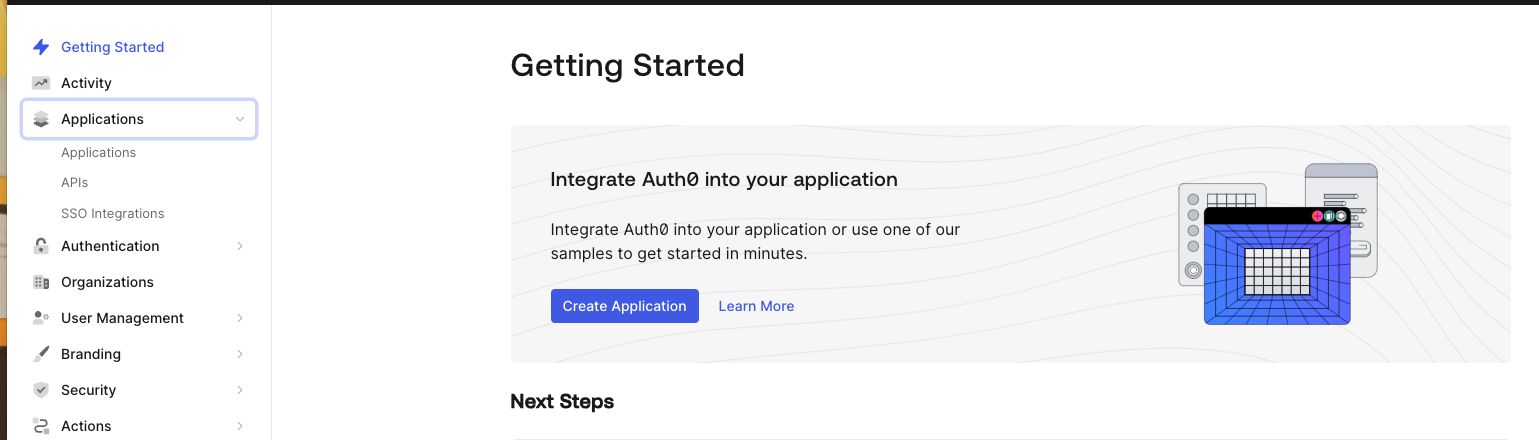
Log in to Auth0 and click Applications then Create Application.
-
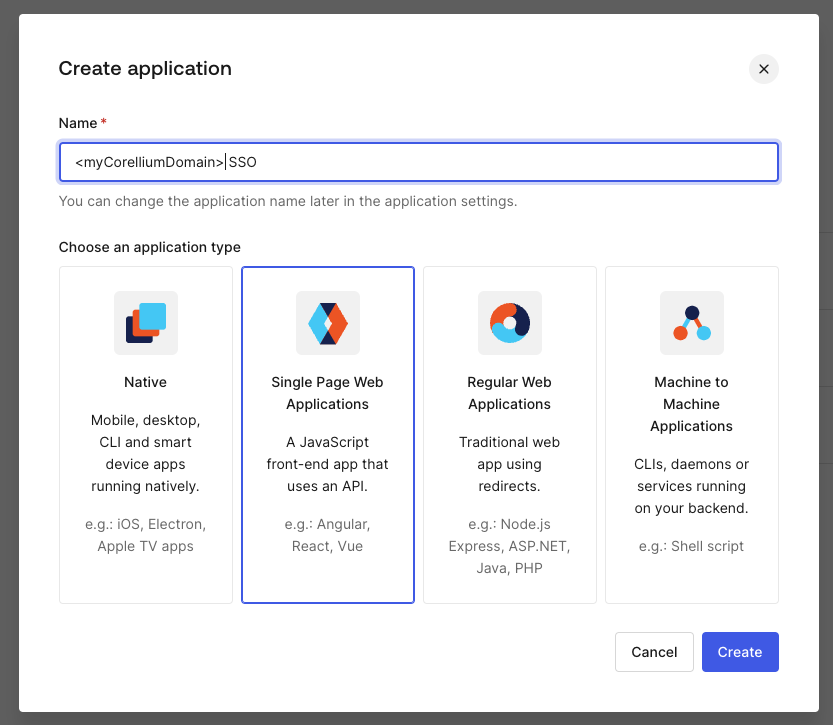
Add a name, select Single Page Web Applications and click Create.
-
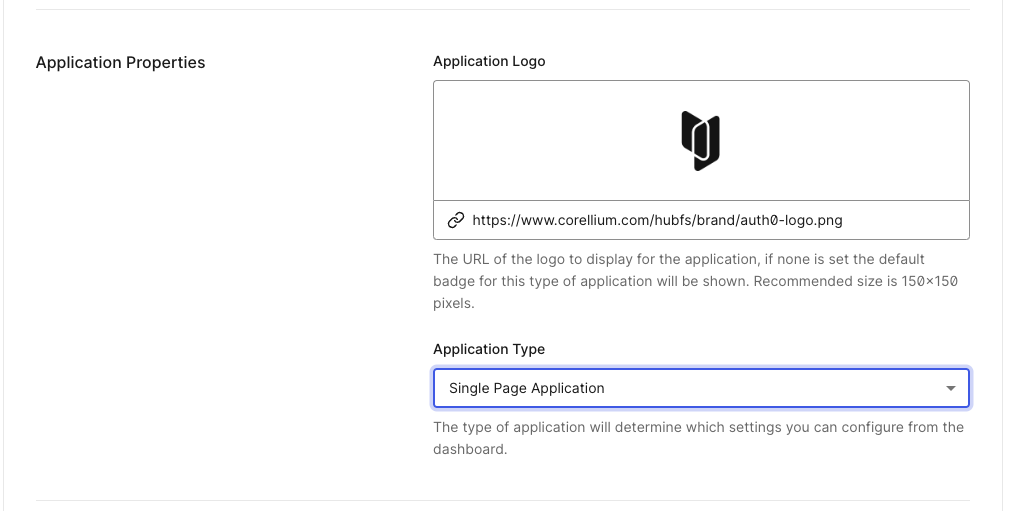
Complete the application setup.
-
(Optional) Set the Application Logo. Feel free to use the Corellium logo.
-
Set the Application Login URI to
https://CorelliumDomain.enterprise.corellium.com/login, replacingCorelliumDomainwith the name of your Corellium domain.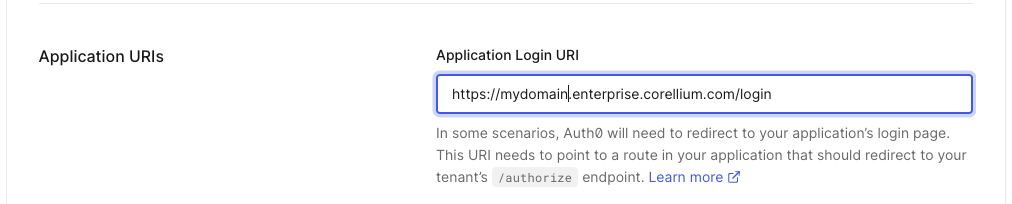
-
Set the Callback URL. That is going to be your domain's
FULL URL+api/v1/auth/providers/+your Auth0 domain+/callback. For example, if your Corellium domain is "CorelliumDomain" and your Auth0 domain (taken from Basic Information) is scabc123.us.auth0.com then your callback URL will behttps://CorelliumDomain.enterprise.corellium.com/api/v1/auth/providers/scabc123.us.auth0.com/callback. -
Click Save Changes to complete the application setup in Auth0.
-
-
Now, we will set up SSO on the Corellium side. Log in to your Corellium enterprise domain as the domain admin.
-
In the top-right dropdown click Admin.
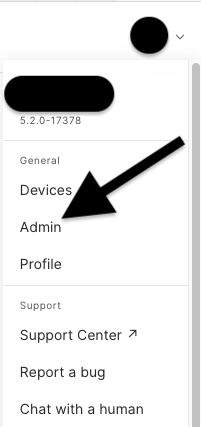
-
Click Authentication and proceed with setting up the OpenID authentication info.
-
Add the URL. It will be your Auth0 domain with
/.well-known/openid-configuration, for examplehttps://scabc123.us.auth0.com/.well-known/openid-configuration -
Set the Key. This will be the Client ID in Auth0.
-
Set the Secret. This will be the Client Secret in Auth0.
-
Set the Label for the SSO login button. In our example, we use "Corellium SSO".
-
-
Log out as the domain admin and return to your domain login page.
-
Click the new button with the label you chose to proceed with the Auth0 login. Once authenticated, you will be redirected to the Corellium device page. You're all set!

Set Up Microsoft Entra SSO (Formerly Azure AD)
Let's go ahead and set up our Corellium SSO login using Microsoft Entra:
-
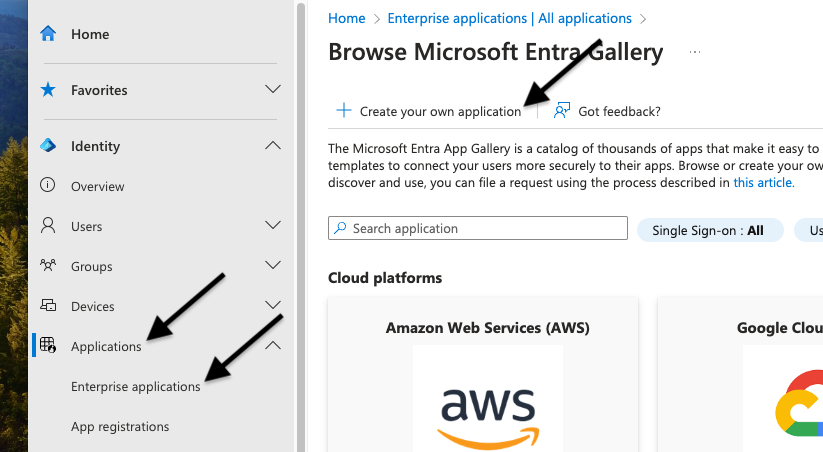
Log in to Entra and click Applications -> Enterprise applications -> Create your own application.
-
Type in the name you'd like to use for the application, select
Integrate any other application..., and click Create.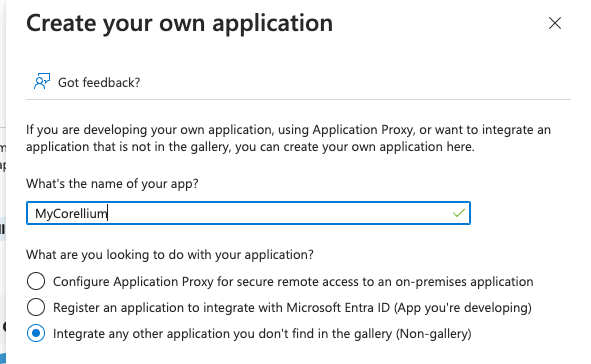
-
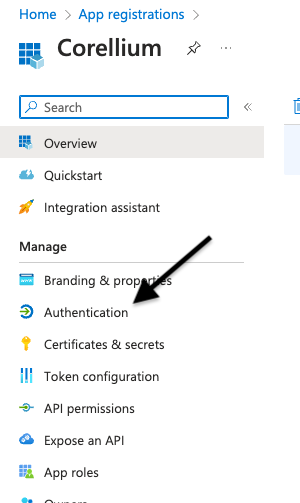
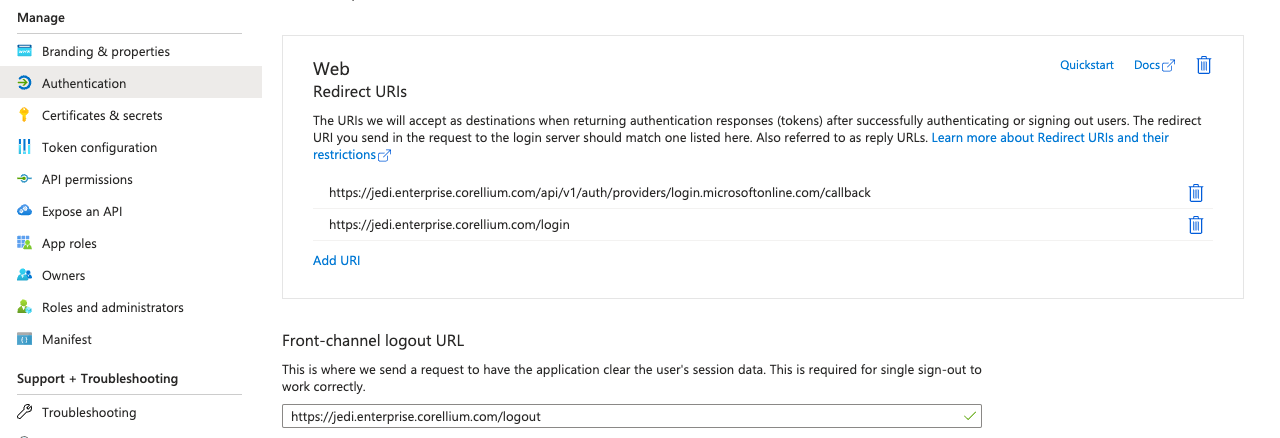
Go to Applications -> App Registrations, click on the application you just created, then click Authentication.
-
Enter the following Web Redirect URIs, replacing
CorelliumDomainwith the name of your Corellium domain.https://CorelliumDomain.enterprise.corellium.com/api/v1/auth/providers/login.microsoftonline.com/callbackhttps://CorelliumDomain.enterprise.corellium.com/login
-
Enter the following Front-channel logout URL, replacing
CorelliumDomainwith the name of your Corellium domain.https://CorelliumDomain.enterprise.corellium.com/logout
-
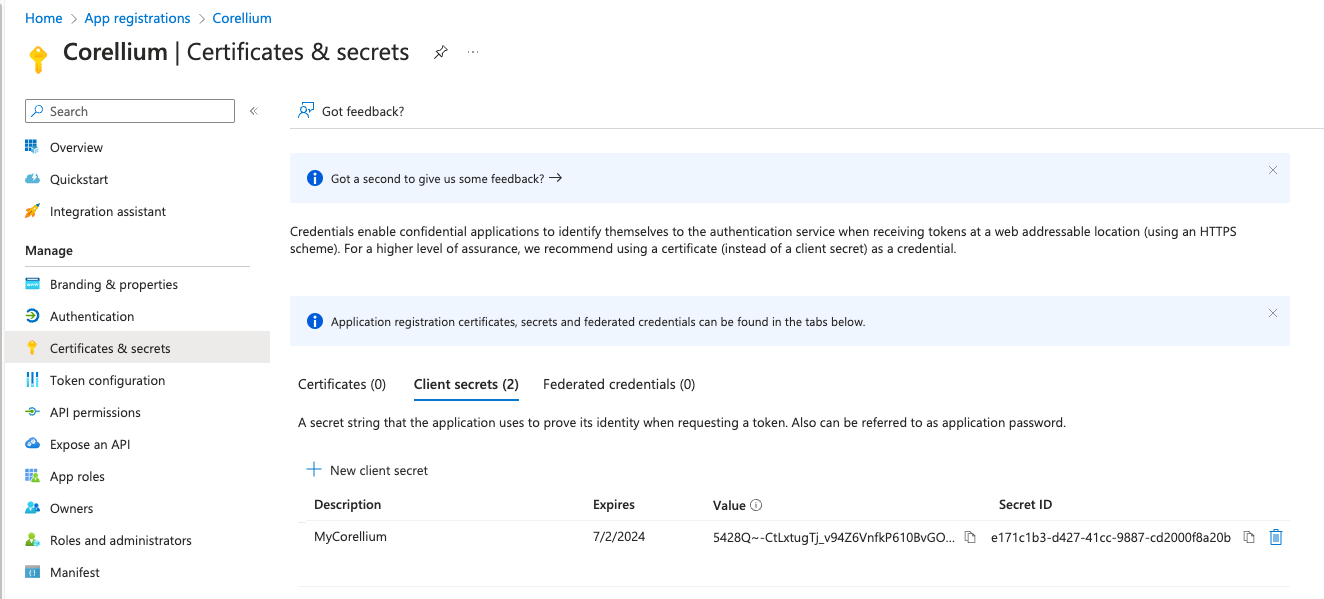
Click on Certificates & secrets (the menu option just below Authentication.)
-
Click New client secret, name your secret appropriately, and click Add. Copy the secret's Value somewhere temporarily.
-
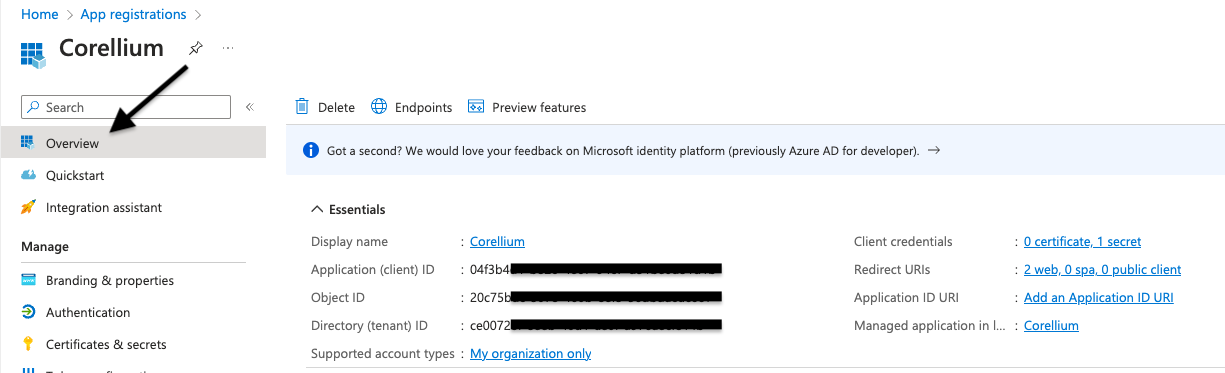
Go back to App registrations -> Overview to confirm your setup.
-
Now, we will set up SSO on the Corellium side. Log in to your Corellium enterprise domain as the domain admin.
-
In the top-right dropdown click Admin.
-
Click Authentication and proceed with setting up the Entra authentication info.
-
Add the URL. It will
https://login.microsoftonline.com/<Entra-TenantID>/v2.0/.well-known/openid-configuration, replacing<Entra-TenantID>with the Directory (tenant) ID found on App registrations -> Overview. -
Set the Key. This will be the Application (client) ID found on App registrations -> Overview.
-
Set the Secret. This will be the secret value we temporarily copied in Step #7.
-
Set the Label for the SSO login button. In our example, we use "Corellium SSO".
-
Log out as the domain admin and return to your domain login page.
-
Click the new button with the label you chose to proceed with the Entra login. Once authenticated, you will be redirected to the Corellium device page. You're all set!
Set Up Ping Identity SSO
Let's go ahead and set up our Corellium SSO login using Ping Identity:
-
Log in to the Ping Identity, select your environment, click Connections then Applications, and create a new application.
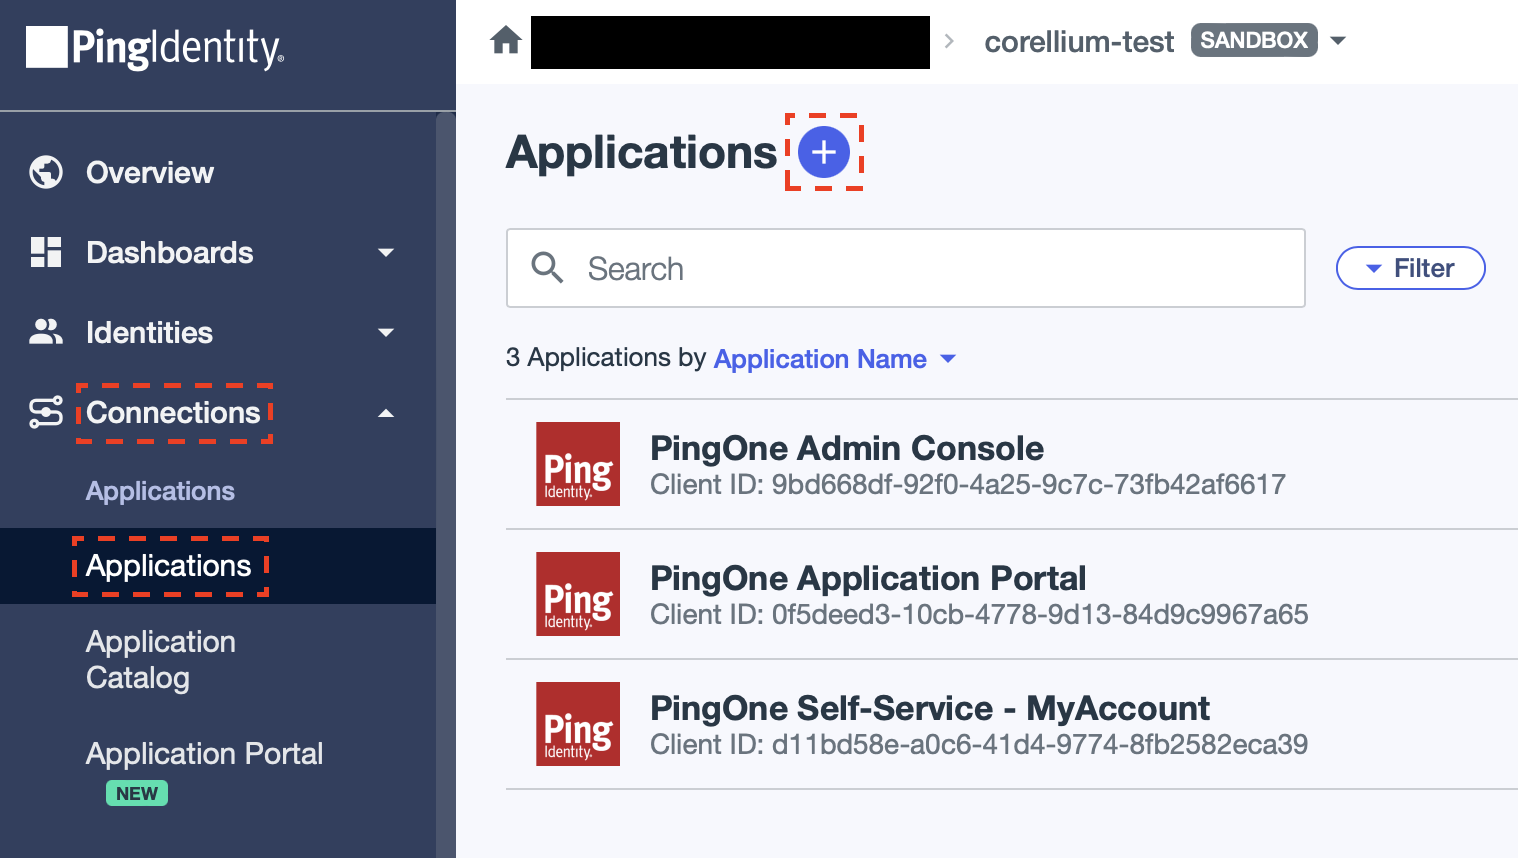
-
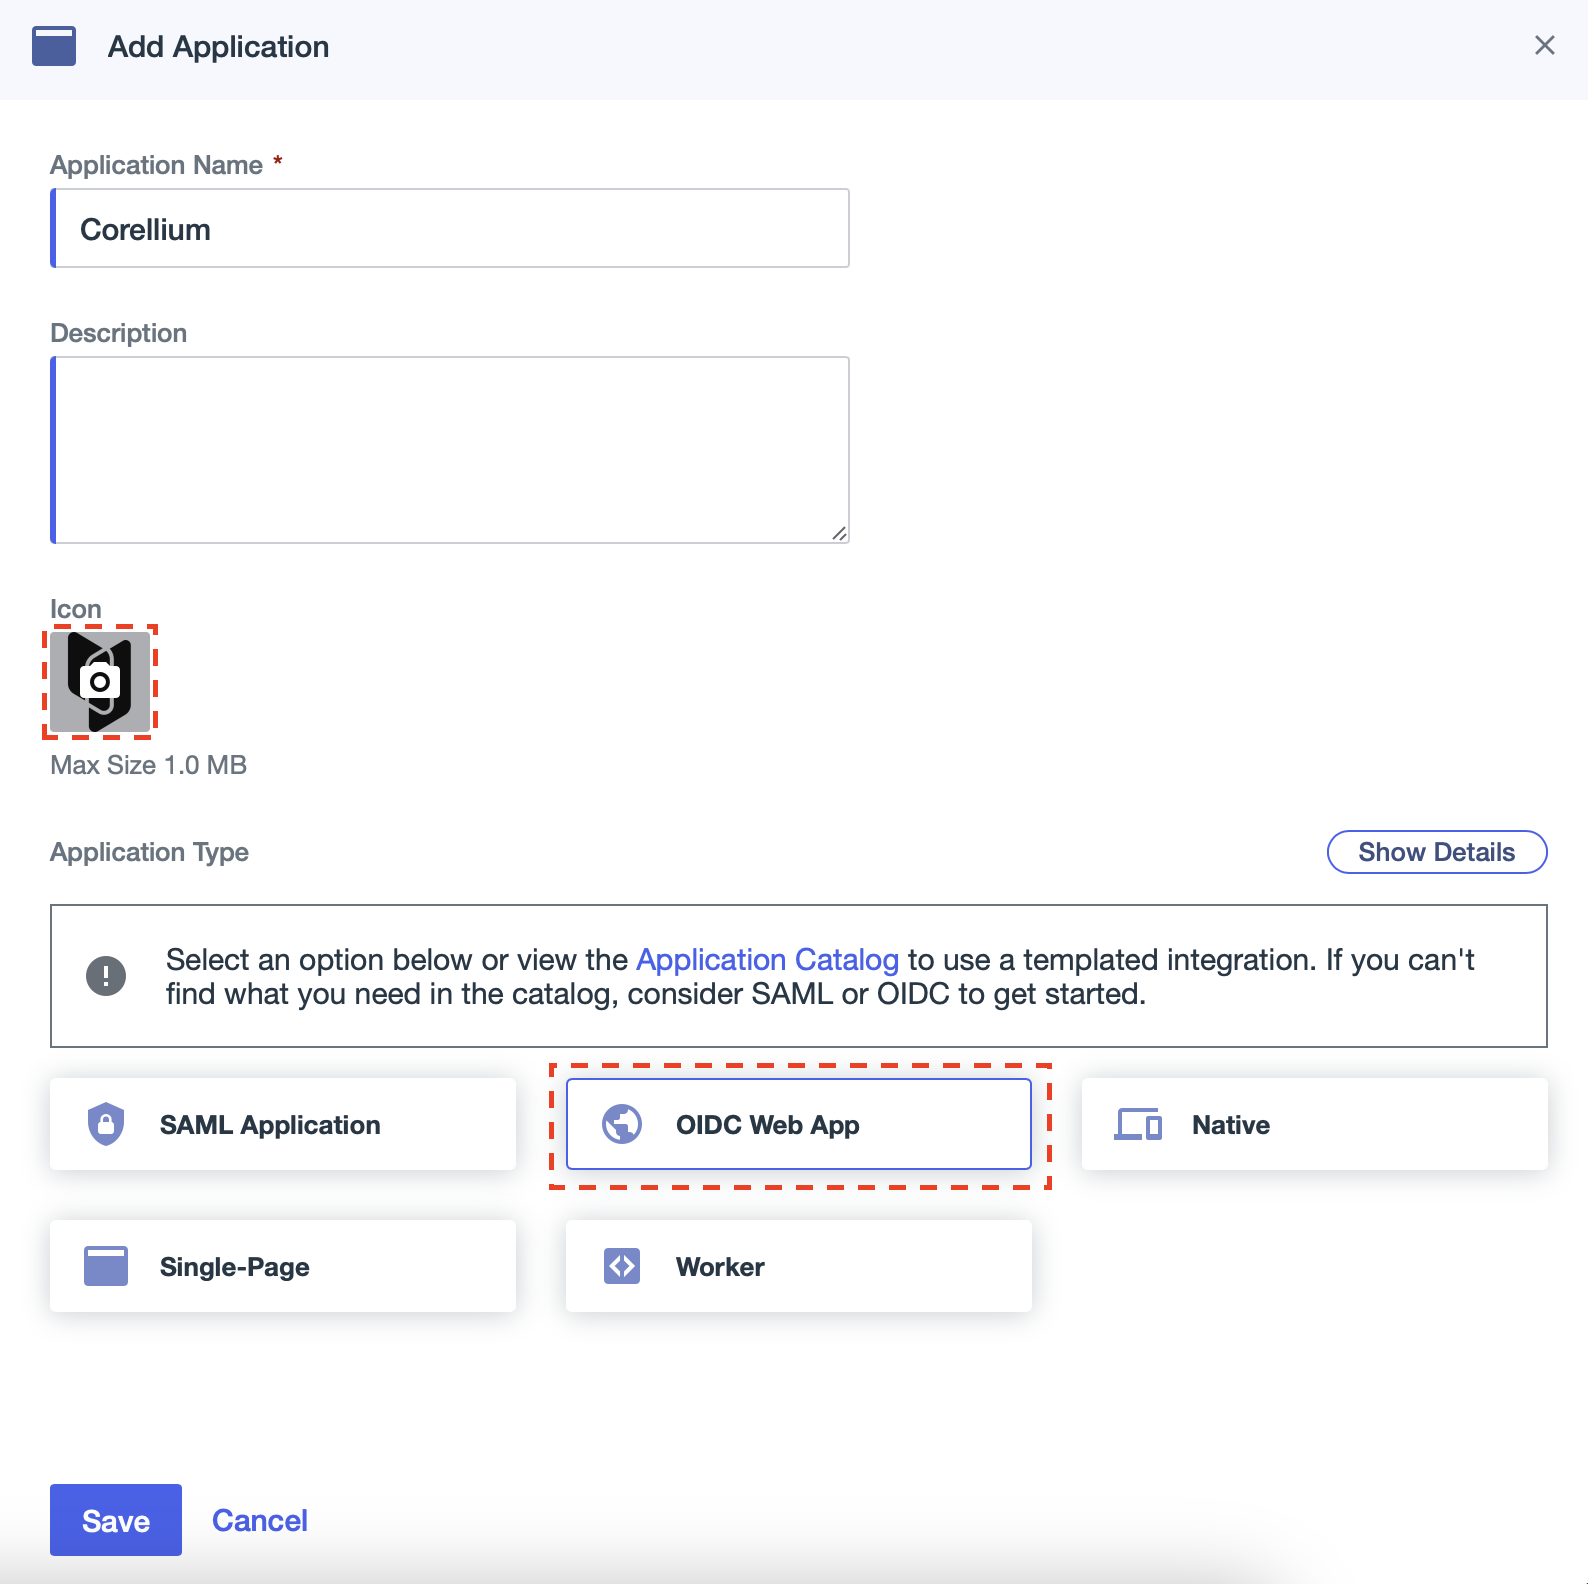
Add a name, optionally choose a logo, choose OIDC Web App and click Save.
- Feel free to use the Corellium logo.
-
The application is created in a disabled state. Make note of the application's
Client IDandClient Secretthen click Protocol OpenID Connect.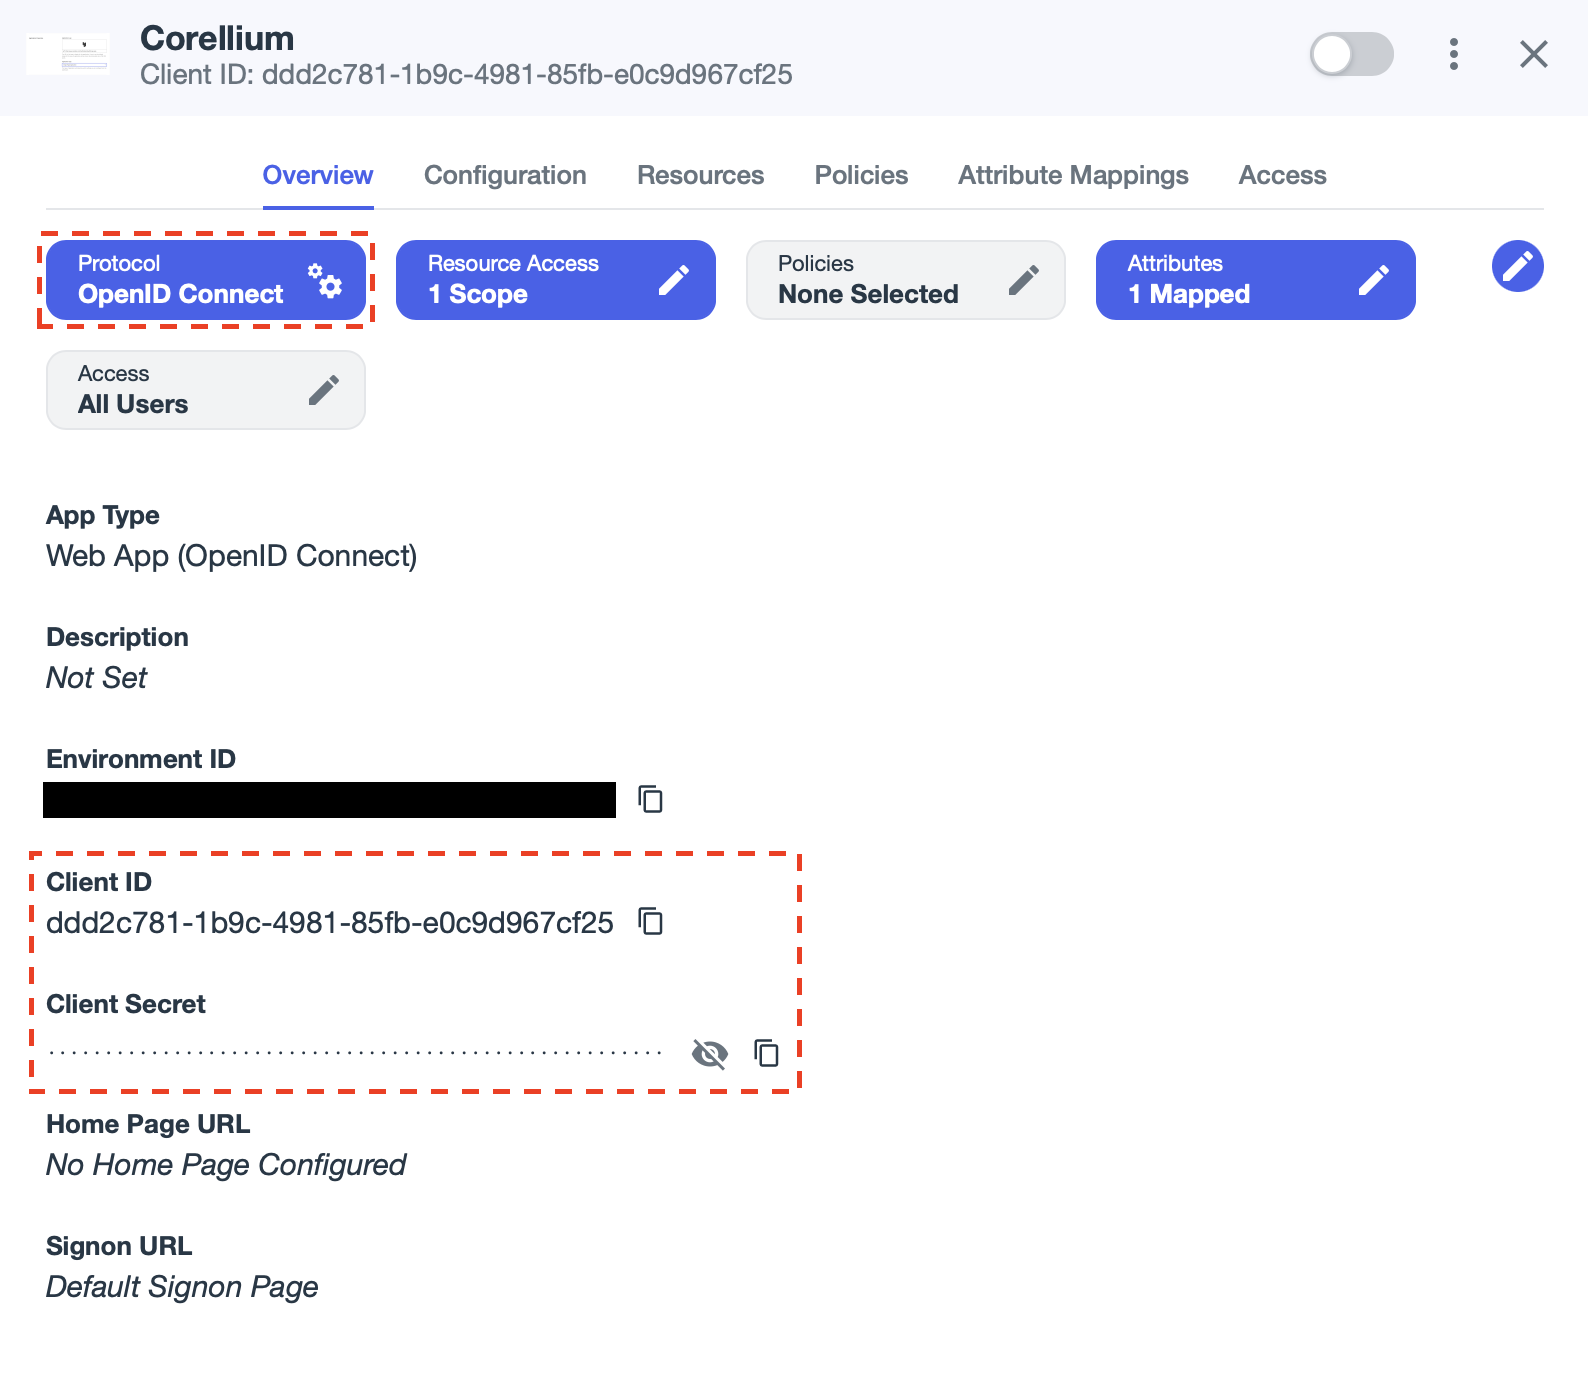
-
Set the Redirect URI to the following, replacing
CorelliumDomainwith the name of your Corellium domain.
https://CorelliumDomain.enterprise.corellium.com/api/v1/auth/providers/auth.pingone.com/callback
- Set the Initiate Login URI to the following, replacing
CorelliumDomainwith the name of your Corellium domain.
https://CorelliumDomain.enterprise.corellium.com/login
-
Click Save then Enable the application.
-
Now, we will set up SSO on the Corellium side. Log in to your Corellium enterprise domain as the domain admin.
-
In the top-right dropdown click Admin.
-
Click Authentication and proceed with setting up the OpenID authentication info.
-
Add the URL. It will be your Ping Identity's "OIDC Discovery Endpoint", for example
https://auth.pingone.com/00000000-0000-0000-0000-000000000000/as/.well-known/openid-configuration -
Set the Key. This will be the Client ID in Ping Identity.
-
Set the Secret. This will be the Client Secret in Ping Identity.
-
Set the Label for the SSO login button. In our example, we use "Corellium SSO".
-
-
Log out as the domain admin and return to your domain login page.
-
Click the new button with the label you chose to proceed with the Auth0 login. Once authenticated, you will be redirected to the Corellium device page. You're all set!
Notes
- Onsite customers may have users configured with usernames but without emails. Before enabling SSO, ensure the email field is added for your users.
- The admin can invite as many SSO users as wanted.
- Make sure you've enabled the application you created on your SSO provider.
- Non-SSO logins can be disabled by toggling Enable database authentication. If disabled, users will only be able to log in using SSO. (Admins can still authenticate with username-password credentials using the
?_auth=localswitch, e.g.https://CorelliumDomain.enterprise.corellium.com/login?_auth=local).