GOST
GOST (Go Simple Tunnel) creates a reverse tunnel to your local machine.
In certain security testing cases, you may need to tunnel the internet connection from a virtual iOS device to your local machine.
Special thanks to David Manouchehri for originally providing this content in a blog post.
What is a Reverse Tunnel?
A reverse tunnel is a technique used to forward a remote machine's port to your local machine, effectively allowing the remote machine to access resources on your local network. This can be especially useful when dealing with remote virtual devices or systems that are behind firewalls or have limited connectivity options.
In our scenario, we want to set up a reverse tunnel so that a remote virtual iOS device can access the internet through our local IP address. To achieve this, we'll need to install and configure a proxy server on our local machine and then create a reverse tunnel using SSH.
Understand the Risks of a Reverse Tunnel
By creating a reverse tunnel, you are essentially opening a door into your local network. In practice, LAN side access to your typical shoddy ISP immobile odem may be enough for your "typical" APT to get a persistent foothold.
Basically, think of this like sharing your WiFi password. You probably trust your coworker on your LAN. You probably don't trust your friend James Willy from North Korea. If you have more "friends" that fall into the latter category, consider running GOST on a mobile network, completely isolated from any of the networks you actually use personally.
Set Up a Reverse Tunnel with GOST
To set up a reverse tunnel with GOST, you'll need to install and run the GOST proxy server on your local machine and, configure a reverse tunnel using SSH, and configure the remote virtual iOS device to use the GOST proxy server for its internet connection via an HTTP proxy.
Install and Run GOST
GOST is a simple yet powerful proxy server written in Go that supports a variety of proxy protocols, including HTTP, HTTPS, and SOCKS.
For this example, we're using GOST v2, which has a larger critical mass when it comes to networking.
-
Install Go.
-
Clone the GOST repository and change to the build directory.
git clone https://github.com/ginuerzh/gost.git
cd gost/cmd/gost/
-
Build the GOST binary.
go build -
Start the proxy server on the local port
31337../gost -L http://127.0.0.1:31337 -
You should see a one-line response.
user1@comp1 gost % ./gost -L http://127.0.0.1:31337
2025/01/01 12:34:56 route.go:700: http://127.0.0.1:31337 on 127.0.0.1:31337
We're using HTTP as that's what iOS supports.
The connection is still encrypted, despite being HTTP, since we're tunneling an encrypted HTTPS connection over an unencrypted HTTP connection over an encrypted SSH connection.
Establish the Reverse Tunnel to Your Local Machine
After running GOST, next step is to establish an SSH reverse tunnel.
-
On the Corellium web interface, the Connect tab for an iOS device.
-
Copy the Quick Connect command and ensure that you can Quick Connect to the virtual iOS device. (If you see an error, please ensure your SSH key is added to the project and device.)
user1@comp1 .ssh % ssh -J [email protected] [email protected]
You are connecting as 7985e640-be0c-469a-8ada-c7818b356293 from 123.123.123.123...
demonstration-device:~ root# -
Modify the command by adding the
-Rargument.ssh -R 127.0.0.1:31337:127.0.0.1:31337 -J [email protected] [email protected]
By executing this command, the reverse tunnel will be established between the virtual iOS device and your local machine, exposing the GOST proxy on 127.0.0.1:31337 from the perspective of the iOS device.
In order for route traffic through your local IP address you must also enable the HTTP proxy on the virtual device.
Explaining the Reverse Tunnel Command
This command has several components:
-
ssh- The SSH binary used to establish the connection.
-
-R 127.0.0.1:31337:127.0.0.1:31337- This argument sets up a reverse tunnel from the remote machine to the local machine.
- Although both
127.0.0.1's look the same, they're actually referring to different machines. The first127.0.0.1refers to the localhost on the remote machine's IP address, and the second127.0.0.1refers to the localhost on the your local machine. - For this demonstration, we use an arbitrary port
31337on both the remote and local machines.
-
- This argument specifies a jump host to use when connecting to the remote machine. The
7985e640-be0c-469a-8ada-c7818b356293is your Corellium project ID proxy.corellium.comis the Corellium jump host.
- This argument specifies a jump host to use when connecting to the remote machine. The
-
- This is the virtual device's SSH login information.
- This address is only accessible from the jump host
Enable the HTTP Proxy on the Virtual iOS Device
-
On your virtual iOS device, open the Settings app and navigate to the Wi-Fi settings.
-
In the "HTTP Proxy" section, set the Server to
127.0.0.1and the Port to31337. -
Save the changes and exit the Settings app.
The remote virtual iOS device should now be using the GOST proxy server for its internet connection, effectively accessing the internet through your local IP address.
Generating traffic on the virtual device should be captured by the GOST proxy.

Test the Reverse Tunnel
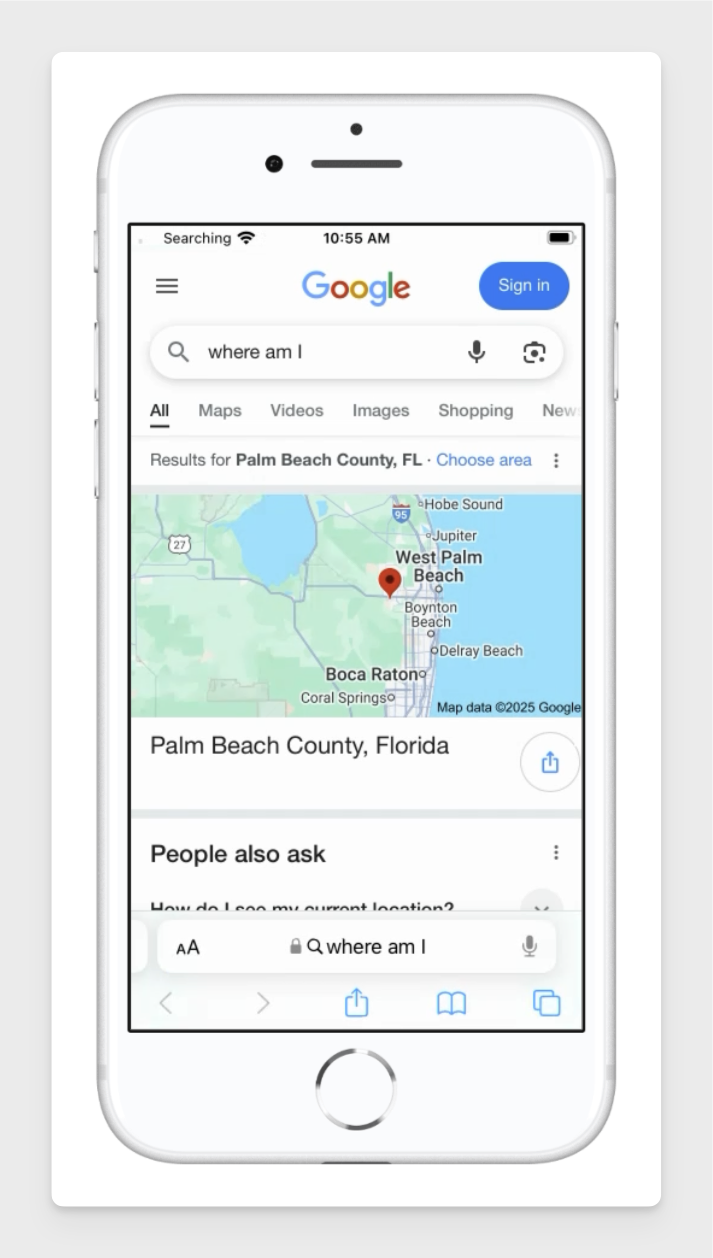
To verify that the reverse tunnel is working as expected, try opening a web page that echoes your IP back, or uses IP geolocation.
Location Test
Search for "where am I" in the browser.
The location should match your local IP address, not the Corellium device's IP address.
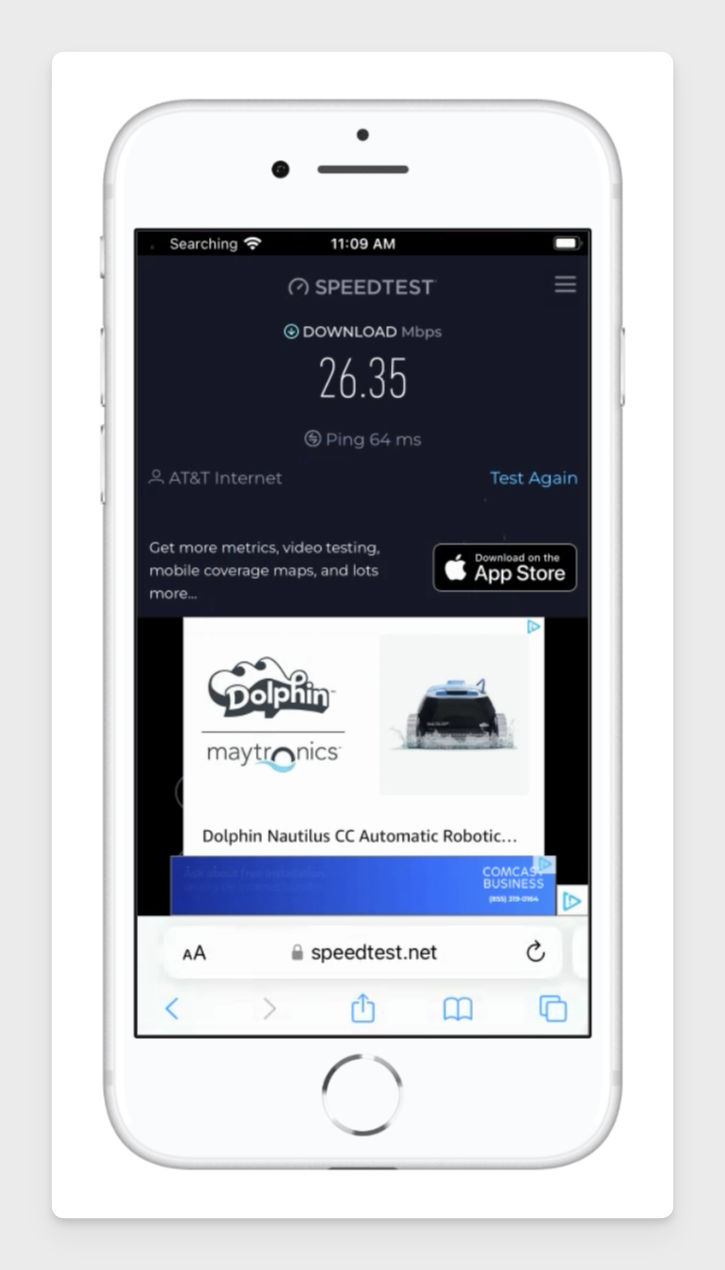
Speed Test
Search for "speed test" in the browser.
The ping should be noticably higher than your local machine, but the download and upload performance should be comparable to your local bandwidth, especialy when considering the number of hops the connection makes.
Additional Details
One minor note is that this proxy setup does bypass the "Network Monitor" feature built-in to Corellium. If you want to capture traffic (which you should), you'll need to set up a tool like mitmproxy on your local machine.