Burp Suite
This article primarily focuses on configuring your local workstation, addressing internal networking considerations, and setting up the device to enable traffic proxying. Note that third-party apps may implement defense mechanisms such as certificate pinning to prevent traffic inspection. For security research purposes, the built-in network monitor or Frida scripts can be used in this scenario.
We'll cover the following using Burp Suite as the MITM proxy tool:
- Proxying traffic on both Android and iOS devices hosted in the cloud, with and without the Corellium VPN, including networking considerations for each method to work.
- Using Safari on iOS and the Webview Shell on Android to generate traffic.
You can download a version of Burp Suite here.
Proxy Traffic using the VPN
In the upcoming steps for this section, we'll assume you've connected to the Corellium VPN using the OpenVPN configuration file provided for the device's project in the web interface.
Network Considerations
If your local workstation is behind an enterprise network with strict firewall policies or is required to be connected to an internal VPN, you may not be able to proxy traffic from the device with the Corellium VPN without additional network configurations. Please review our VPN guide which explains what these additional configurations would look like.
Configure Burp Suite
The Burp Suite configuration is the same, whether you're using an Android or iOS device, and whether or not you're using the Corellium VPN.
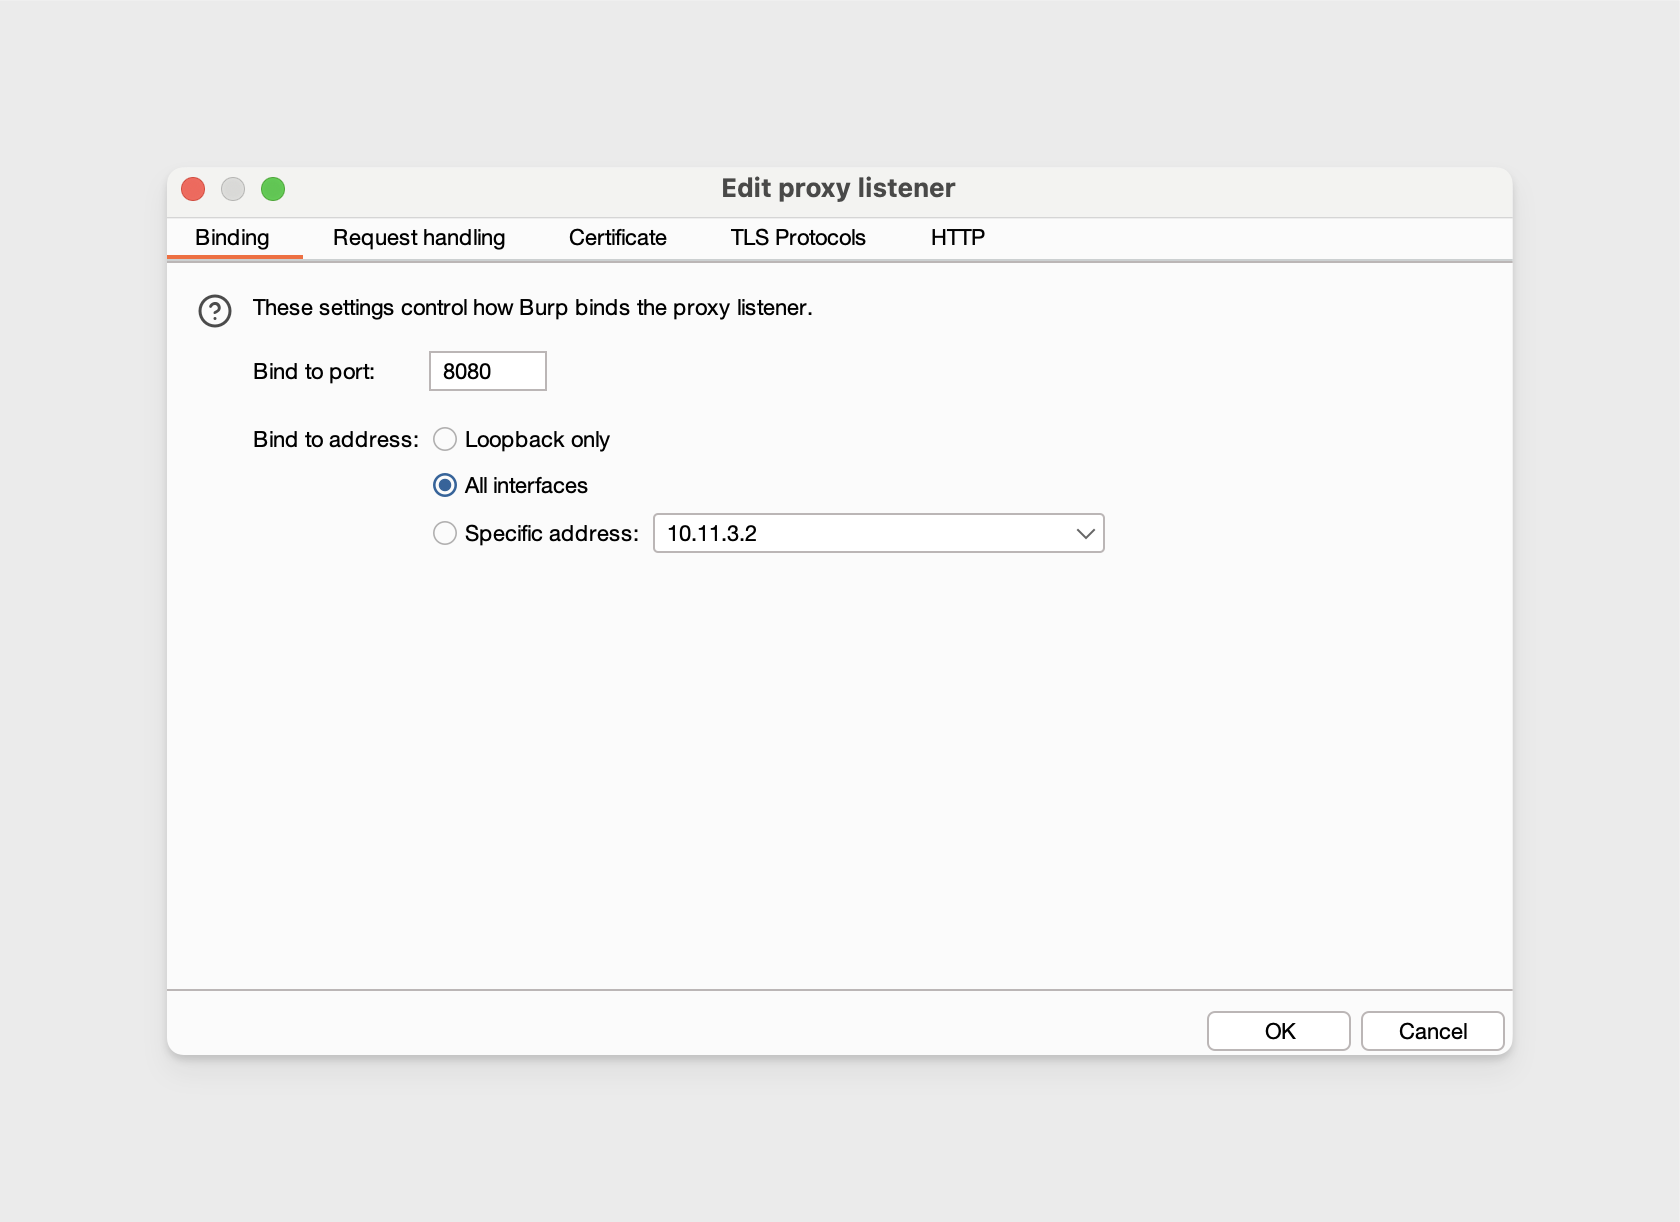
We’ll bind the Burp Proxy listener to port 8080 and set the address to "All Interfaces." With this proxy listener configuration, HTTP(S) traffic will be accepted from any IP address that can reach the machine, as long as it's routed to the specified port and given your internal networking is not blocking traffic.
-
In Burp Suite and navigate to Proxy -> Proxy Settings -> then edit the Proxy listener to bind to port
8080and to listen on all interfaces. -
Ensure the proxy listener is running.
Export a Burp CA Certificate
In Burp Suite, navigate to Proxy -> Proxy Settings -> then under Proxy listeners, select Import / export CA certificate then export the certificate in DER format. The file name should have the .cer file extension.
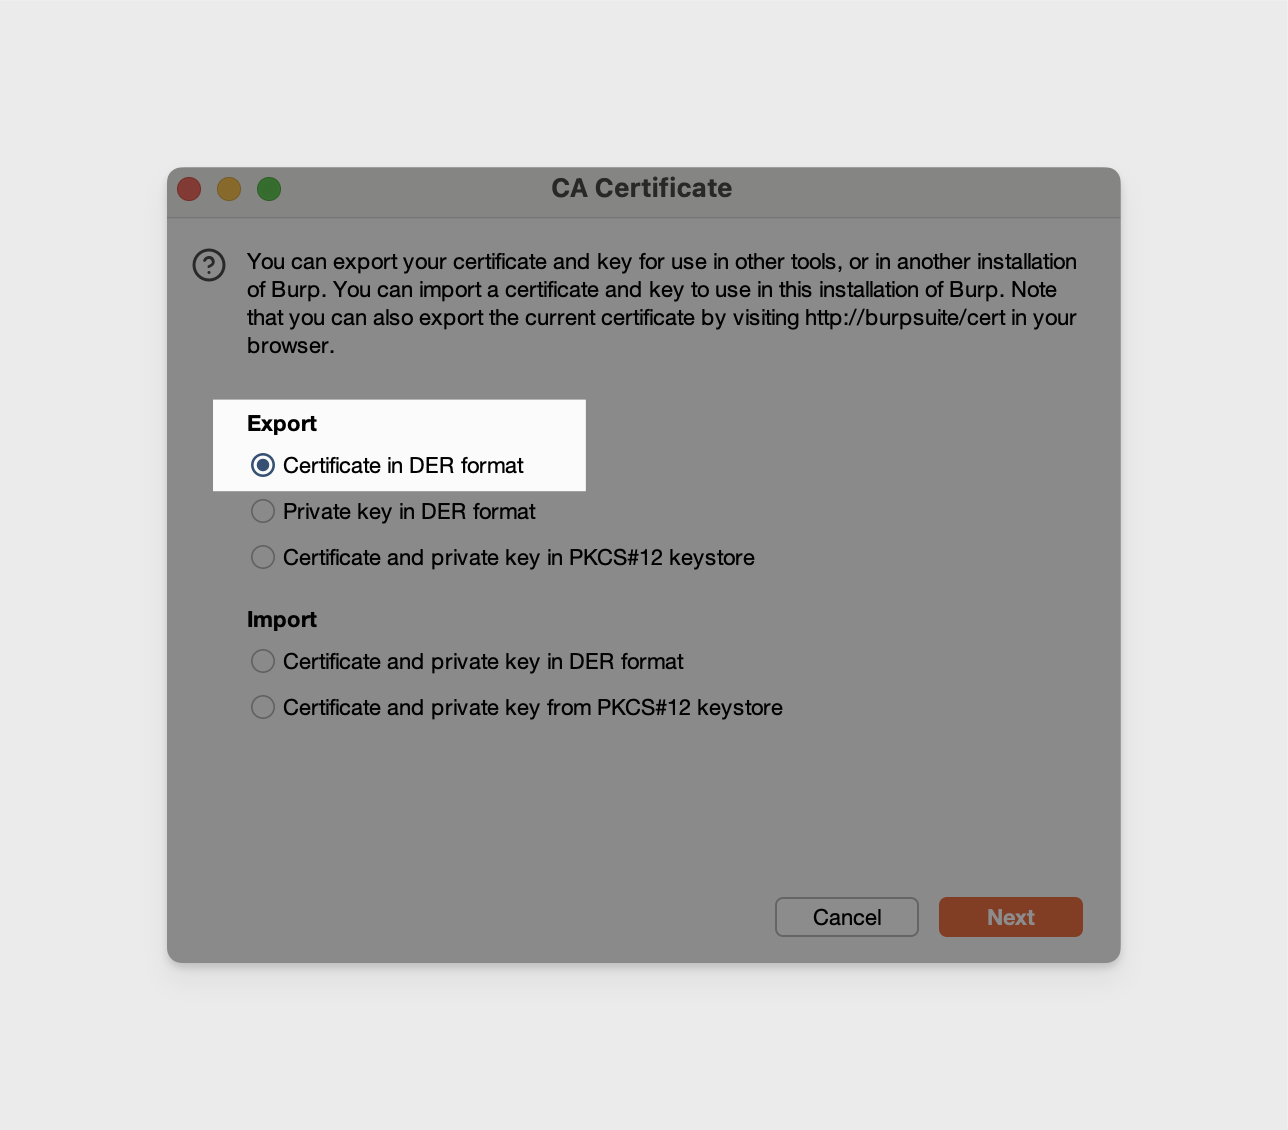
Moving forward, we'll reference ours as "BurpCA.cer".
Proxy Traffic on Rooted Android
With Burp configured and the Burp CA certificate exported, we'll need to set up the device to properly proxy traffic through the Burp Suite proxy. We'll be using a rooted Android 14 for this example.
To get the CA certificate properly on the device, you can either:
A) Push the exported Burp certificate into /mnt/sdcard/Download and install the certificate through the Android settings. Refer to the video guide for this method.
B) Continue following the below steps to accomplish this from the terminal instead.
The following steps require standard OpenSSL and adb commands to be available.
The certificate configuration steps only need to be done once, you can save and reuse the certificate for later sessions.
-
Android expects certificates in PEM format and to be named using their subject hash, so first we'll convert the exported certificate into PEM format.
openssl x509 -inform DER -in /path/to/BurpCA.cer -out /path/to/BurpCA.pem -
Then we'll rename the BurpCA.pem file to its subject hash based on the output of this command.
openssl x509 -inform PEM -subject_hash_old -in /path/to/BurpCA.pem | head -1We also need to add a
.0to the end of the file, this tells the system that it’s the primary certificate for that subject hash which allows the system to recognize and load the certificate properly.mv /path/to/BurpCA.pem <certificate subject hash>.0Our certificate subject hash value is
9a5ba575so our new name would be9a5ba575.0. -
With the certificate renamed to the subject hash, we need to drop this file into the device's system wide trusted certificates.
First, run the adb connect command for your Android device located in the Connect tab in the web interface:
adb connect <device_service_IP>:5001Restart the adb session as root.
adb rootThen push the renamed certificate.
adb push 9a5ba575.0 /system/etc/security/cacerts/You can verify the permissions of the certificate, it should already contain the necessary permissions:
adb shell ls -l /system/etc/security/cacerts/9a5ba575.0
-rw-r--r-- 1 root root 1326 2024-12-11 18:57 /system/etc/security/cacerts/9a5ba575.0 -
Set up the HTTP proxy on the device.
Our example would look like this:
adb shell settings put global http_proxy 10.11.3.2:808010.11.3.2is the IP address assigned to our VPN connection and8080is the port we used to bind the Burp proxy listener to.Clear the proxy if needed, this overrides whatever is currently set.
adb shell settings put global http_proxy :0Check the current value of the proxy.
adb shell settings get global http_proxy -
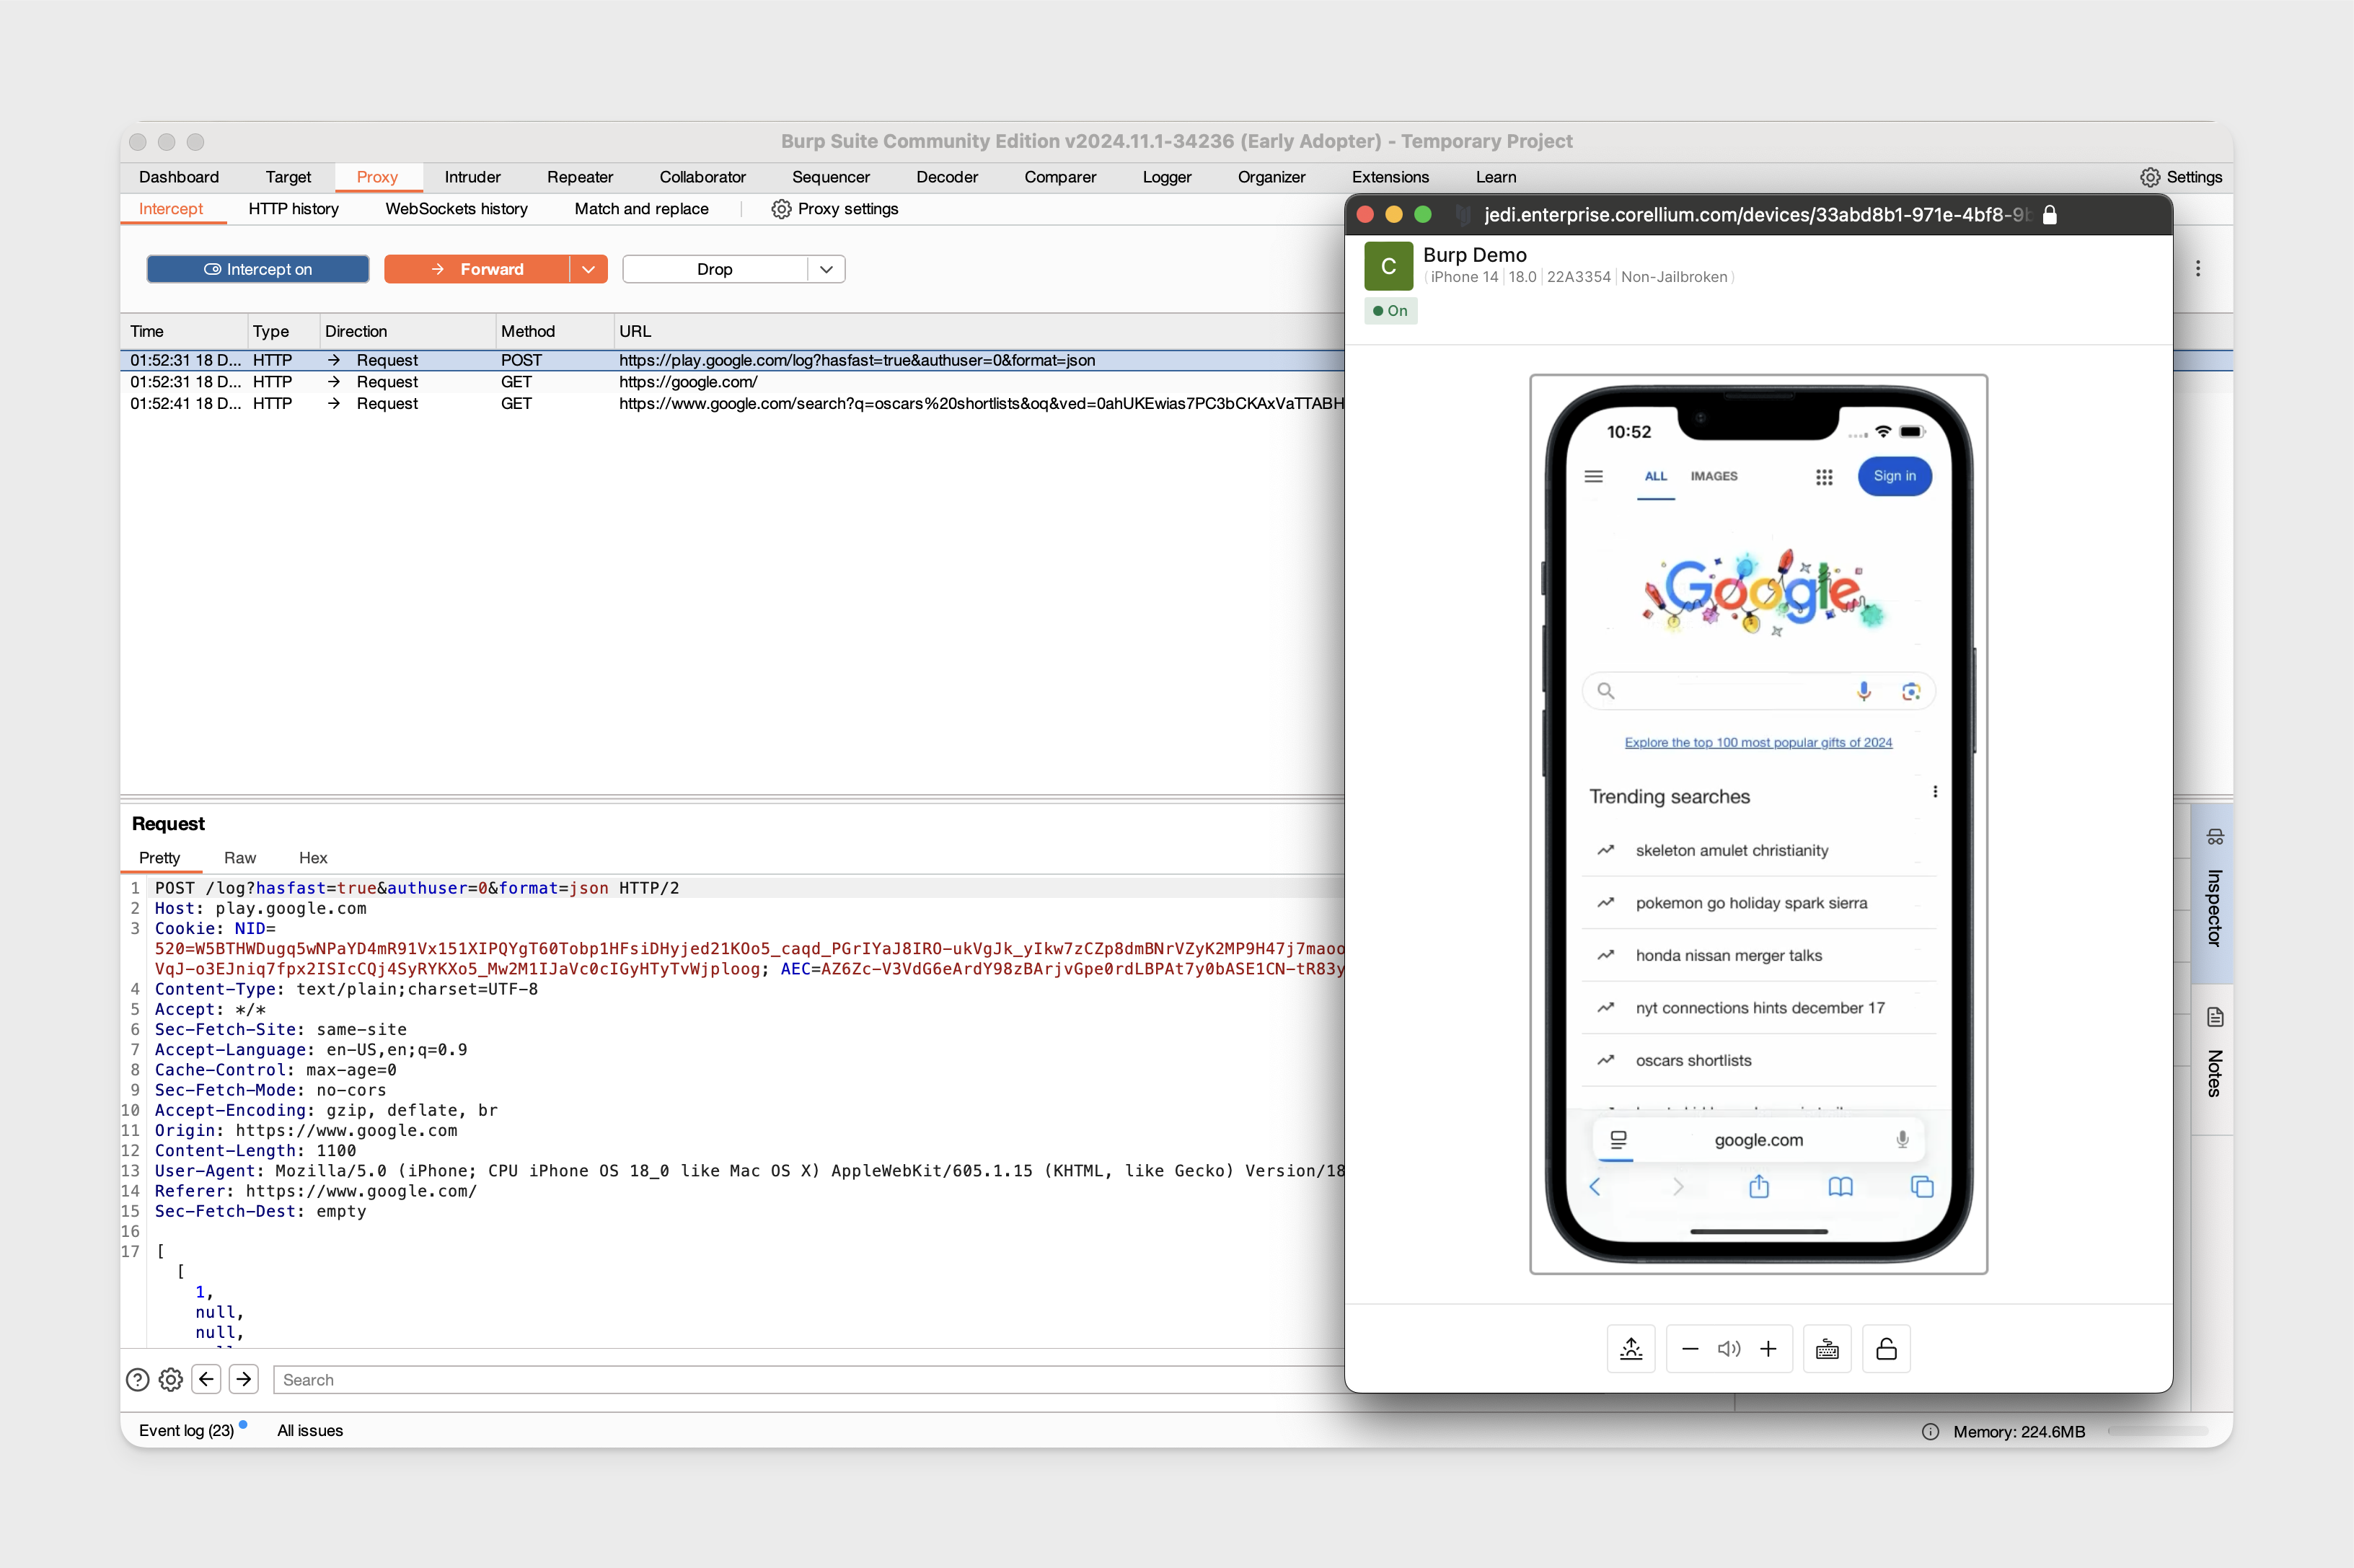
Open the WebView app on the device and load an example URL like https://google.com to confirm traffic is appearing in Burp Suite.
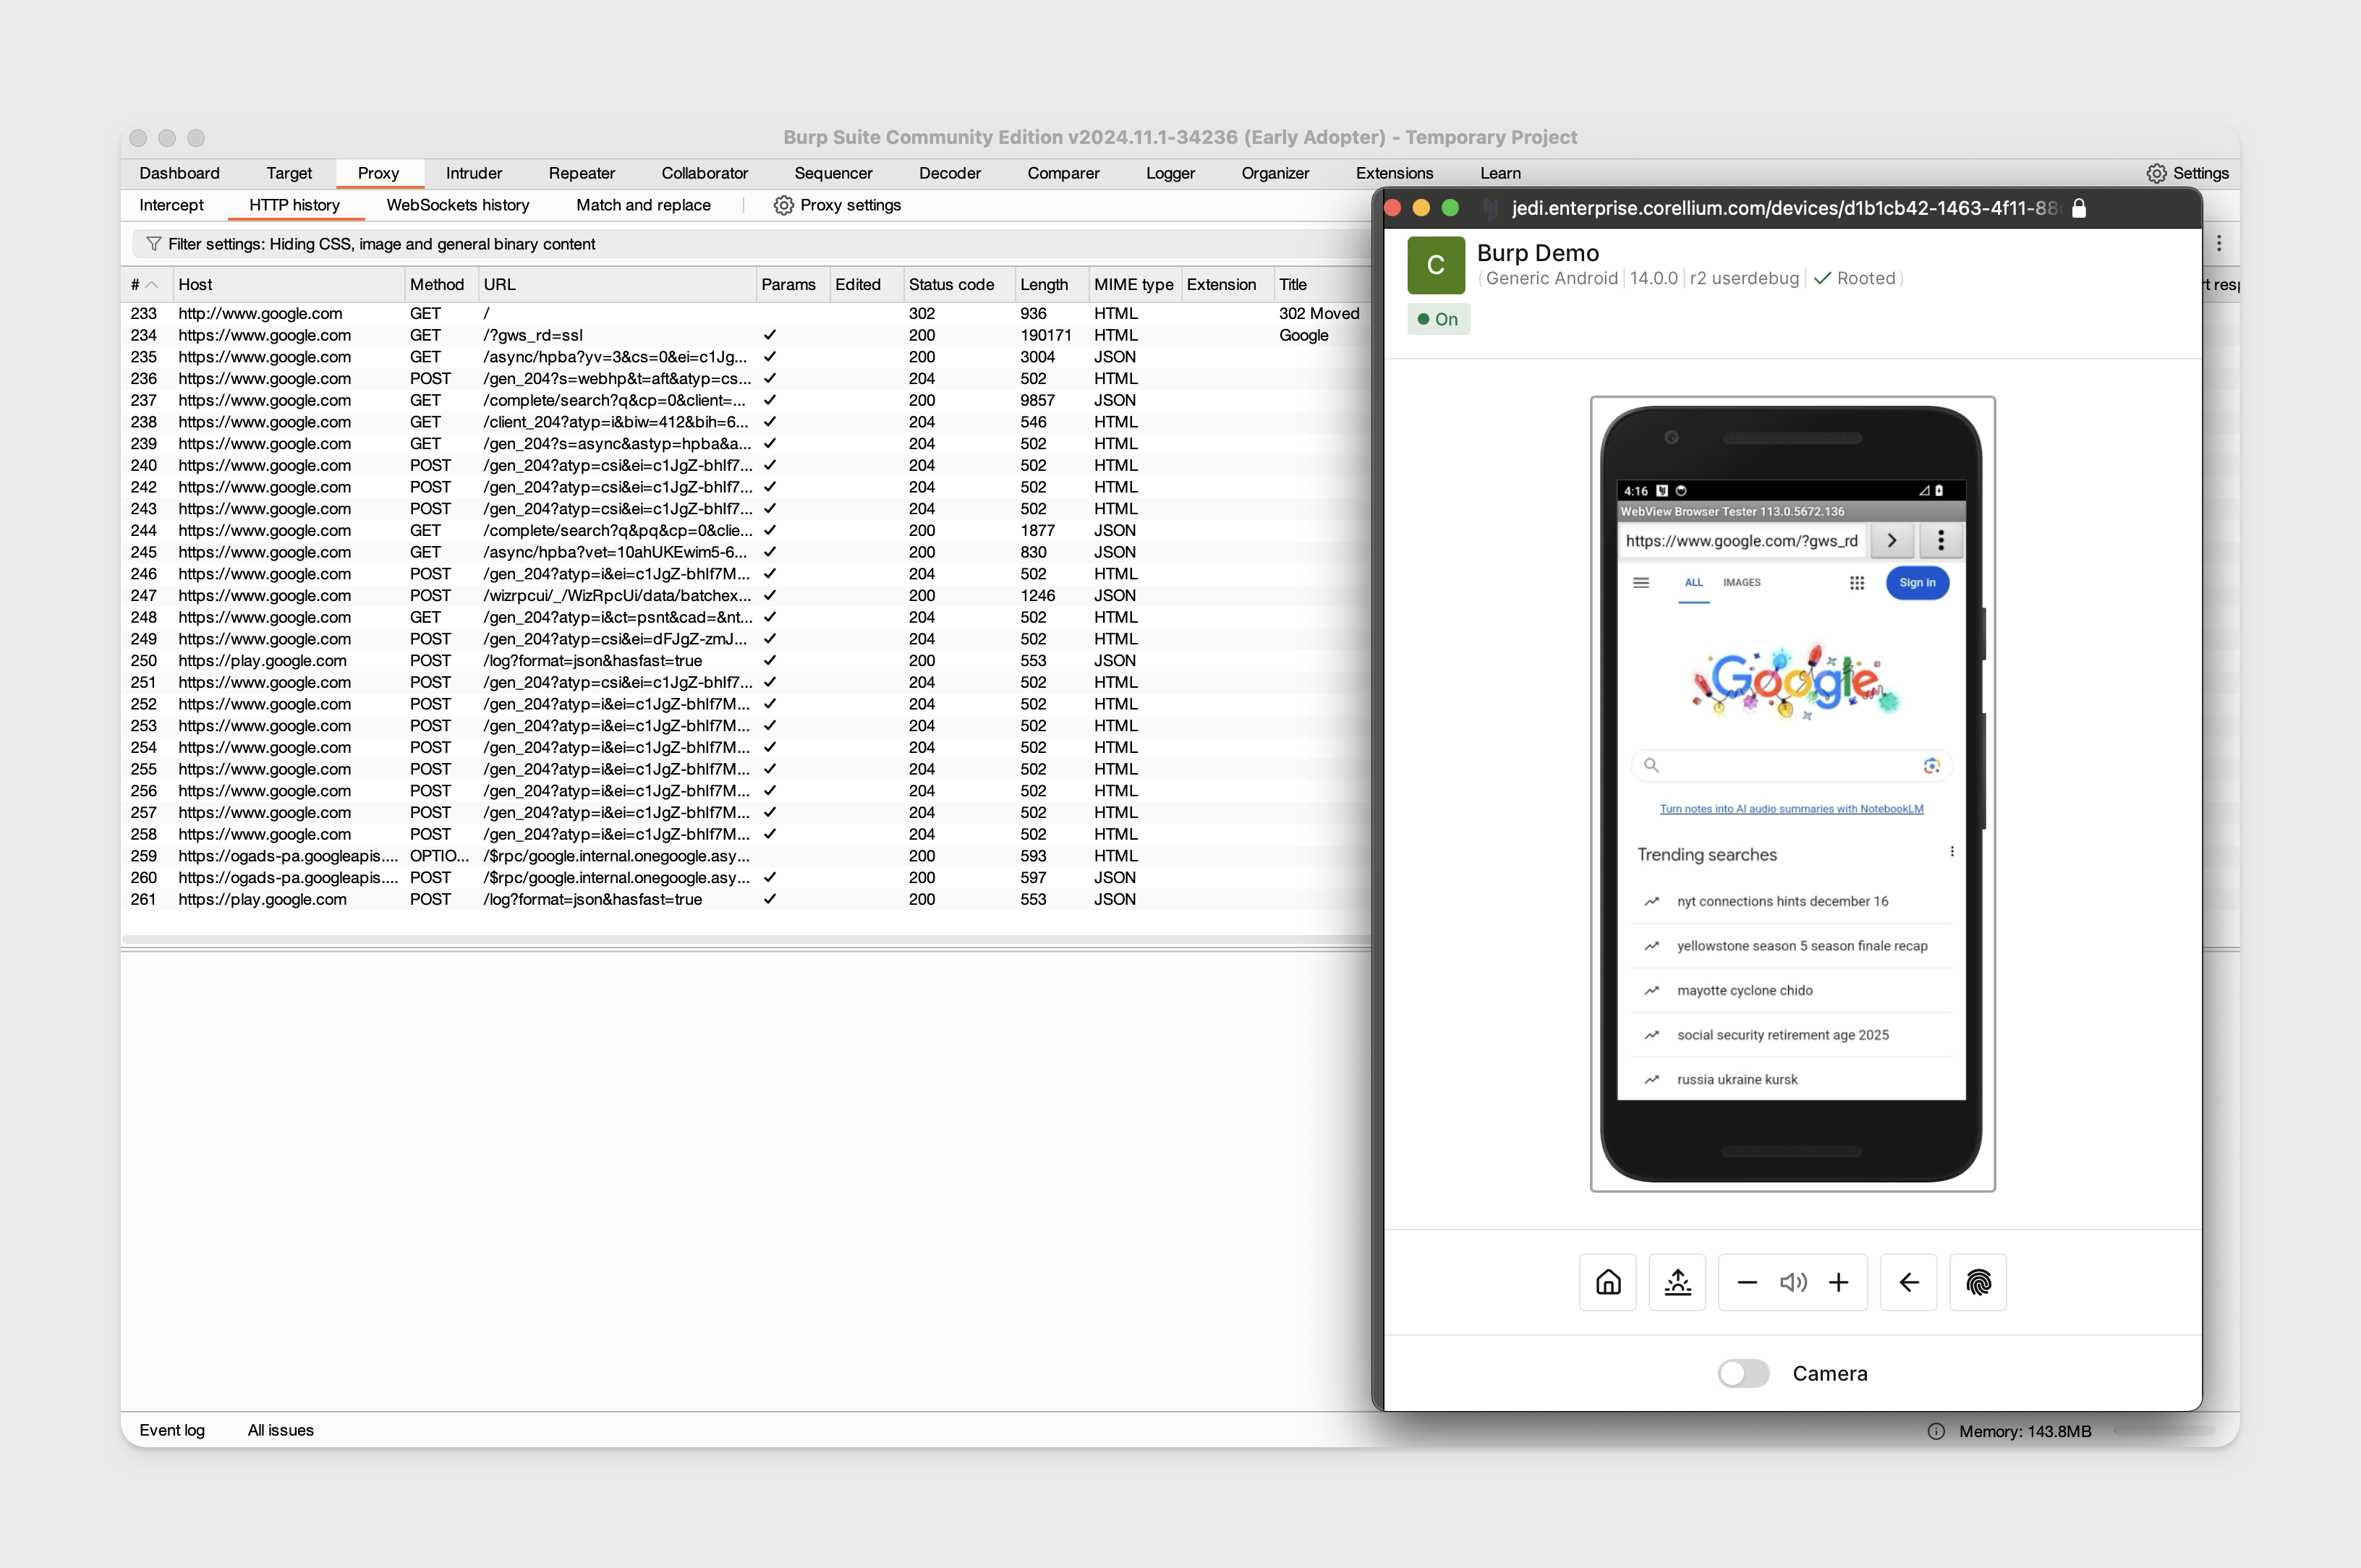
Proxy Traffic on Non-Rooted Android
We'll be using the same Burp Suite configuration with an Android 14 non-rooted device.
-
Run the adb connect command for your device found under the VPN section in the "Connect" tab in the web interface.
-
On the Android device, confirm that you have allowed USB debugging when prompted.
-
Push the CA certificate to the device.
adb push BurpCA.cer /sdcard/Download -
Install the certificate on the device. For an Android running version 14.0.0, open the Android settings app and navigate to Security -> Security and privacy -> More security & privacy -> Encryption & credentials -> Install a certificate -> click "CA certificate" -> click "Install Anyway" then go to "Downloads" and click on the Burp CA certificate to install it, you should see the device reboot.
noteThe exact places to click to install the certificate through the Android settings can vary depending on the firmware version being used.
-
Set up the HTTP proxy on the device.
Our example would look like this:
adb shell settings put global http_proxy 10.11.3.2:808010.11.3.2is the IP address assigned to our VPN connection and8080is the port we used to bind the Burp proxy listener to. -
Traffic can now be proxied from the device.
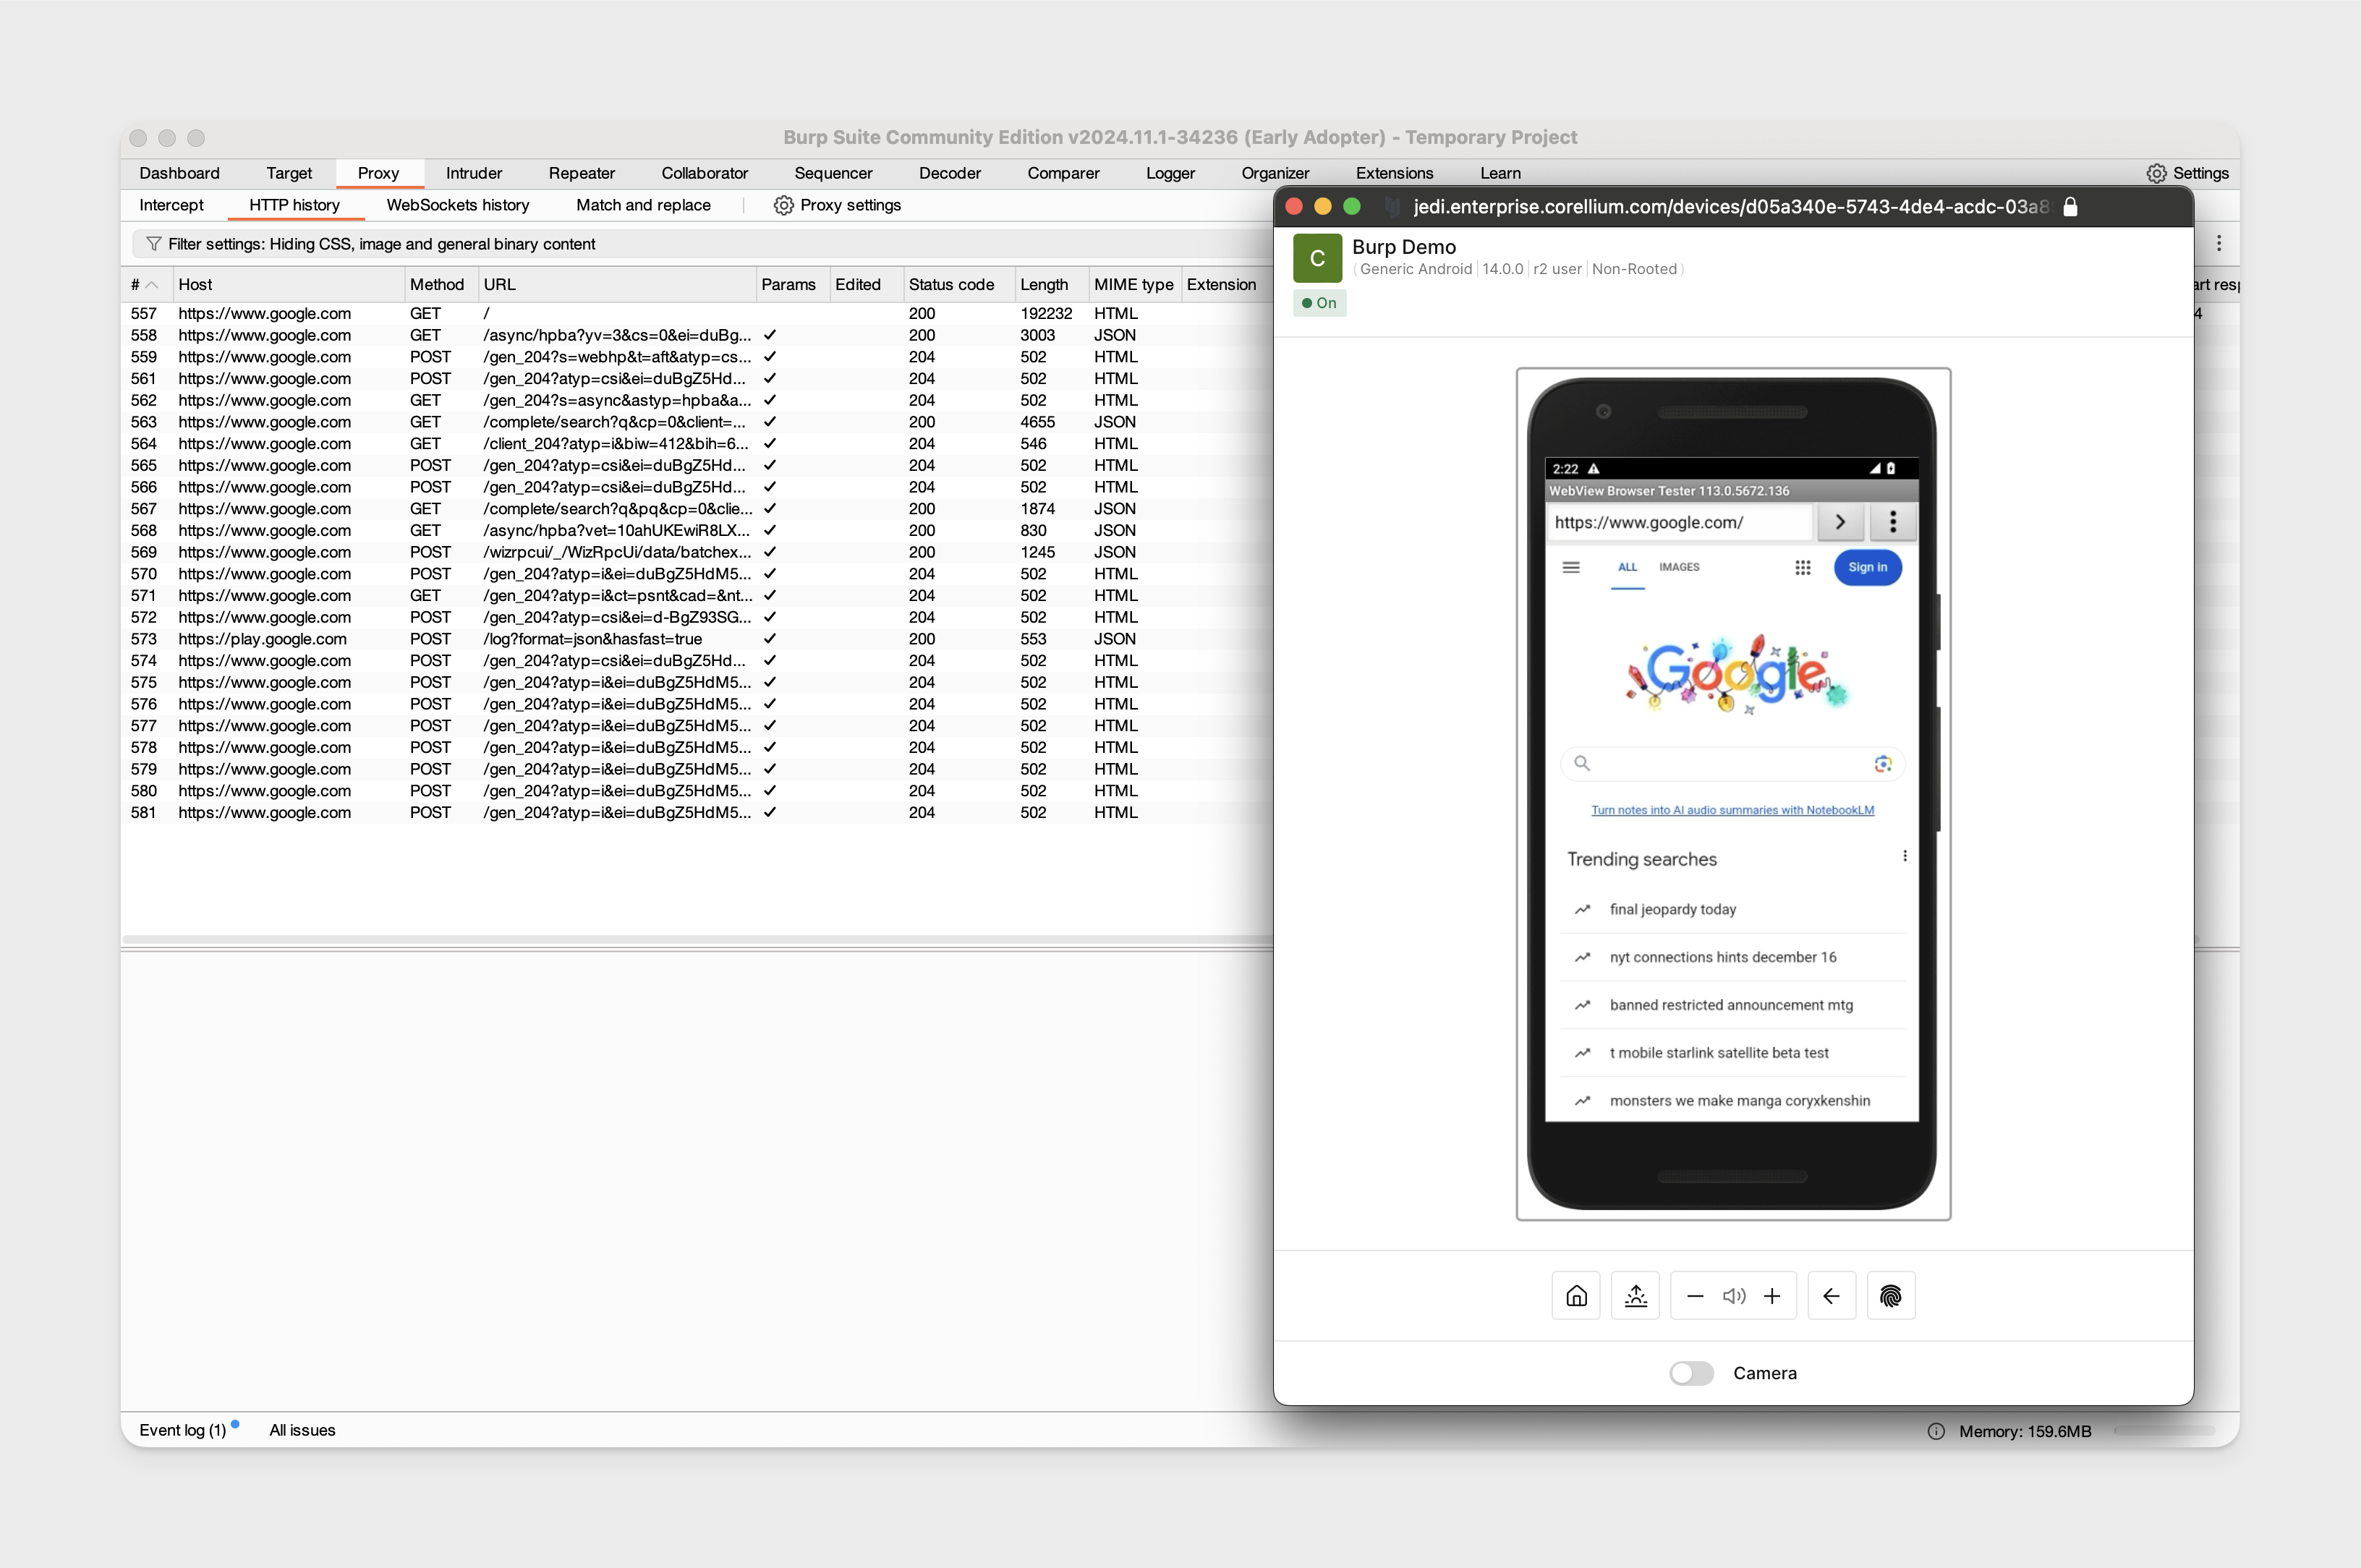
Proxy Traffic on Jailbroken iOS
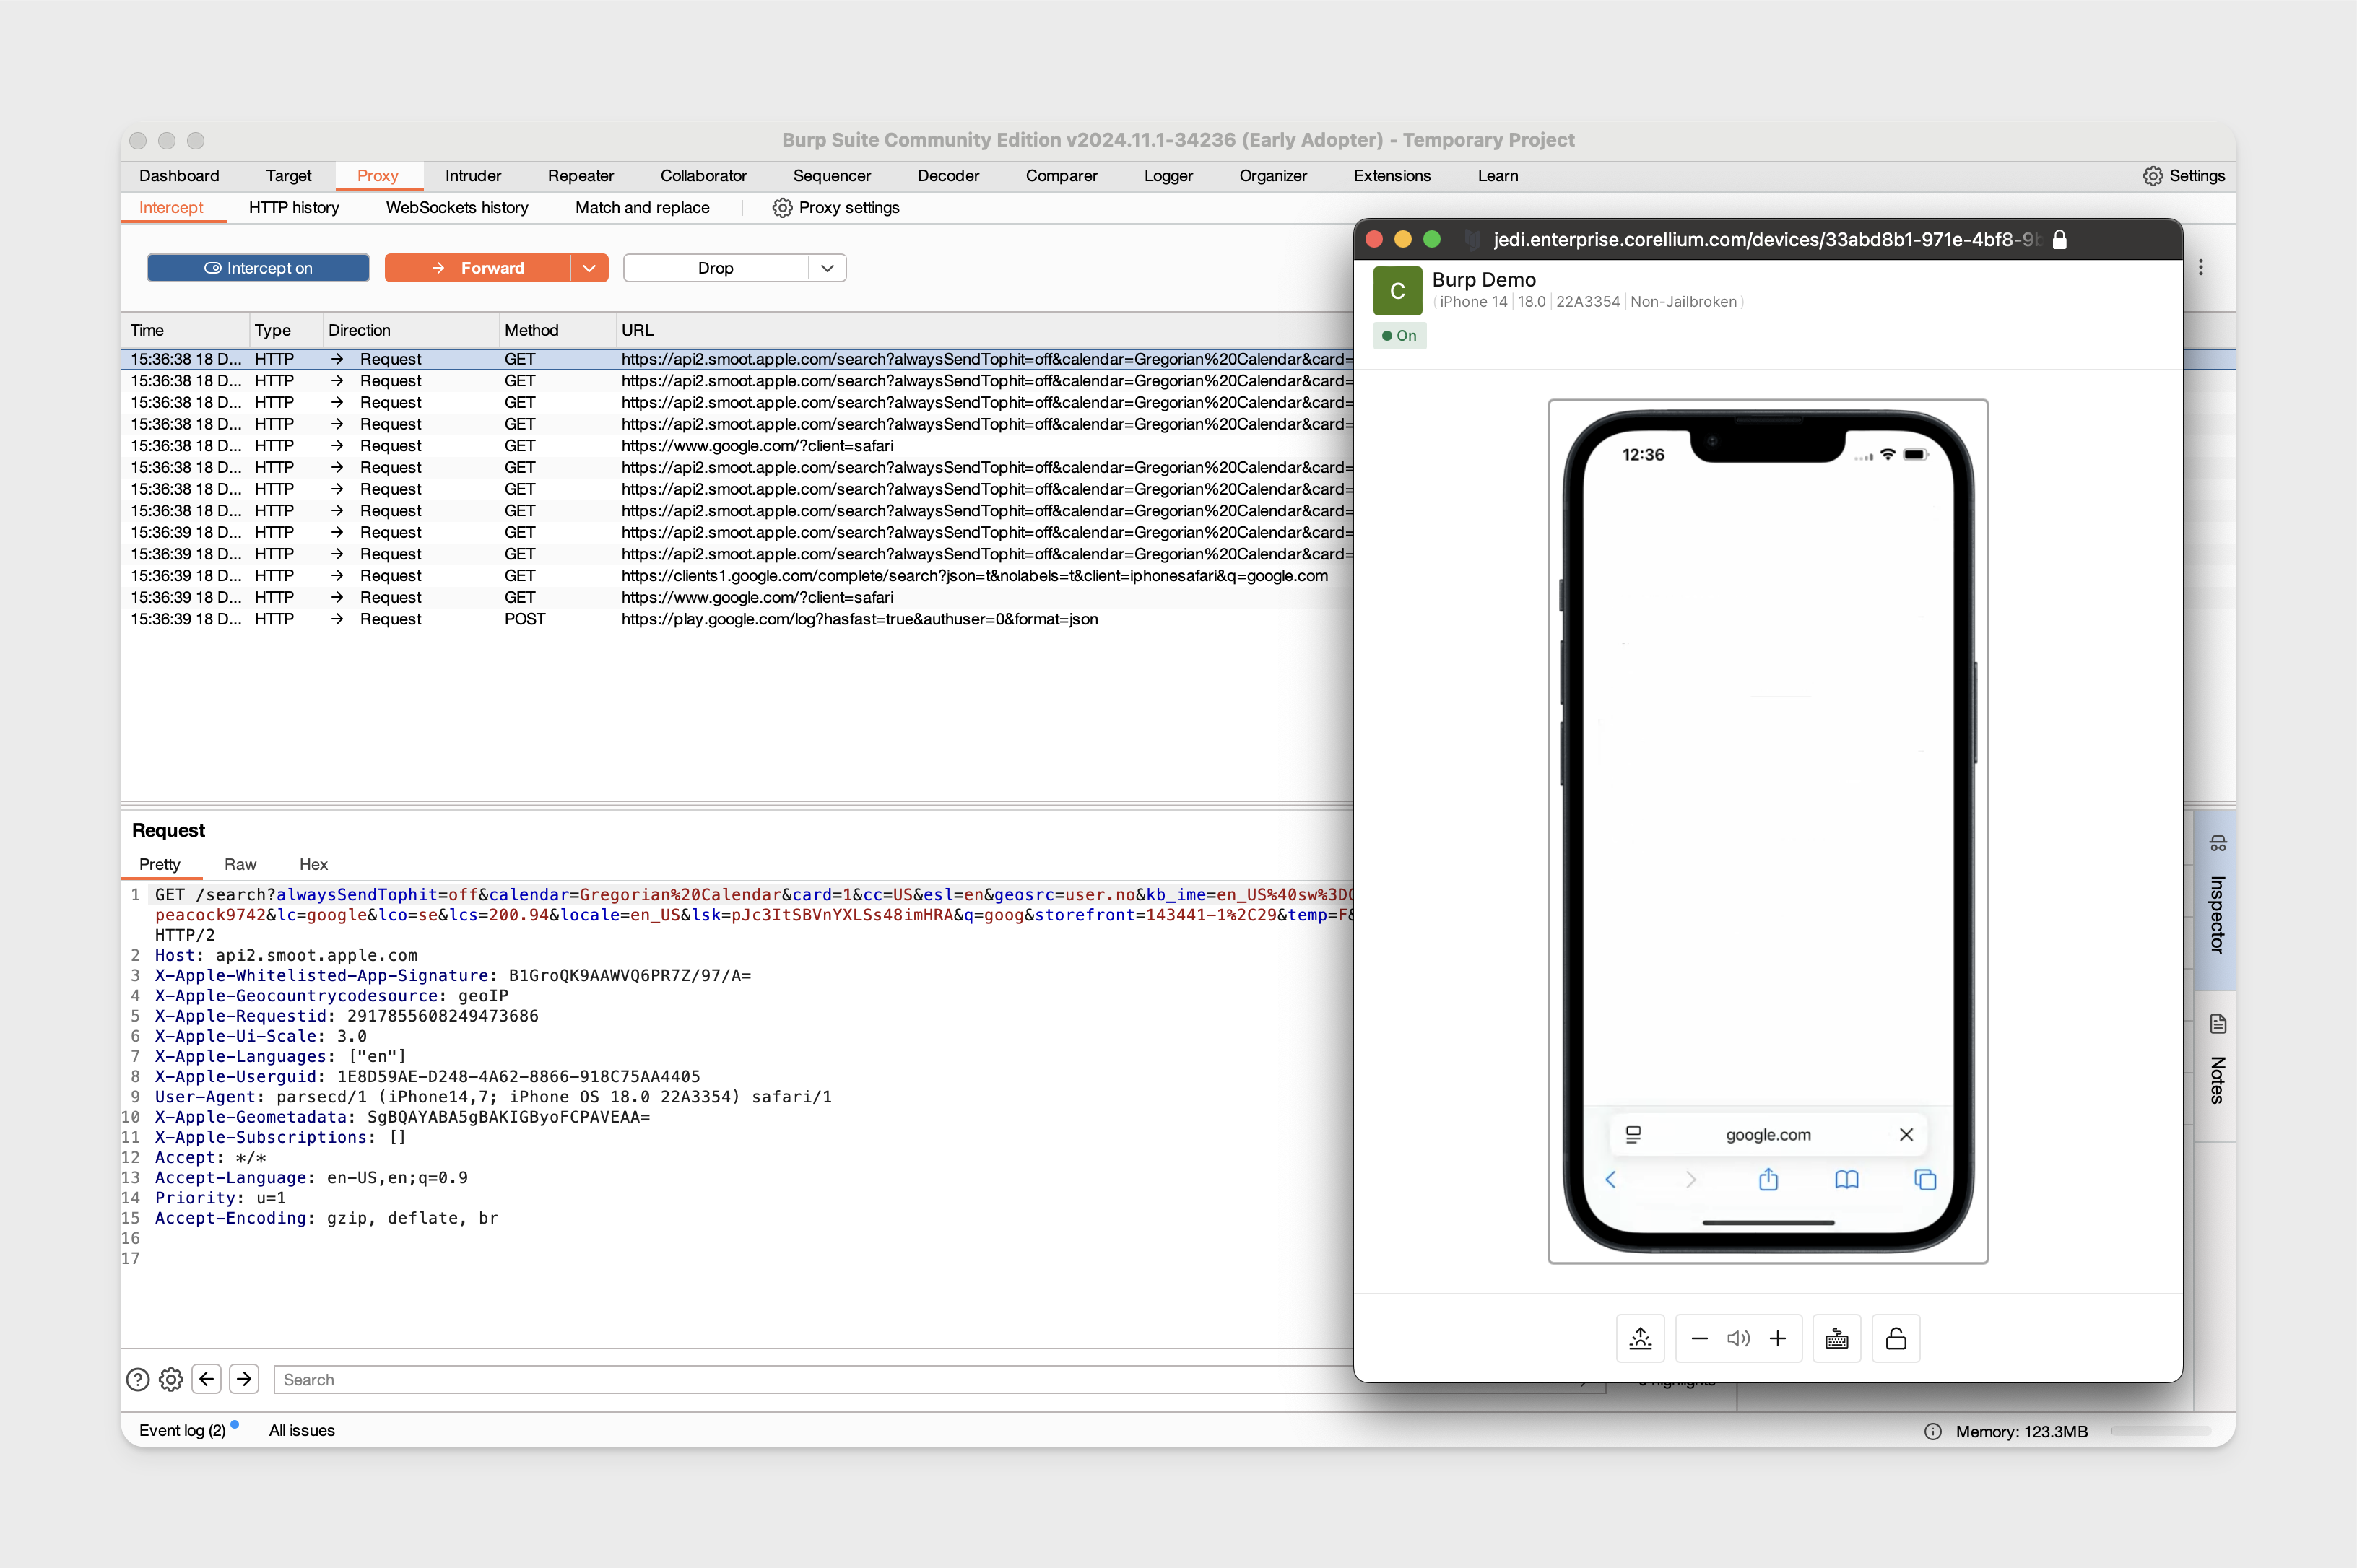
Jailbroken iOS devices do not require the CA certificate installed on the device to start intercepting traffic from Safari. We'll be using a jailbroken iPhone 14 running iOS 18 to demonstrate this.
-
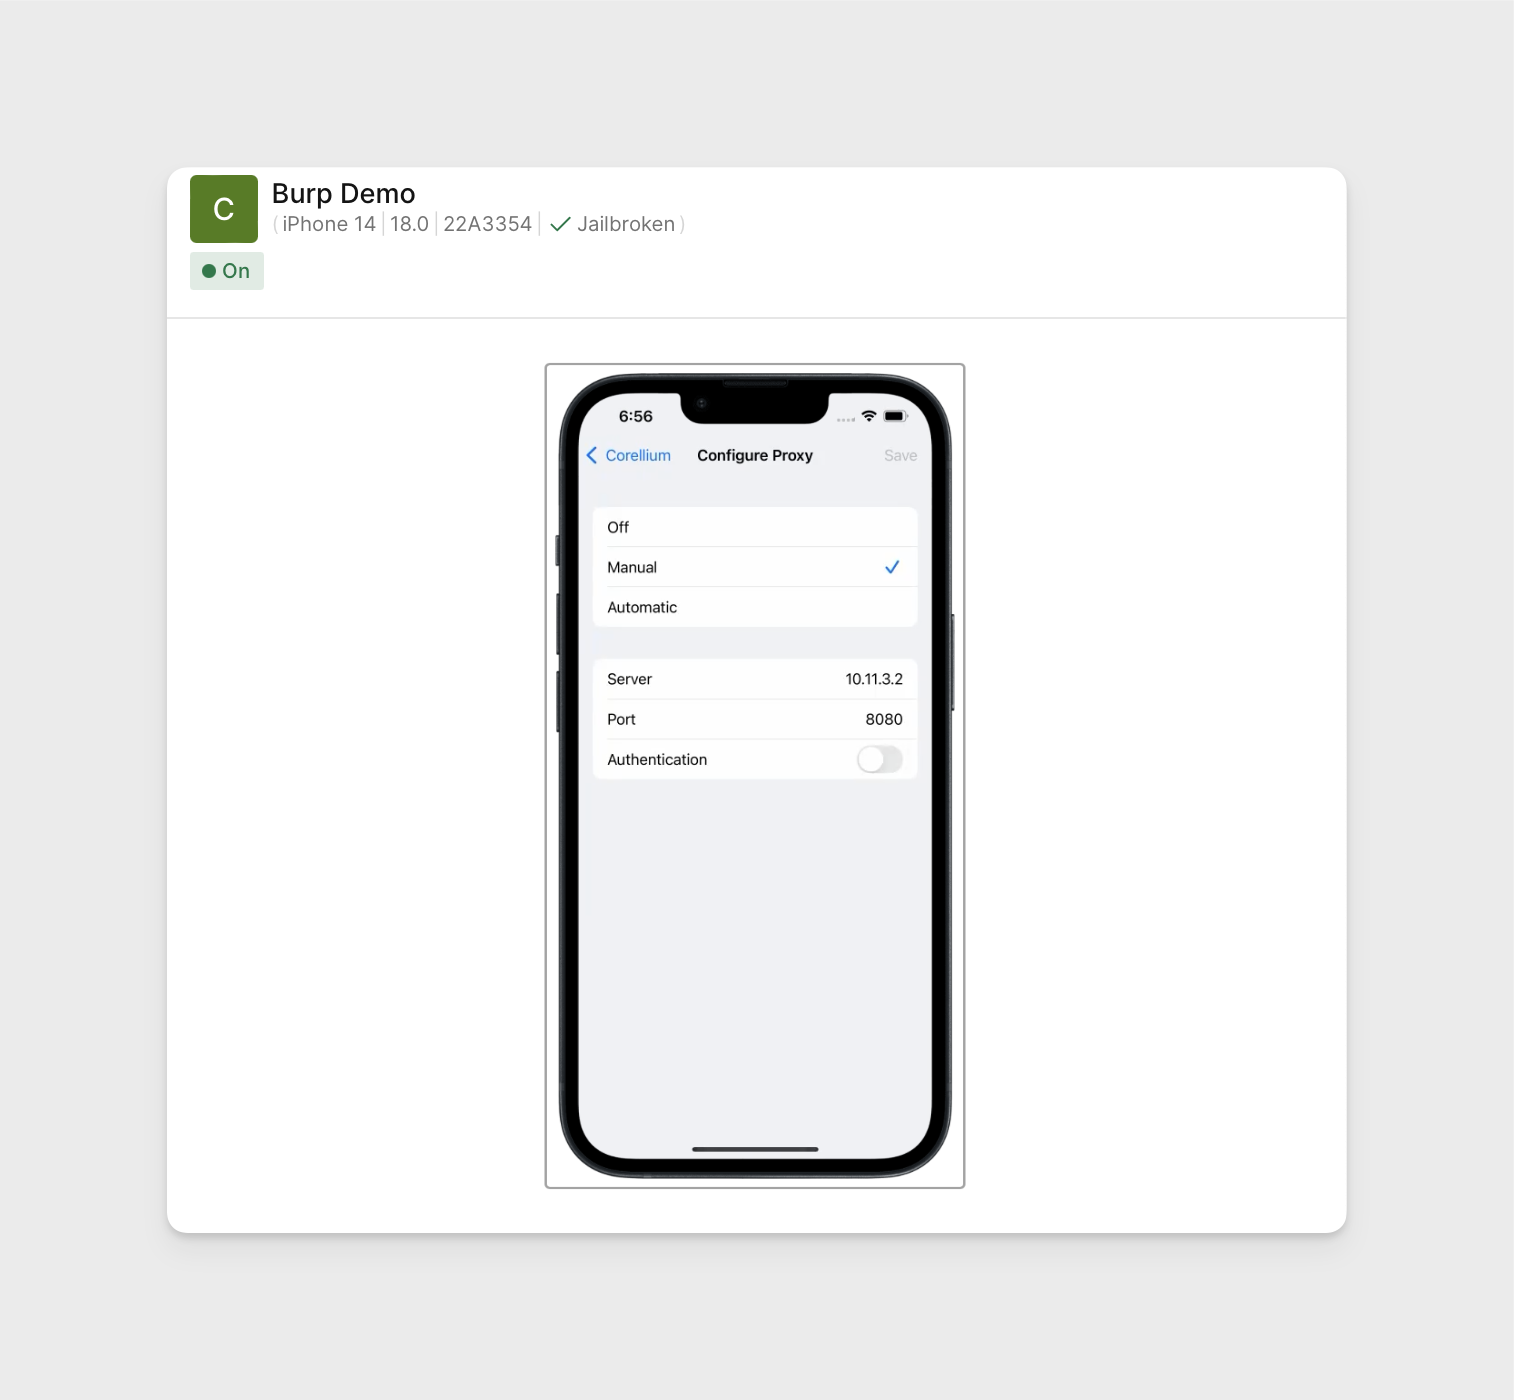
Using the same Burp configuration, set the HTTP proxy on the device by opening the iOS settings app -> Wi-Fi -> click the (i) next to the Corellium network -> click "Configure Proxy".
-
Configure the proxy port to the same port the Burp proxy listener is binded and to point the address to the same IP address assigned to your VPN connection.
-
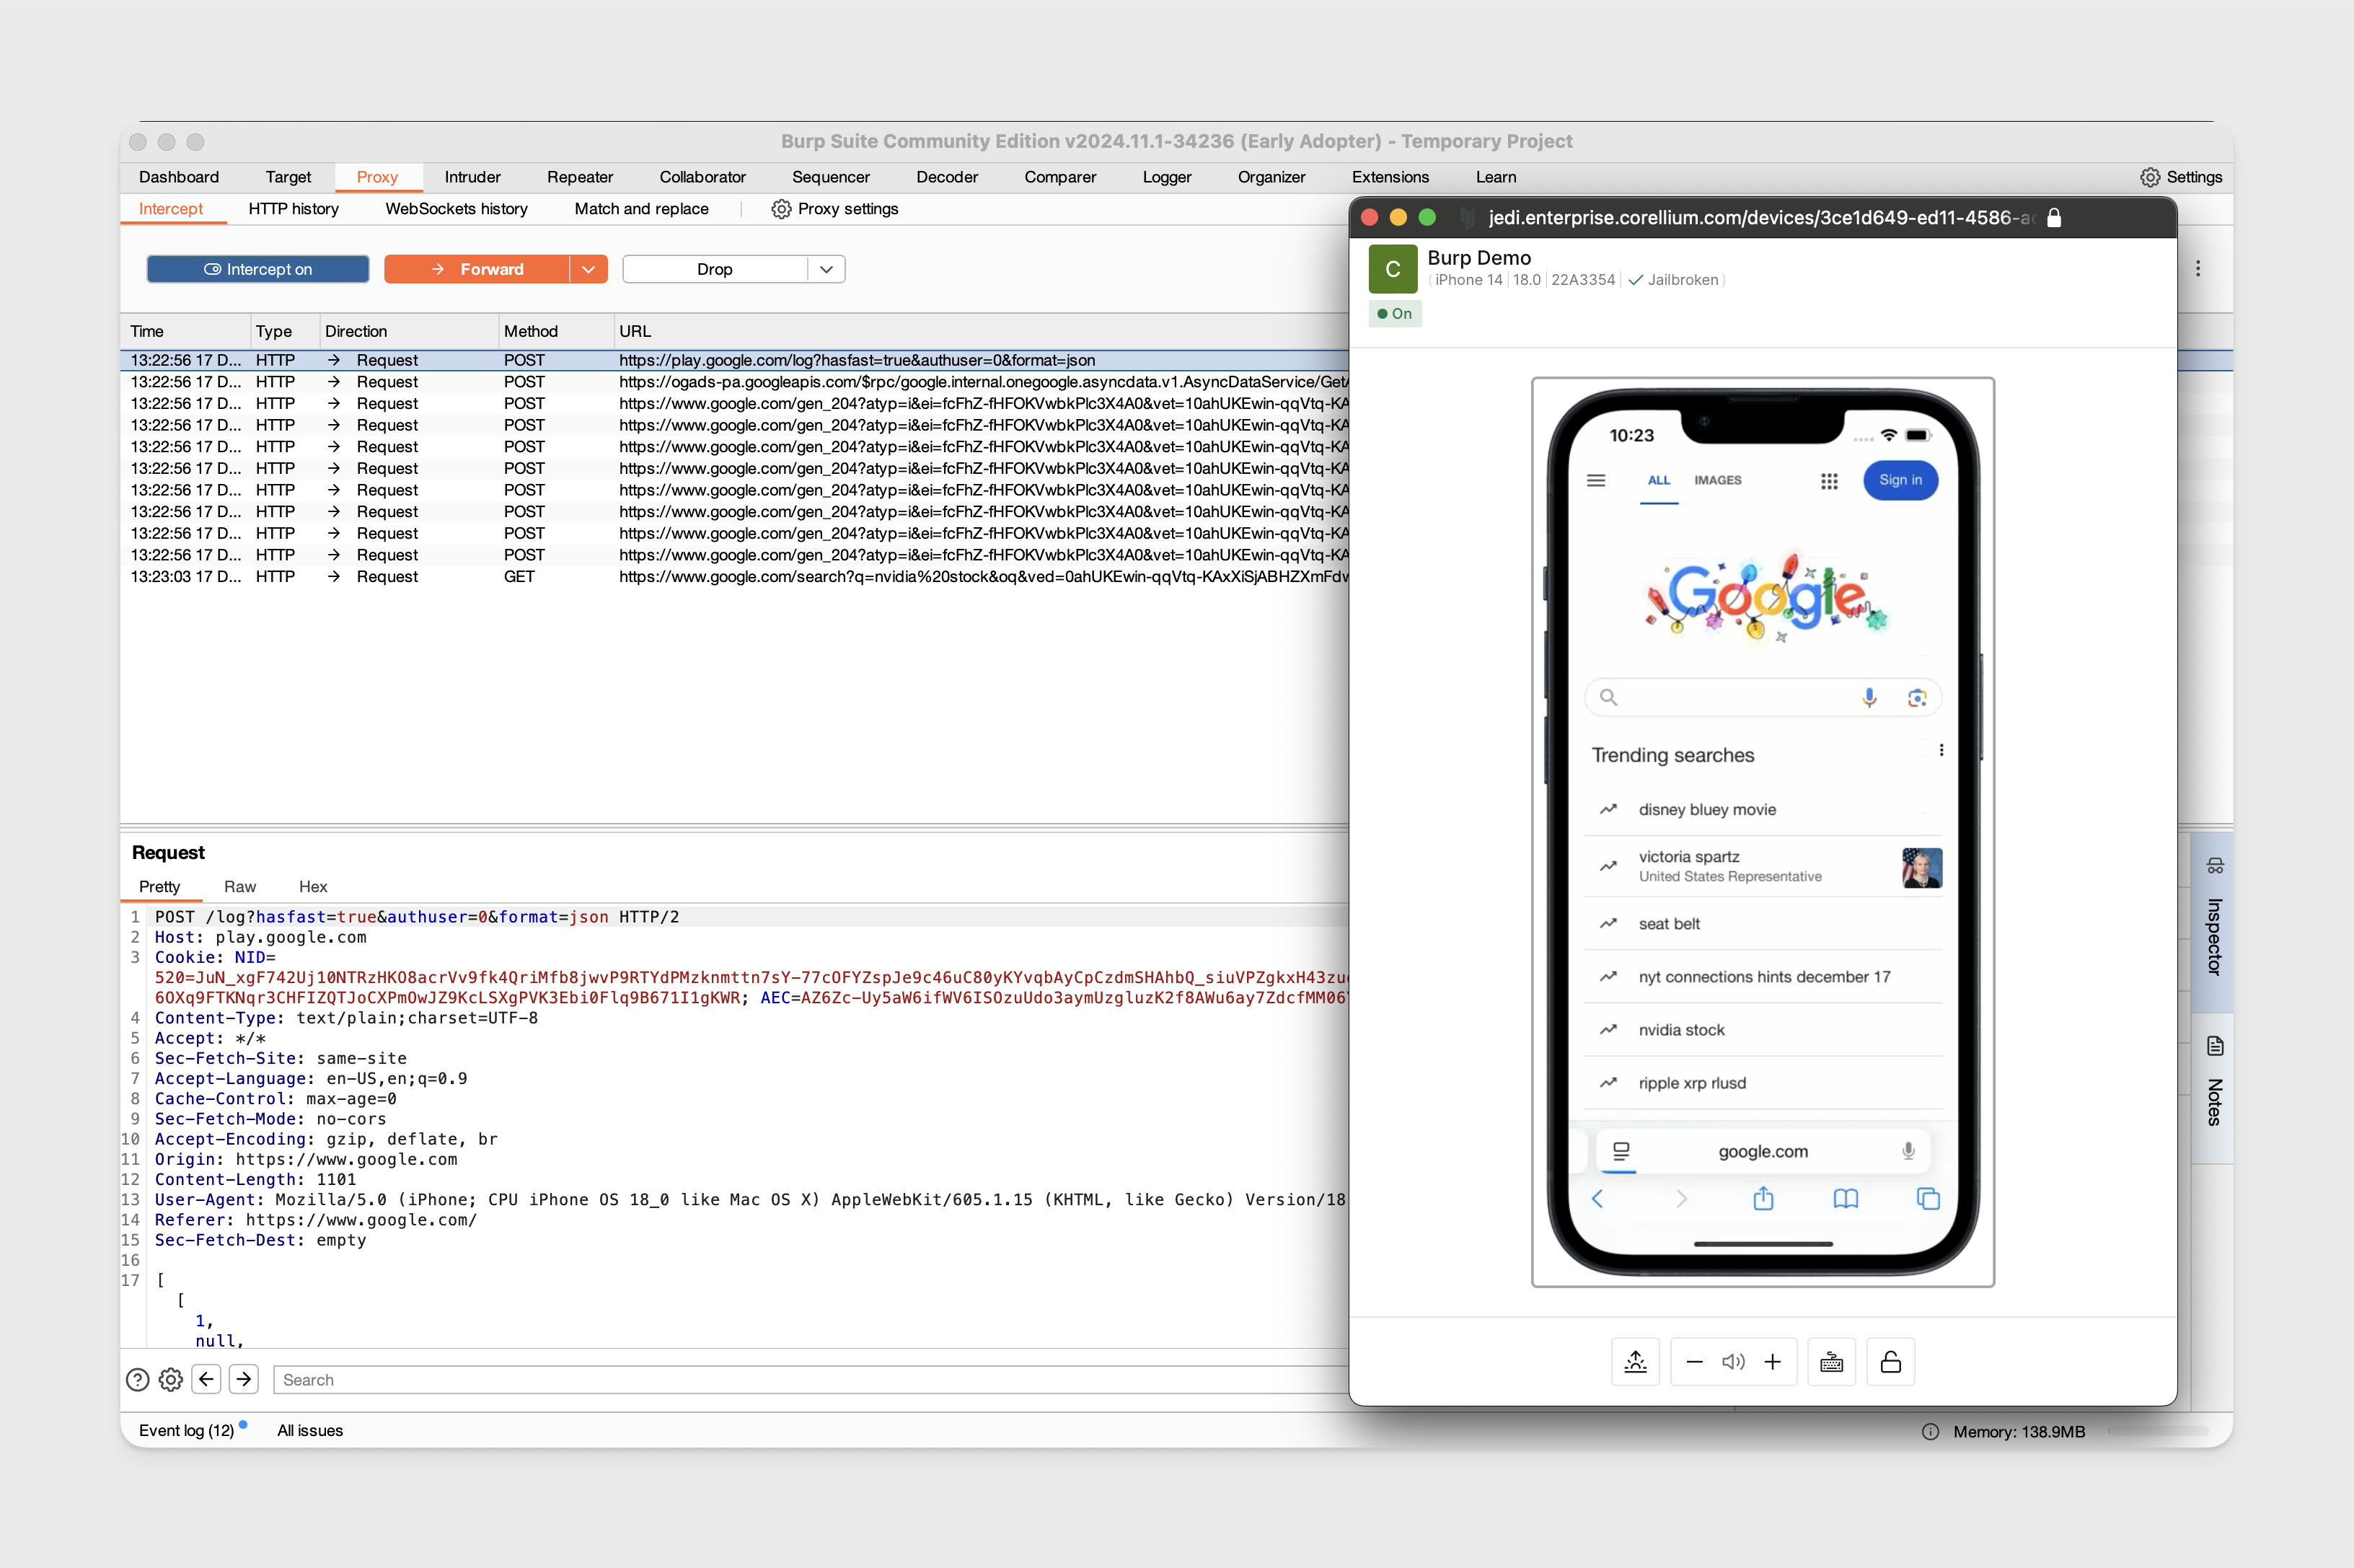
We can now begin intercepting traffic.
Proxy Traffic on Non-Jailbroken iOS
With the VPN connection enabled and Burp Suite configured as shown, we will need to download and install the CA certificate on the non-jailbroken iOS device. We'll be using a non-jailbroken iPhone 14 running 18.0.
A) Mail the certificate to your inbox and download it.
B) Serve the certificate over a web server to the device. Download the certificate through the directory listing.
For option B, this is straight forward.
-
Start the web server from the same directory that the CA certificate is.
python3 -m http.server <port> -
Ensure you can reach the device through the VPN connection.
-
In Safari on the device, access the web server to download the certificate:
<vpn_ip>:<web_server_port> -
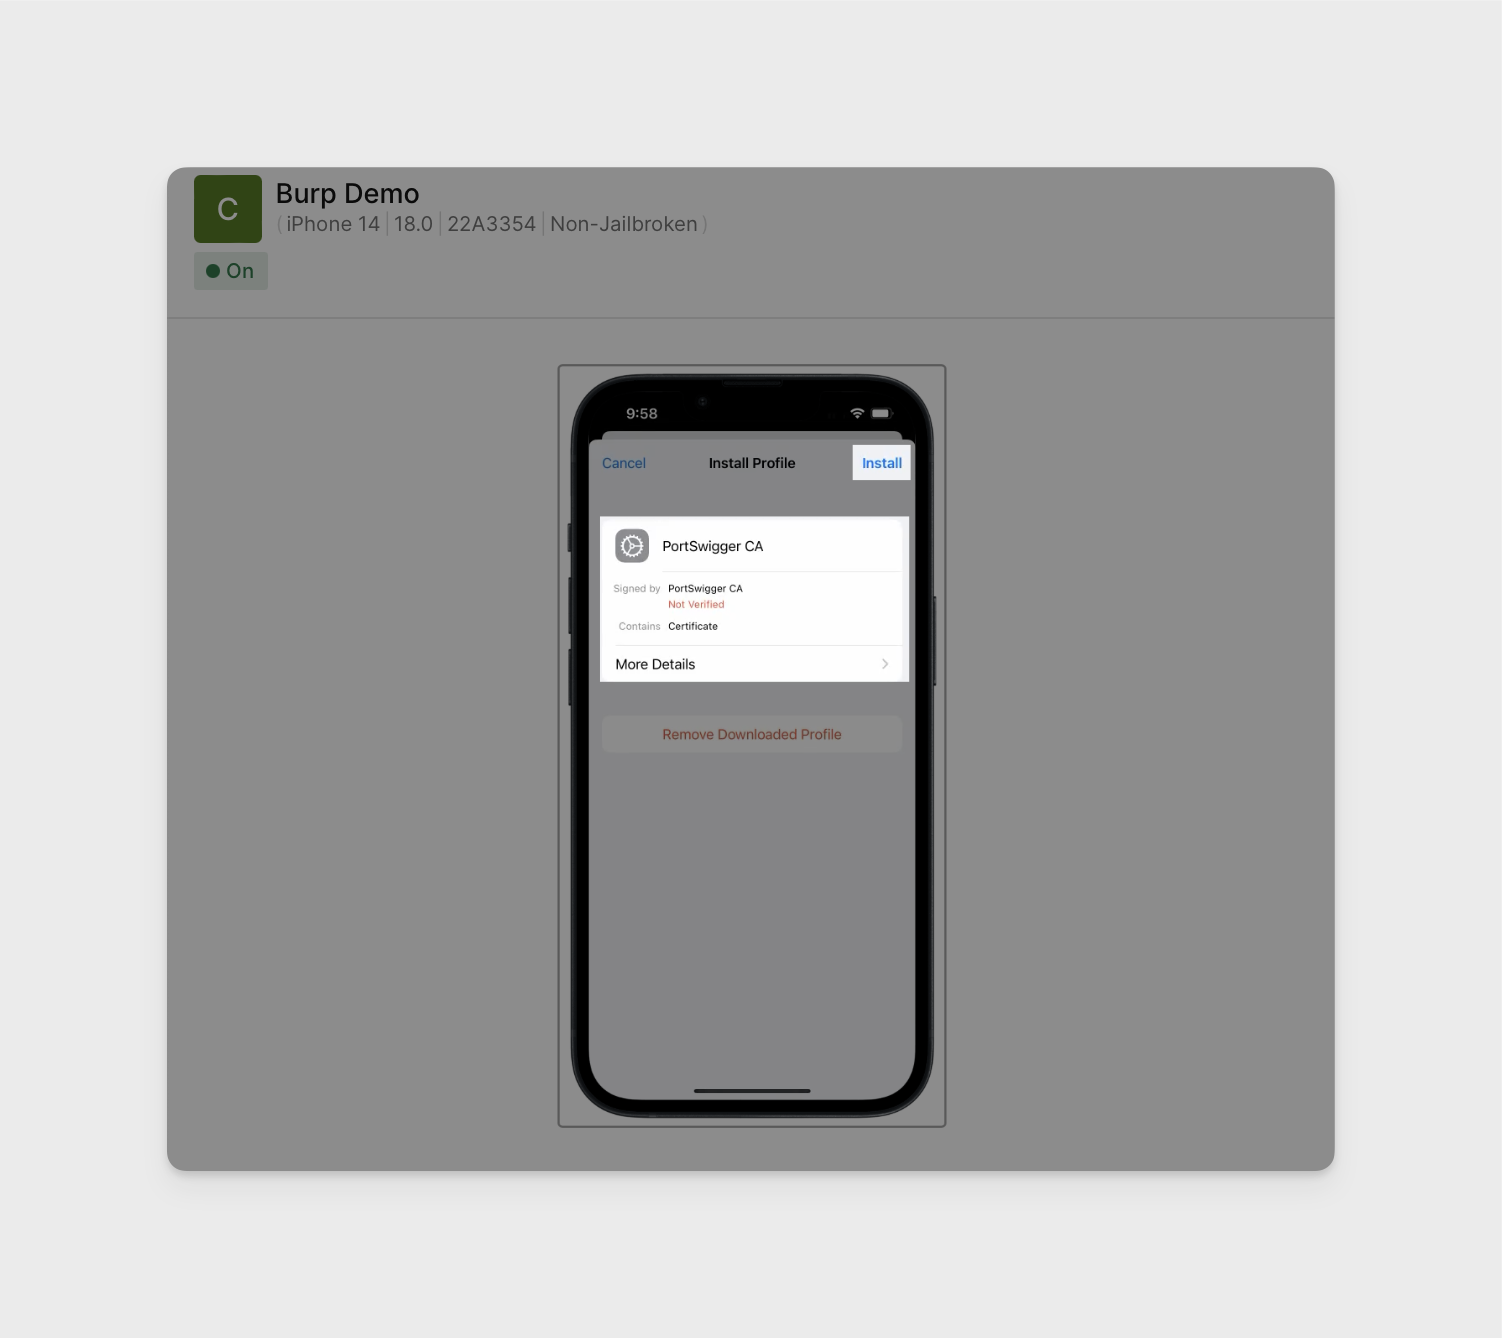
Once you have the certificate downloaded, install it by opening iOS Settings -> General -> VPN & Device Management -> Select the "PortSwigger CA" configuration profile -> Install the Certificate.
-
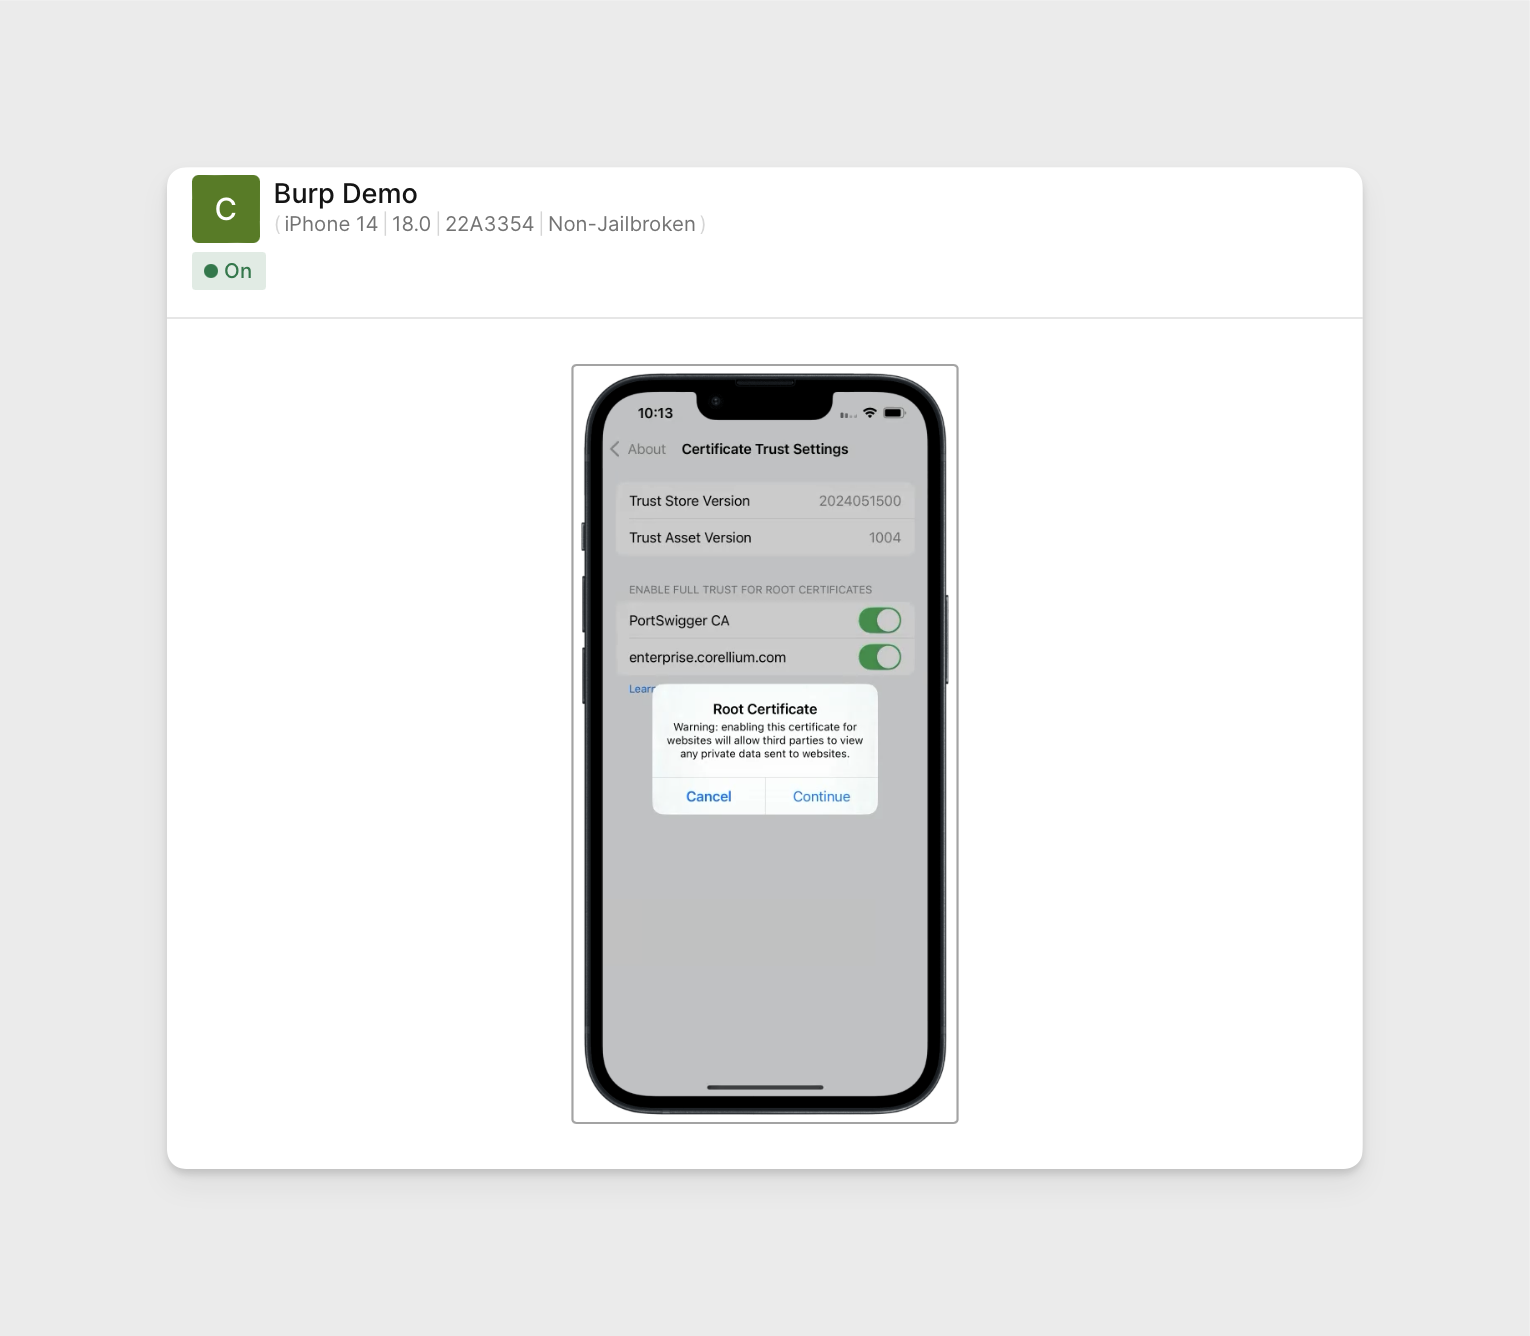
Ensure the certificate is also trusted. While in iOS Settings -> General -> About -> Enable full trust for the "Port Swigger CA" certificate.
-
Configure the HTTP proxy as show in the jailbroken iOS section.
- Port:
8080 - Address:
VPN_IP
- Port:
-
Traffic can now be intercepted.
Proxy Traffic without the VPN
Exluding the non-jailbroken device example, the following steps require you to add a public key to your project's authorized keys so you can properly authenticate with the respective proxy server, will only work for devices that were created after adding your public key to the project's authorized keys.
We'll be using the same Burp Configuration and CA certificate we exported previously for these examples.
Network Considerations
-
Except for non-jailbroken devices, you must be able to reach and authenticate with the respective proxy server (allowing outbound SSH traffic port 22).
- Run the "Quick Connect" commands for applicable devices to test this, you should be able to SSH into the device for iOS or
adb shellfor Android without the VPN.
- Run the "Quick Connect" commands for applicable devices to test this, you should be able to SSH into the device for iOS or
-
Assuming you are proxying traffic over port
8080, outbound/inbound traffic to this port on your local workstation should not be blocked.
Proxy Traffic on Rooted Android
Following steps were done on rooted Android 14 and using the same Burp Suite configuration.
-
Run the Android "Quick Connect" command found in the web interface for your device to connect to the proxy. Ensure you've added your public key to your project's authorized keys.
-
Ensure adb is running as
root.adb root -
Run the
localhostadb connect command.adb connect localhost:5001 -
Assuming you have the Burp certificate exported as shown previous, follow the steps in Proxy Traffic on Rooted Android to convert your certificate to PEM format and named properly.
Push the certificate to the device:
adb push 9a5ba575.0 /system/etc/security/cacerts/ -
Set up port forwarding on the device to send the HTTP traffic into Burp running locally:
adb reverse tcp:8080 tcp:8080 -
Configure the HTTP proxy on the device:
adb shell settings put global http_proxy localhost:8080 -
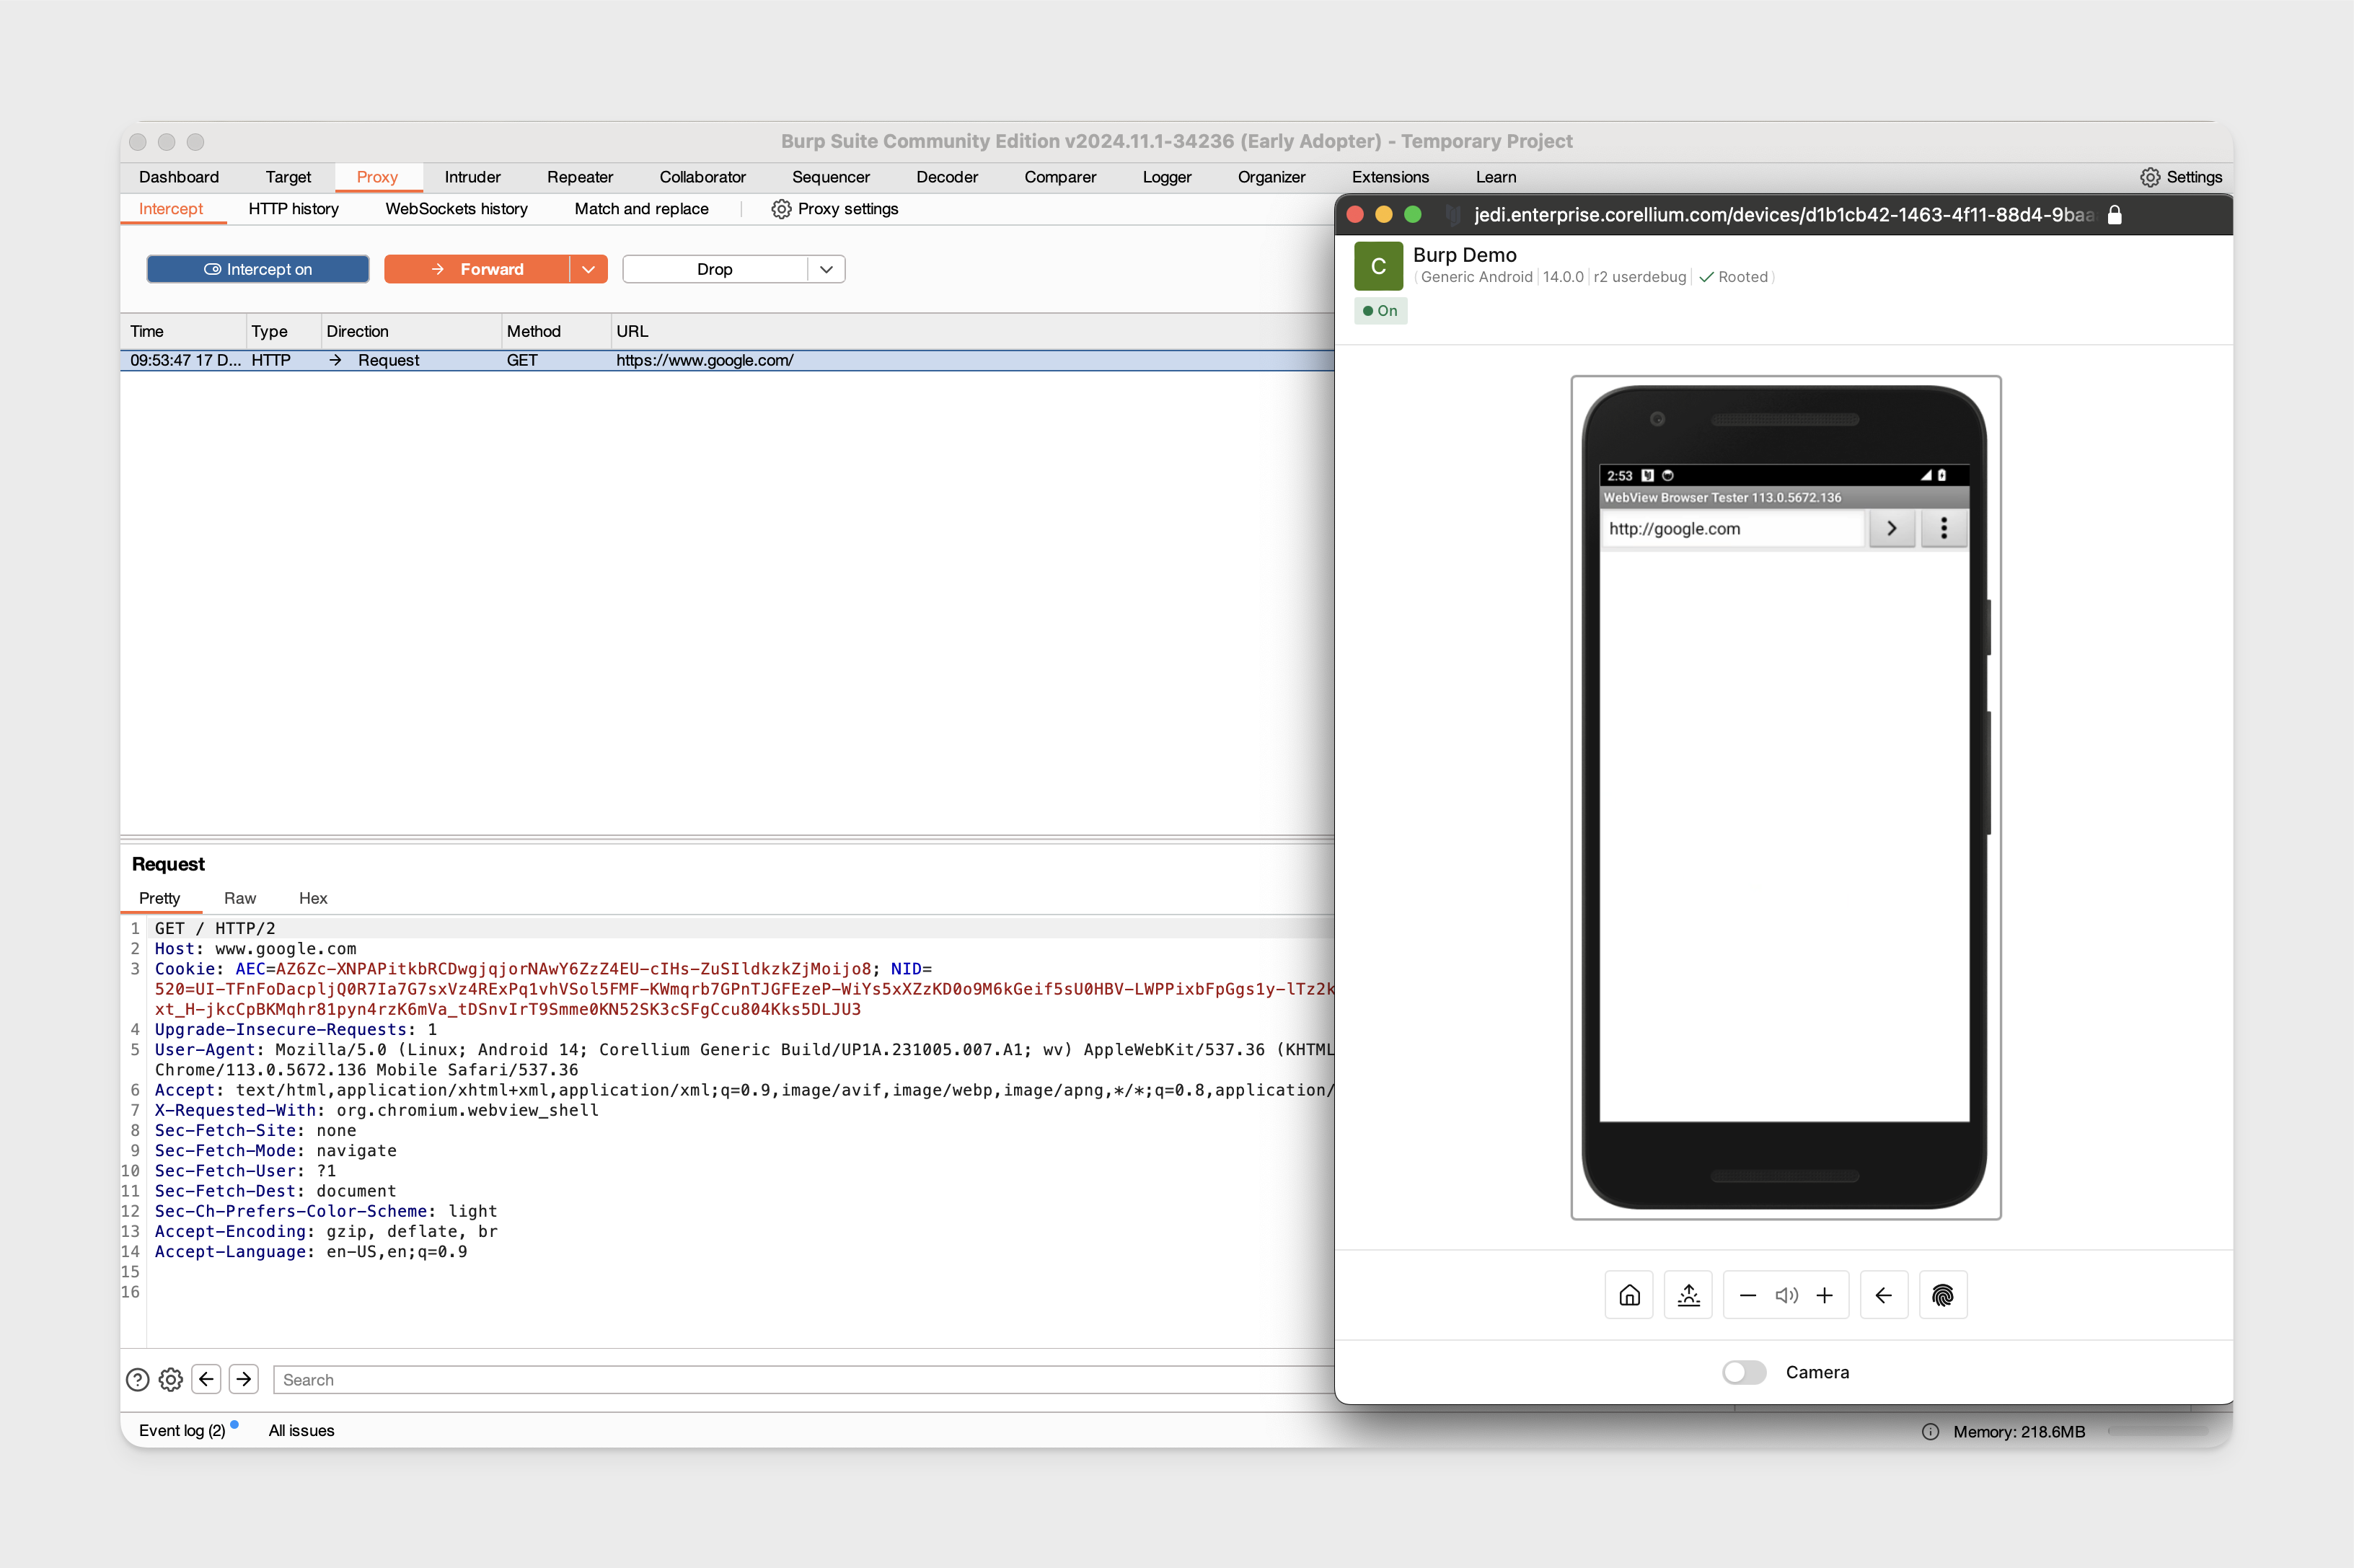
We can now start intercepting traffic.
-
When finished, cleanly close the SSH multiplexed session. Command is also found in the "Quick Connection" tab web interface:
If on Enterprise:
ssh -Ssock -O exit proxy.enterprise.corellium.comIf on Individual:
ssh -Ssock -O exit proxy.corellium.com
Proxy Traffic on Non-Rooted Android
Following steps were done on non-rooted Android 14 and uses the same Burp Suite configuration.
-
Except for the certificate steps, we'll be using the same steps outlined in the rooted Android section for proxying without a VPN.
-
Install the CA certificate the same way as show in the previous non-rooted Android section.
-
Traffic can be intercepted from the device.

Proxy Traffic on Jailbroken iOS
In this example we used a jailbroken iPhone 14 running iOS 18.0 using the same Burp Suite configuration.
-
Run the SSH reverse tunnel command from your local workstation, requires you use a device that was created after adding a public key your project's authorized keys.
MacOS/Linux:
ssh -M -Ssock -N -f -R 8080:localhost:8080 -J <project_id>@<proxy_server> root@<device's_services_ip>Windows Powershell:
ssh -M -S C:\path\for\control_sock -N -f -R 8080:localhost:8080 -J <project_id>@<proxy_server> root@<device's_services_ip>proxy.corellium.com- Individual domain proxy serverproxy.enterprise.corellium.com- Enterprise domain proxy server
-
Set the HTTP proxy on the device to point to
127.0.0.1and port8080: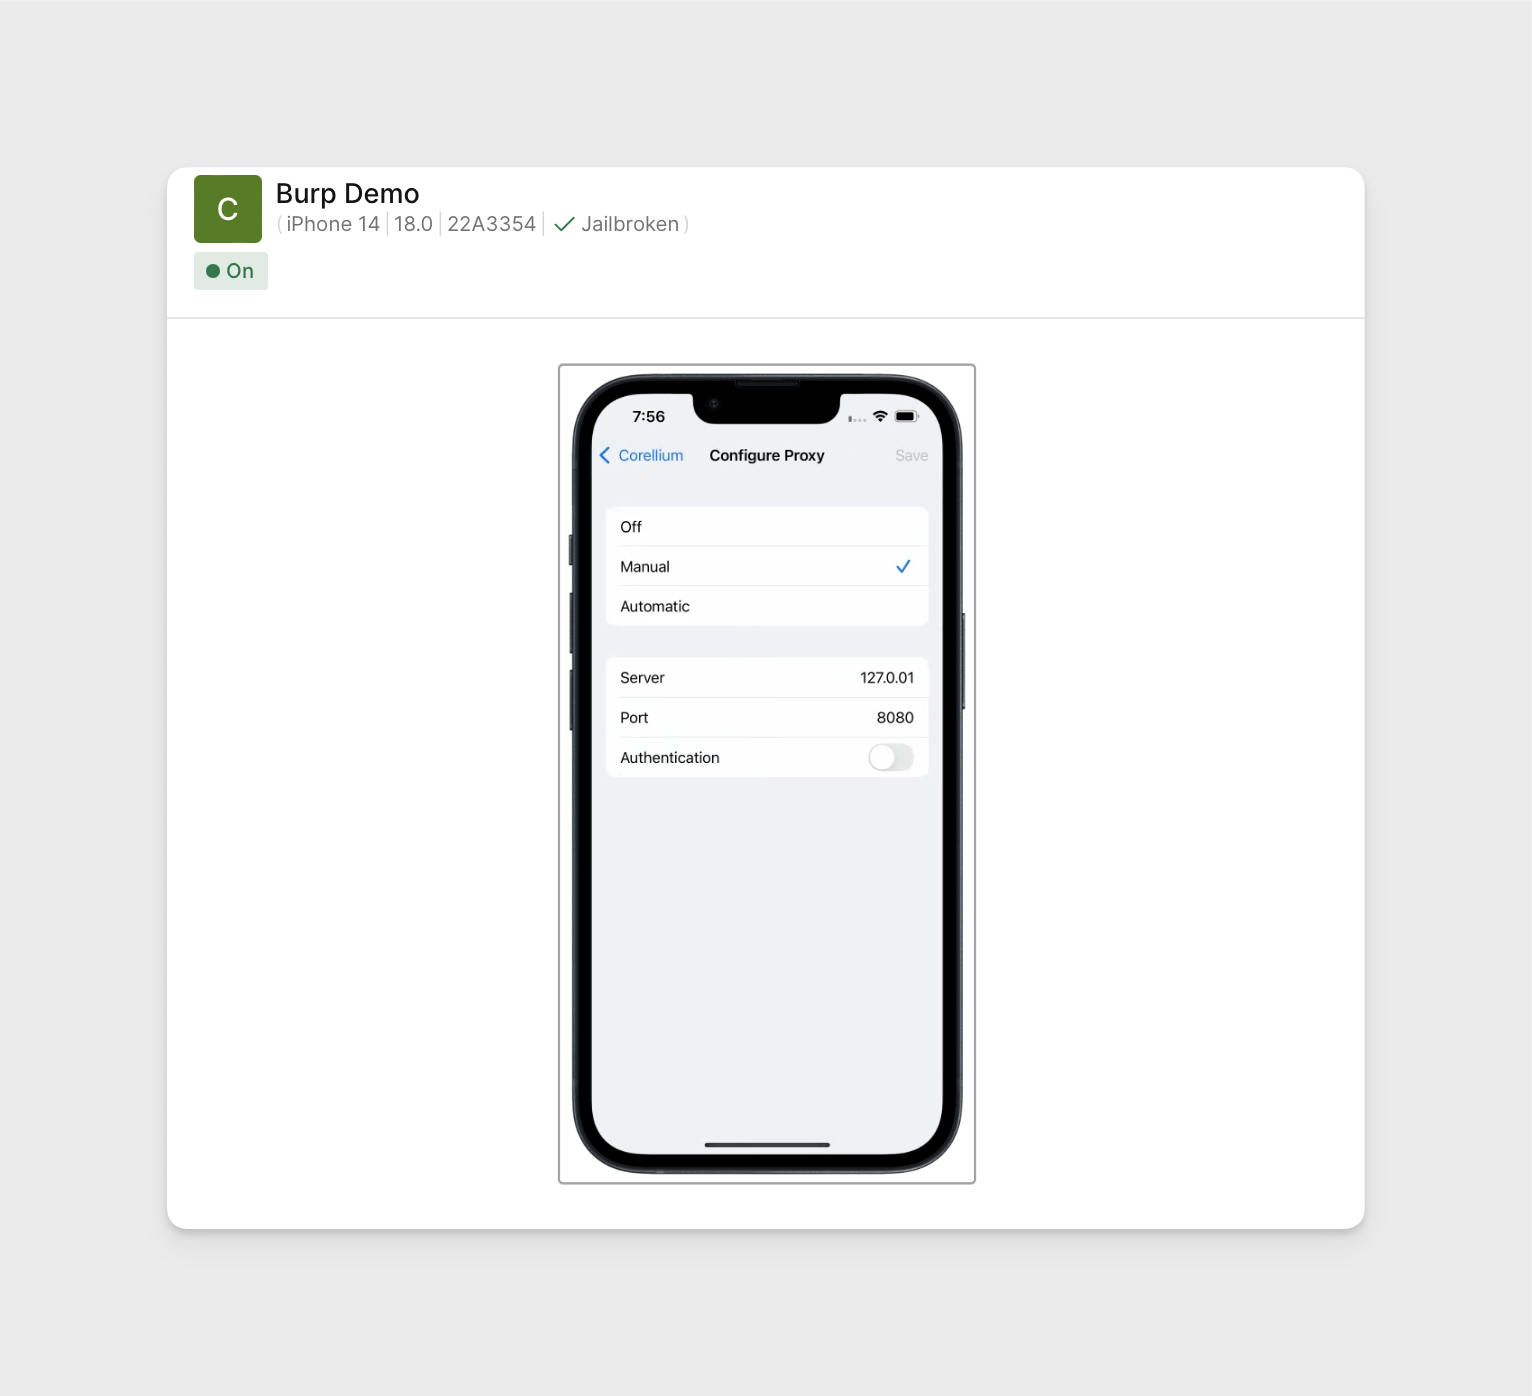
-
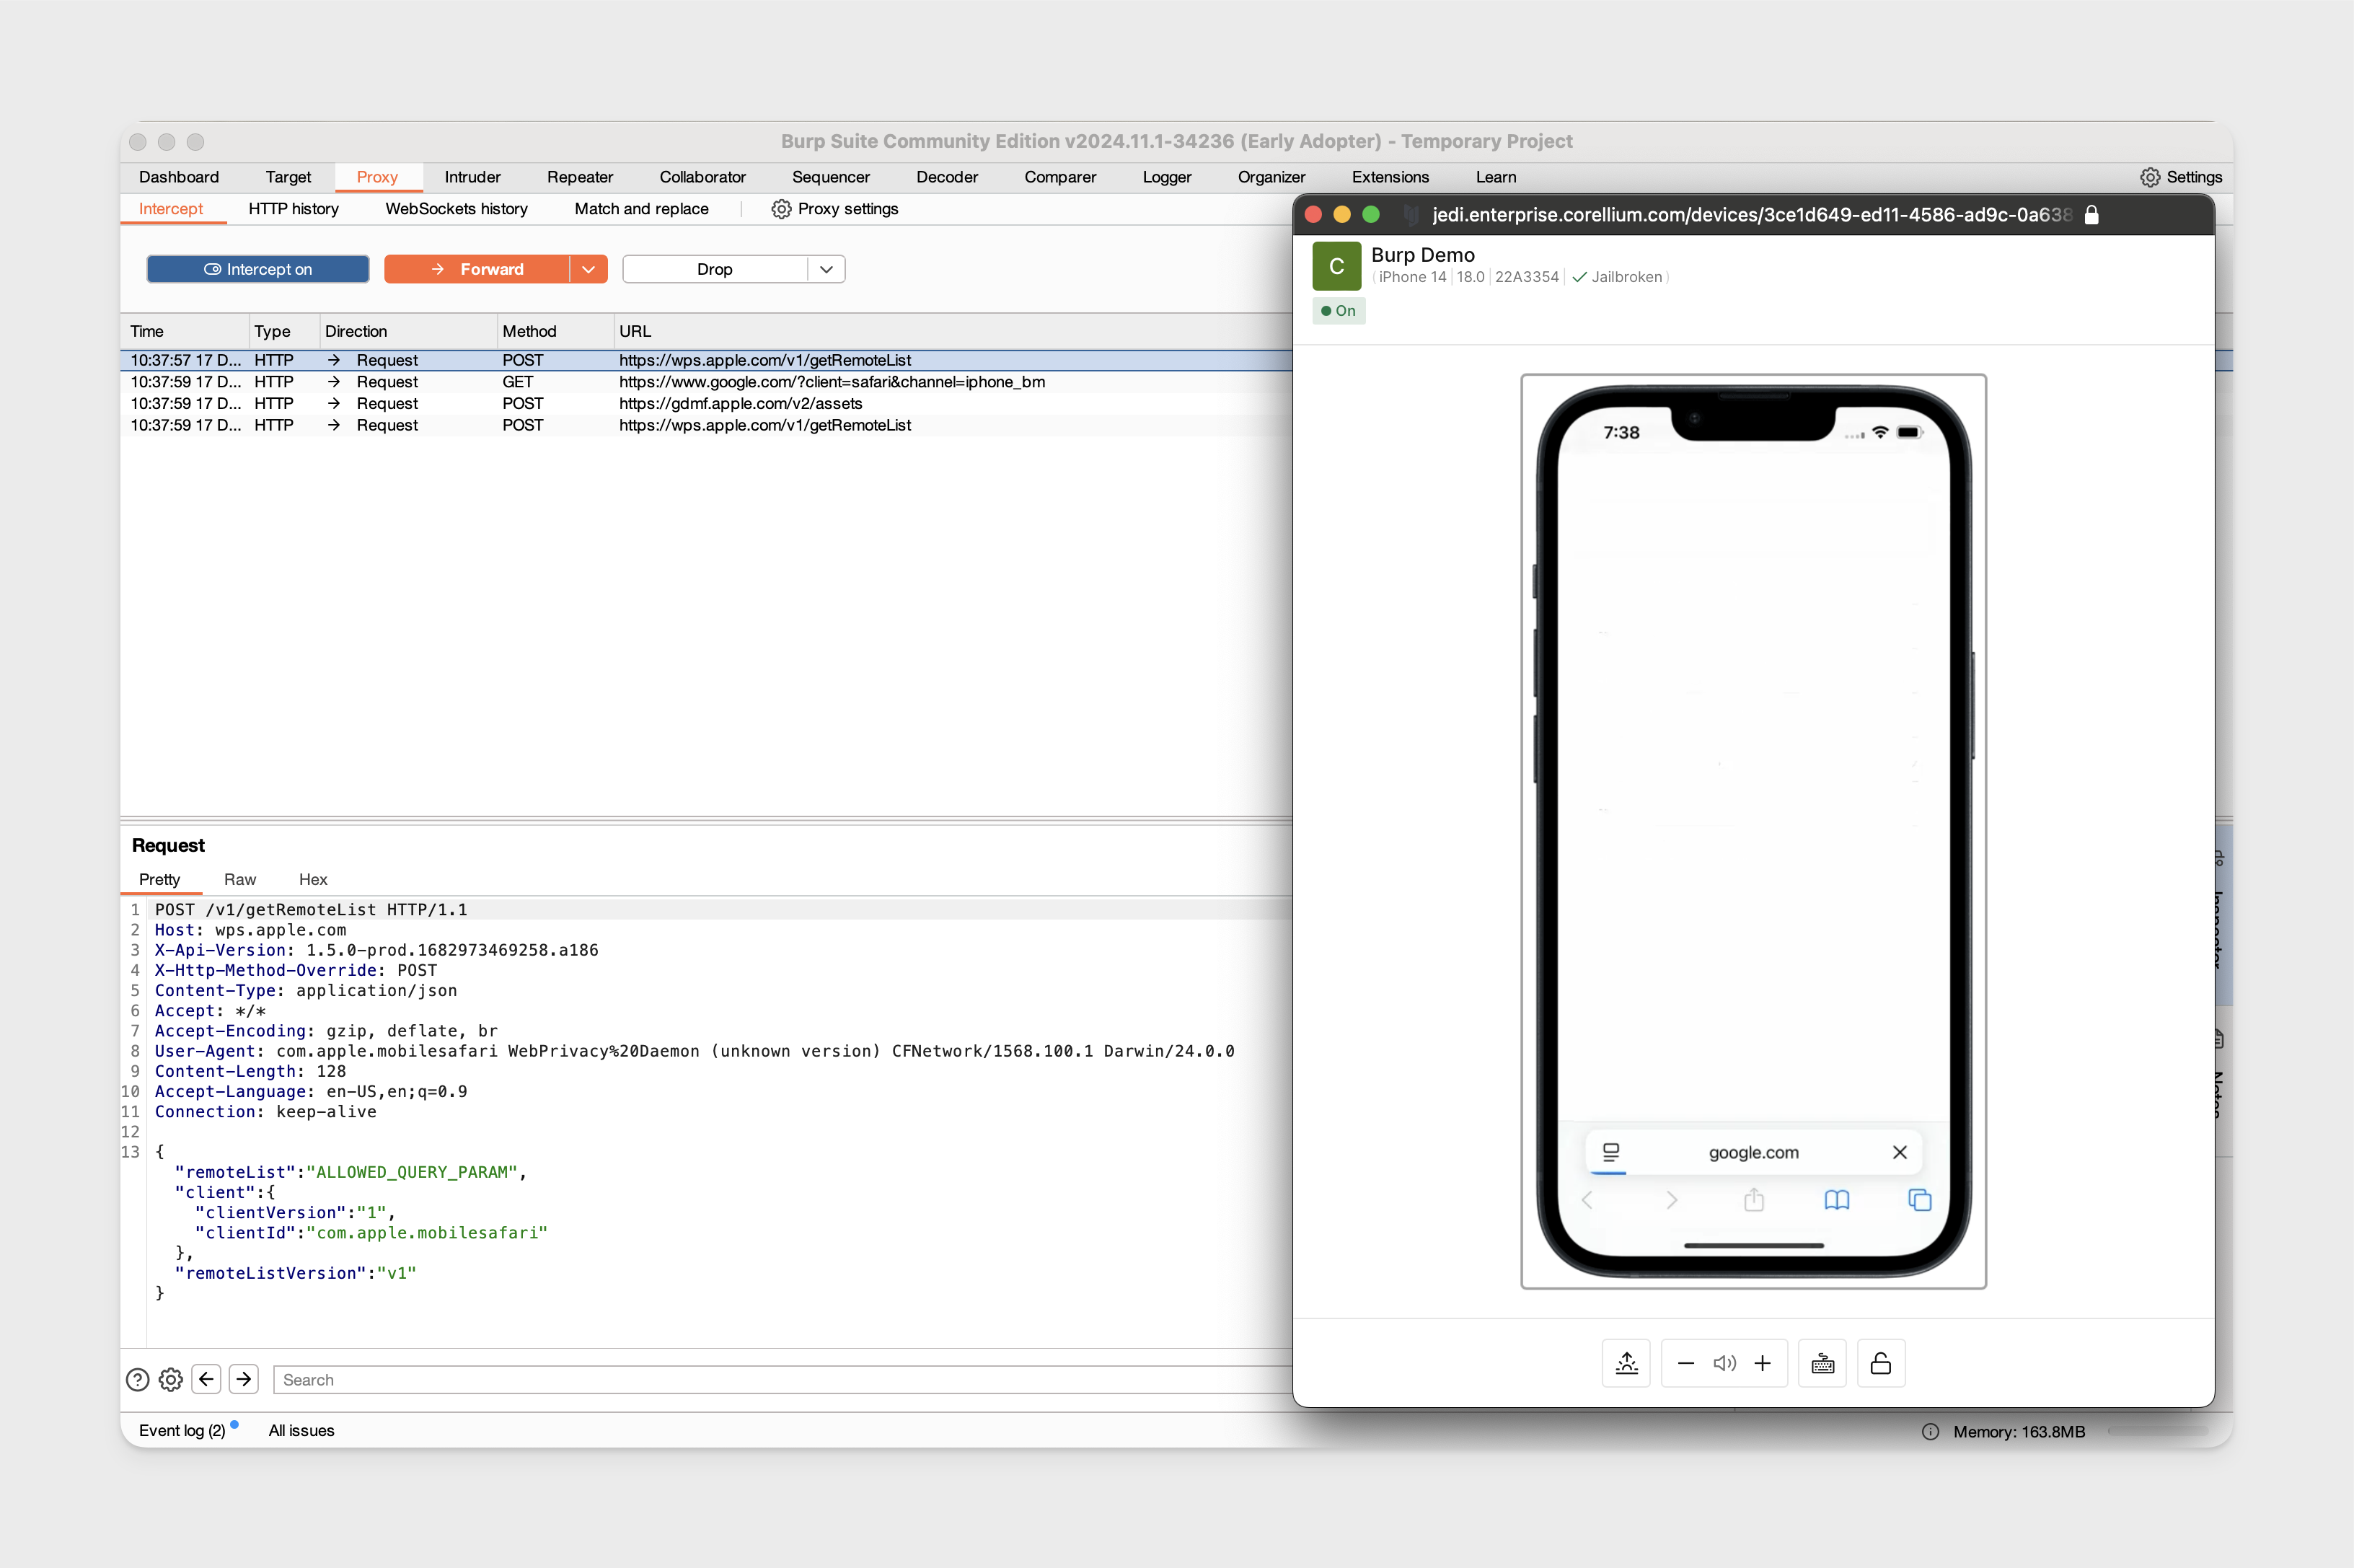
We are able to start intercepting traffic.
-
Clean up the SSH control session:
MacOS/Linux:
ssh -S sock -O exit root@<device's_services_ip>Stop the SSH processes in Windows Powershell:
Stop-Process -Name ssh Force
Proxy Traffic on Non-Jailbroken iOS
Considering we don't have the ability to SSH into non-jailbroken devices, we'll need to take a different approach. We'll be using a non-jailbroken iPhone 14 running iOS 18.0 and the same Burp Suite configuration for this example.
For this example, your local workstation's public ip address needs to be accessible to the internet. If possible, you can configure this in your network router settings through the router's web interface.
If your local workstation is required to be behind an internal VPN, you could consider using split tunneling to exclude traffic to specific IP addresses and the port used by Burp Suite from being routed through the VPN.
-
Configure IP Passthrough in the router settings to forward all traffic from your public IP to your workstation's internal IP. Ensure the internal IP address is static and uniquely identifies your local workstation within the network.
Once set up, confirm you can ping your public IP address from an external network like from the iOS device.
-
To download the Burp CA certificate on the device, you can serve the certificate over a web server now that the workstation public IP is accessible through the internet.
Start a web in the directory where the certificate is located:
python3 -m http.server <port>You can verify if a given port is open and accessible from the internet through your public IP using https://canyouseeme.org/, requires a service running on the specified port.
To access the web server on the iOS device in Safari:
<workstation_public_ip>:<web_server_port>Find and download the certificate from the directory listing.
-
Follow the previous section Proxy Traffic on Non-Jailbroken iOS for installing and trusting the certificate on the device.
-
Configure the HTTP proxy on the device:
- Address:
<workstation_public_ip> - Port:
<proxy_listener_port>
- Address:
-
Traffic can now be proxied from the device.
Troubleshoot Traffic Not Appearing in Burp Suite
If you've confirmed your configurations are correct based on the examples and you are not able to proxy traffic from Safari or WebView, there are likely internal network configurations preventing traffic from being proxied. Review the respective Network Considerations for the method being used to understand how to configure your internal network.
Validate If Device Traffic Can Reach Local Workstation
If you're using the VPN connection for iOS or Android:
-
Validate you can SSH into the device through the VPN connection.
-
Start a Netcat listening on port
8080on your local workstation:nc -l 8080On the remote device, run:
wget <vpn_ip>:8080Successful wget output:
root# wget 10.11.3.2:8080
--2024-12-20 13:10:35--  http://10.11.3.2:8080/
Connecting to 10.11.3.2:8080... connected.
HTTP request sent, awaiting response...
Successful Netcat output:
% nc -l 8080
GET / HTTP/1.1
User-Agent: Wget/1.20.3 (darwin17)
Accept: */*
Accept-Encoding: identity
Host: 10.11.3.2:8080
Connection: Keep-Alive
If you're not using the VPN connection for a jailbroken iOS device:
-
Depending on the OS being used, start an SSH reverse tunnel from your local workstation.
-
Validate you can SSH into the device by reusing the existing multiplexed connection:
ssh -S /path/to/sock root@<device's_services_ip> -
Run a Netcat listening on port
8080on your local workstation.nc -l 8080 -
On the device, run a wget:
wget localhost:<port>Successful Netcat response:
% nc -l 8080
GET / HTTP/1.1
User-Agent: Wget/1.20.3 (darwin17)
Accept: */*
Accept-Encoding: identity
Host: localhost:8080
Connection: Keep-Alive
If you're not using the VPN connection for Android devices:
-
Run the Android Quick Connect command found in the web interface for your device.
-
Connect to ADB locally:
adb connect localhost:5001 -
Run the ADB reverse command:
adb reverse tcp:8080 tcp:8080 -
Start a Netcat on your local workstation:
nc -l 8080 -
Run a
wget:adb shell wget localhost:8080 -
Successful Netcat response:
% nc -l 8080
GET / HTTP/1.1
Host: localhost:8080
User-Agent: Wget
Connection: close