Bring Your Own SSL Certificate
By default, Corellium is configured to use self-signed certificates for the web interface. However, if your organization requires the use of a trusted certificate, you can replace the default with your own.
Corellium supports three methods to apply your own SSL certificate, depending on the appliance type and deployment configuration.
| Method | Desktop Appliance (DA) | CHARM Development Kit(CDK) | Server Appliance | Private Cloud |
|---|---|---|---|---|
corellium-configure CLI tool | ✅ | ✅ | ✅ | ✅ |
| Web interface | ❌ | ❌ | ✅ | ✅ |
| Installer web interface | ❌ | ❌ | ✅ | ✅ |
Use corellium-configure
If you're using a multi node setup, only the controller runs the web frontend. Locate the server appliance acting as the controller node and follow these steps there.
-
Transfer your SSL certificate and key file to the appliance. The location of these files do not matter as long as the files do not get deleted once configured.
-
From a shell on the appliance, run
corellium-configure. You'll be guided through a series of prompts — pressEnterto accept the existing values until you reach the following two prompts:prompt: SSL certificate file for the web interface (blank for the same as the main cert):
prompt: SSL certificate key file for the web interface (blank for the same as the main cert):infoThe paths given here are automatically appended to
clientCertFileandclientCertKeyFilein/etc/corellium/setup.jsonwhencorellium-configurefinishes. -
For the first prompt, enter the path to the certificate file. In our example, it would be
/root/mycert.pem. -
For the second prompt, enter the path to the key file. In our example it would be
/root/mykey.key. -
Hit
Enterto proceed through the next prompts until the terminal shell appears again. -
After these commands run successfully, the appliance should now be using your custom SSL certificate and key.
Use the Web Interface
If you're using a server appliance and you don't want to mess with the CLI, these steps accomplish the same thing.
-
Log into the web interface and navigate to Setup & Configuration, next click Enter setup, then enter admin credentials.
-
Scroll down to the HTTPS Certificate (optional) section.
- Certificate Chain - paste in the contents of your certificate chain (including any intermediate certificates) in
.pemformat. - Certificate Key - paste in the contents of your unencrypted private key.
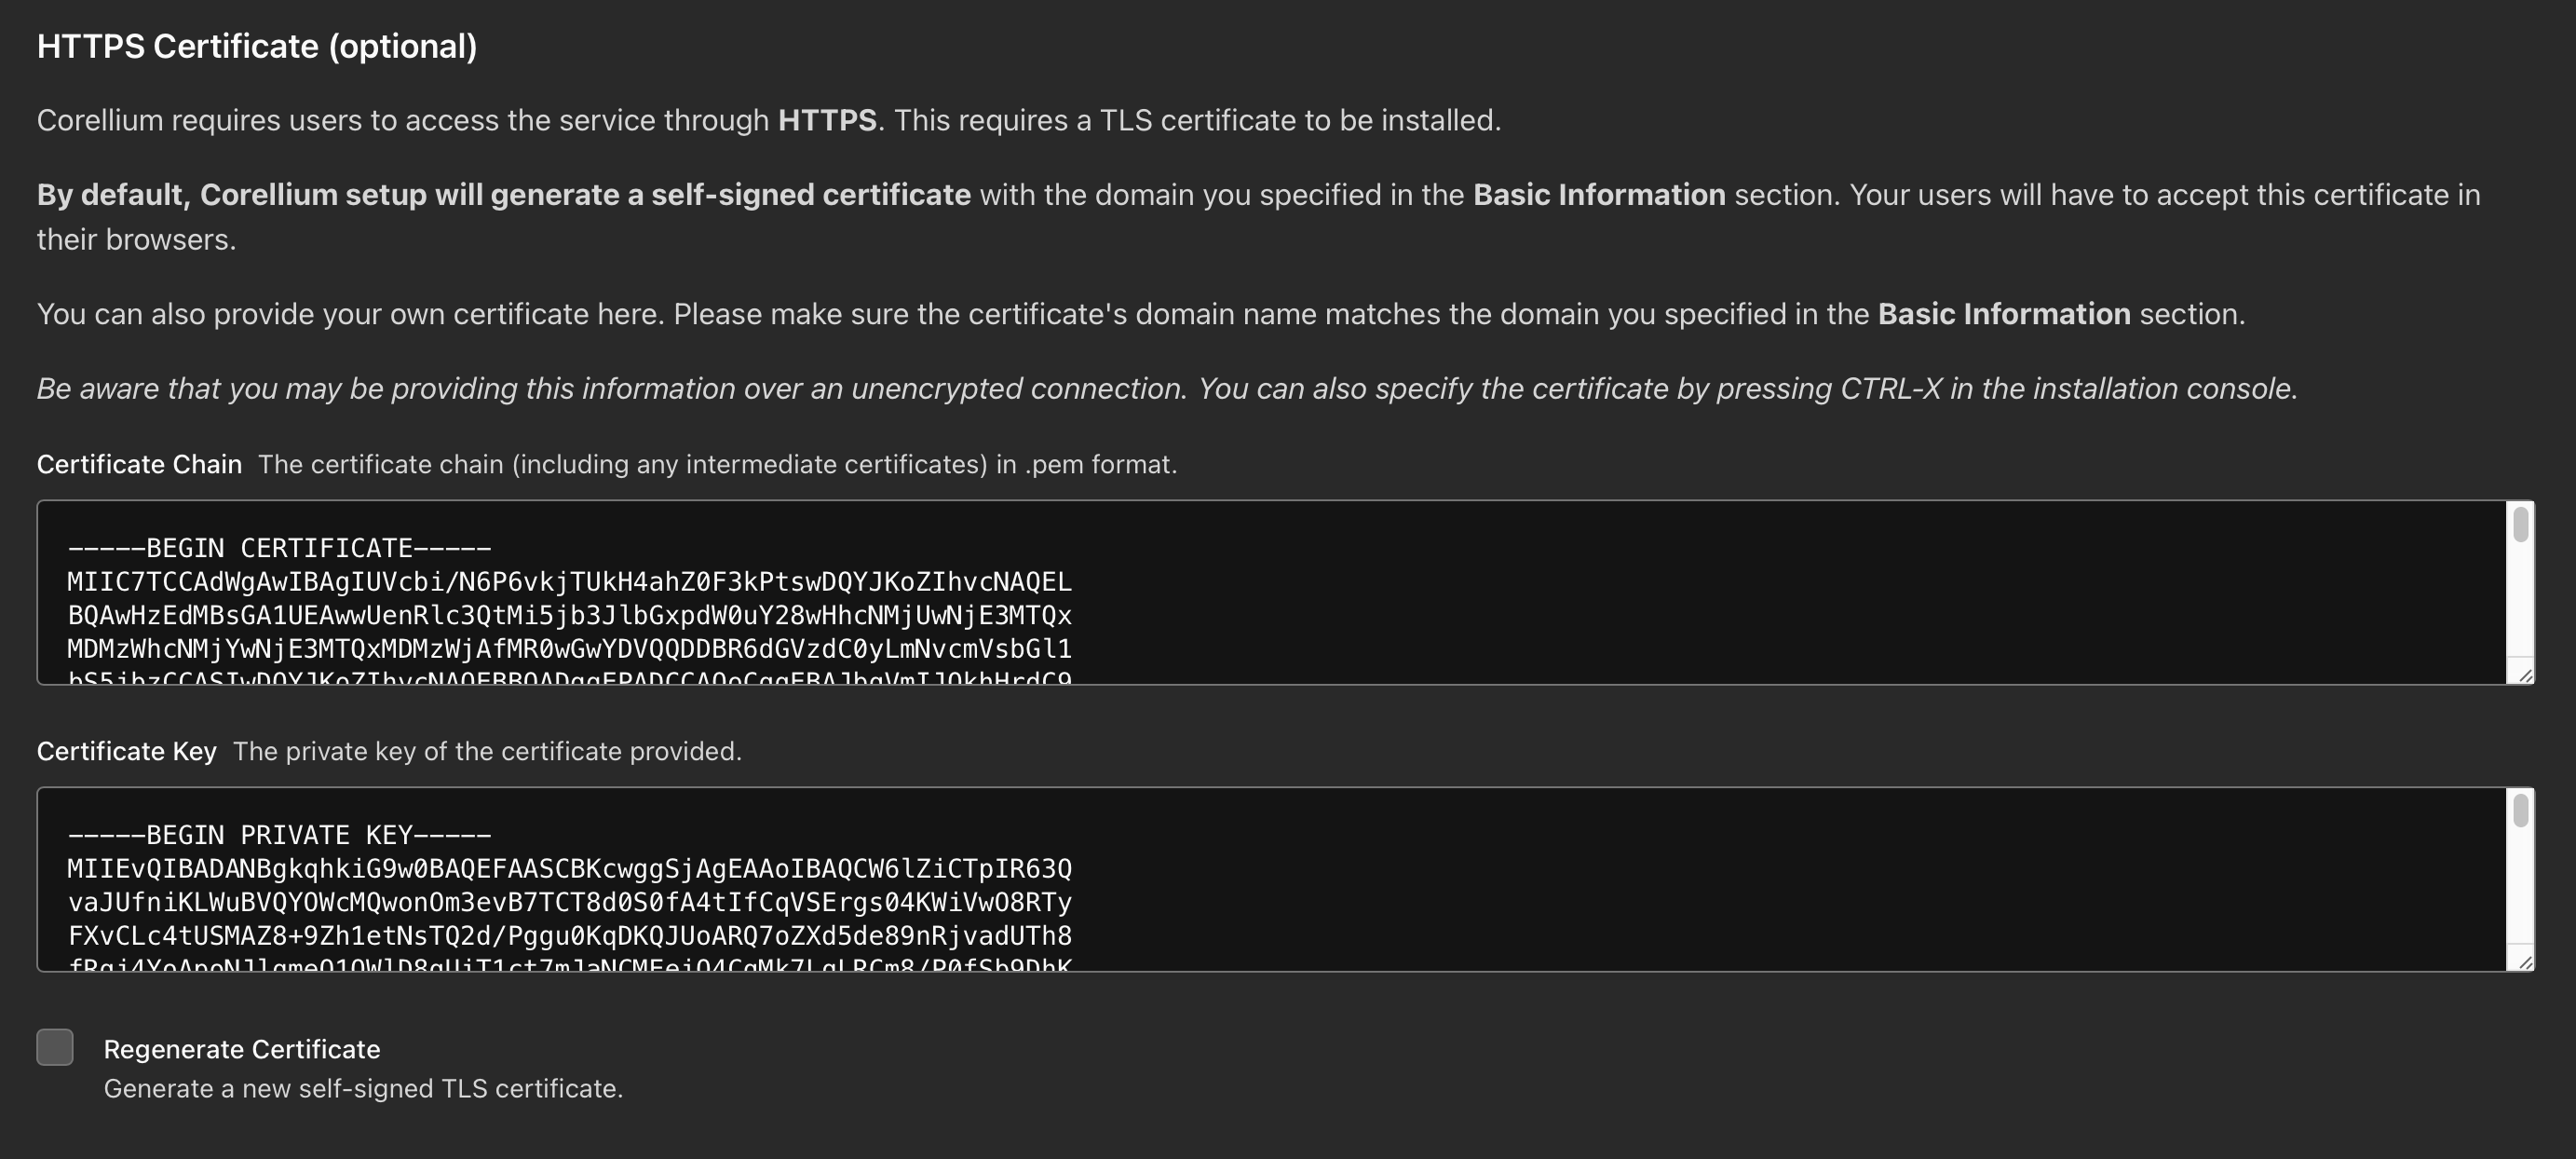
- Certificate Chain - paste in the contents of your certificate chain (including any intermediate certificates) in
-
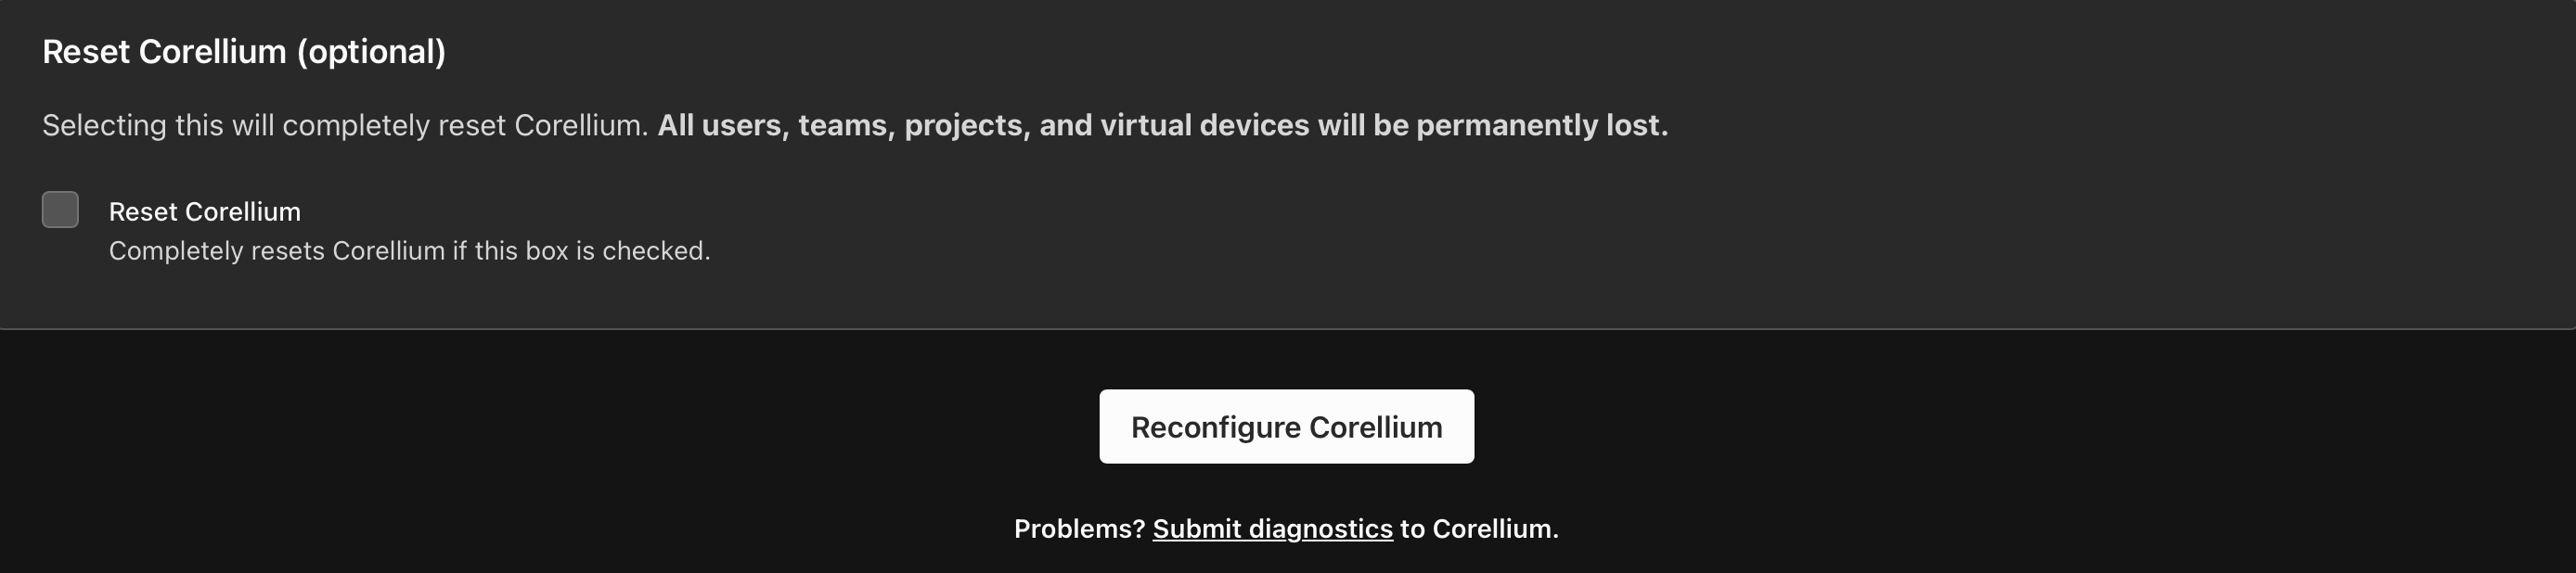
Navigate to the bottom of the page and click Reconfigure Corellium. Reset Corellium does not need to be checked here. Once the reconfigure finishes, the appliance should be using the new certificate and key for the web interface.
Use the Installer Web Interface
When an installer is kicked off, the SSL certificate and key can be changed.
-
Navigate to the installation site after running
./install.sh. -
Scroll down to the HTTPS Certificate (optional) section.
- Certificate Chain - paste in the contents of your certificate chain (including any intermediate certificates) in
.pemformat. - Certificate Key - paste in the contents of your unencrypted private key.
- Certificate Chain - paste in the contents of your certificate chain (including any intermediate certificates) in
-
Navigate to the bottom of the page and click Reconfigure Corellium to continue the Corellium update. Reset Corellium does not need to be checked here. Once the update finishes, the appliance should be using the new certificate and key for the web interface.
Certificate Locations and Troubleshooting
Certificate and Key File
The certificate file should be a valid PEM certificate and the private key file must be unencrypted or nginx will fail to start.
If your private key is encrypted with a pass phrase, the key needs to be decrypted first before starting nginx.
Configuration Files
If you're troubleshooting certificate-related issues, there are a few key locations and configuration files to be aware of.
Setup.json
This is the primary configuration file that tells Corellium what certificate and key file to use for the web interface, the full path is /etc/corellium/setup.json.
If you've never run through corellium-configure before, clientCertFile and clientCertKeyFile will not be present — this is expected.
In setup.json, note the values for the following key value pairs:
generatedCertFingerPrint- certificate fingerprintcertFileData- contents of certificate file for web interfacecertKeyFileData- contents of key file for web interfaceclientCertFile- path to certificate file used for the web interfaceclientCertKeyFile- path to key file used for the web interface
Nginx
The nginx configuration file is located at /etc/nginx/sites-available/frontend.conf.
If you used corellium-configure, the paths given to clientCertFile and clientCertKeyFile are automatically assigned to ssl_certificate and ssl_certificate_key in frontend.conf.
If you used the installer or web interface instead, the certificate data you provided is applied to the same fields in frontend.conf
nginx will fail to start if the certificate paths are invalid, key/certificate data is misconfigured, or your private key is encrypted.
Regenerate a Self-Signed Certificate
When encountering certificate issues and wanting to restore Corellium to a working configuration, these steps can be followed.
-
Edit the following file:
vi /etc/corellium/setup.jsonto empty out the values from the following keys:infoIf you've never run through corellium-configure before,
clientCertFileandclientCertKeyFilewill not be present — this is expected. You can still follow the steps below, skipping those values.generatedCertFingerPrintcertFileDatacertKeyFileDataclientCertFileclientCertKeyFile
-
When in
vi, place your cursor inside the double quotes of one of the above values. Then pressEscthen typedi". This should empty out all the contents within the double quotes so it looks like this:"generatedCertFingerPrint":"",You can then move to each value and press
.to repeat the last change. -
Once finished, save and exit
vi, then apply the changes with:corellium-configure --postinstIf done successfully, you should see a similar line in the output:
New self-signed certificate fingerprint: 5A:42:5C:...