Snapshots
Snapshots give you the ability to save the state of a device and then restore, clone, or share that state at a moment's notice.
Save valuable setup time by instantly returning to a previously saved state, creating clones to run multiple tests from the same starting environment, or providing all students in a virtual classroom an identical starting VM.
Snapshots can significantly reduce the time to reproduce bugs or repeat tests in comparison to recreating a test environment on a real device.
Initial Snapshot and the Snapshot Limit
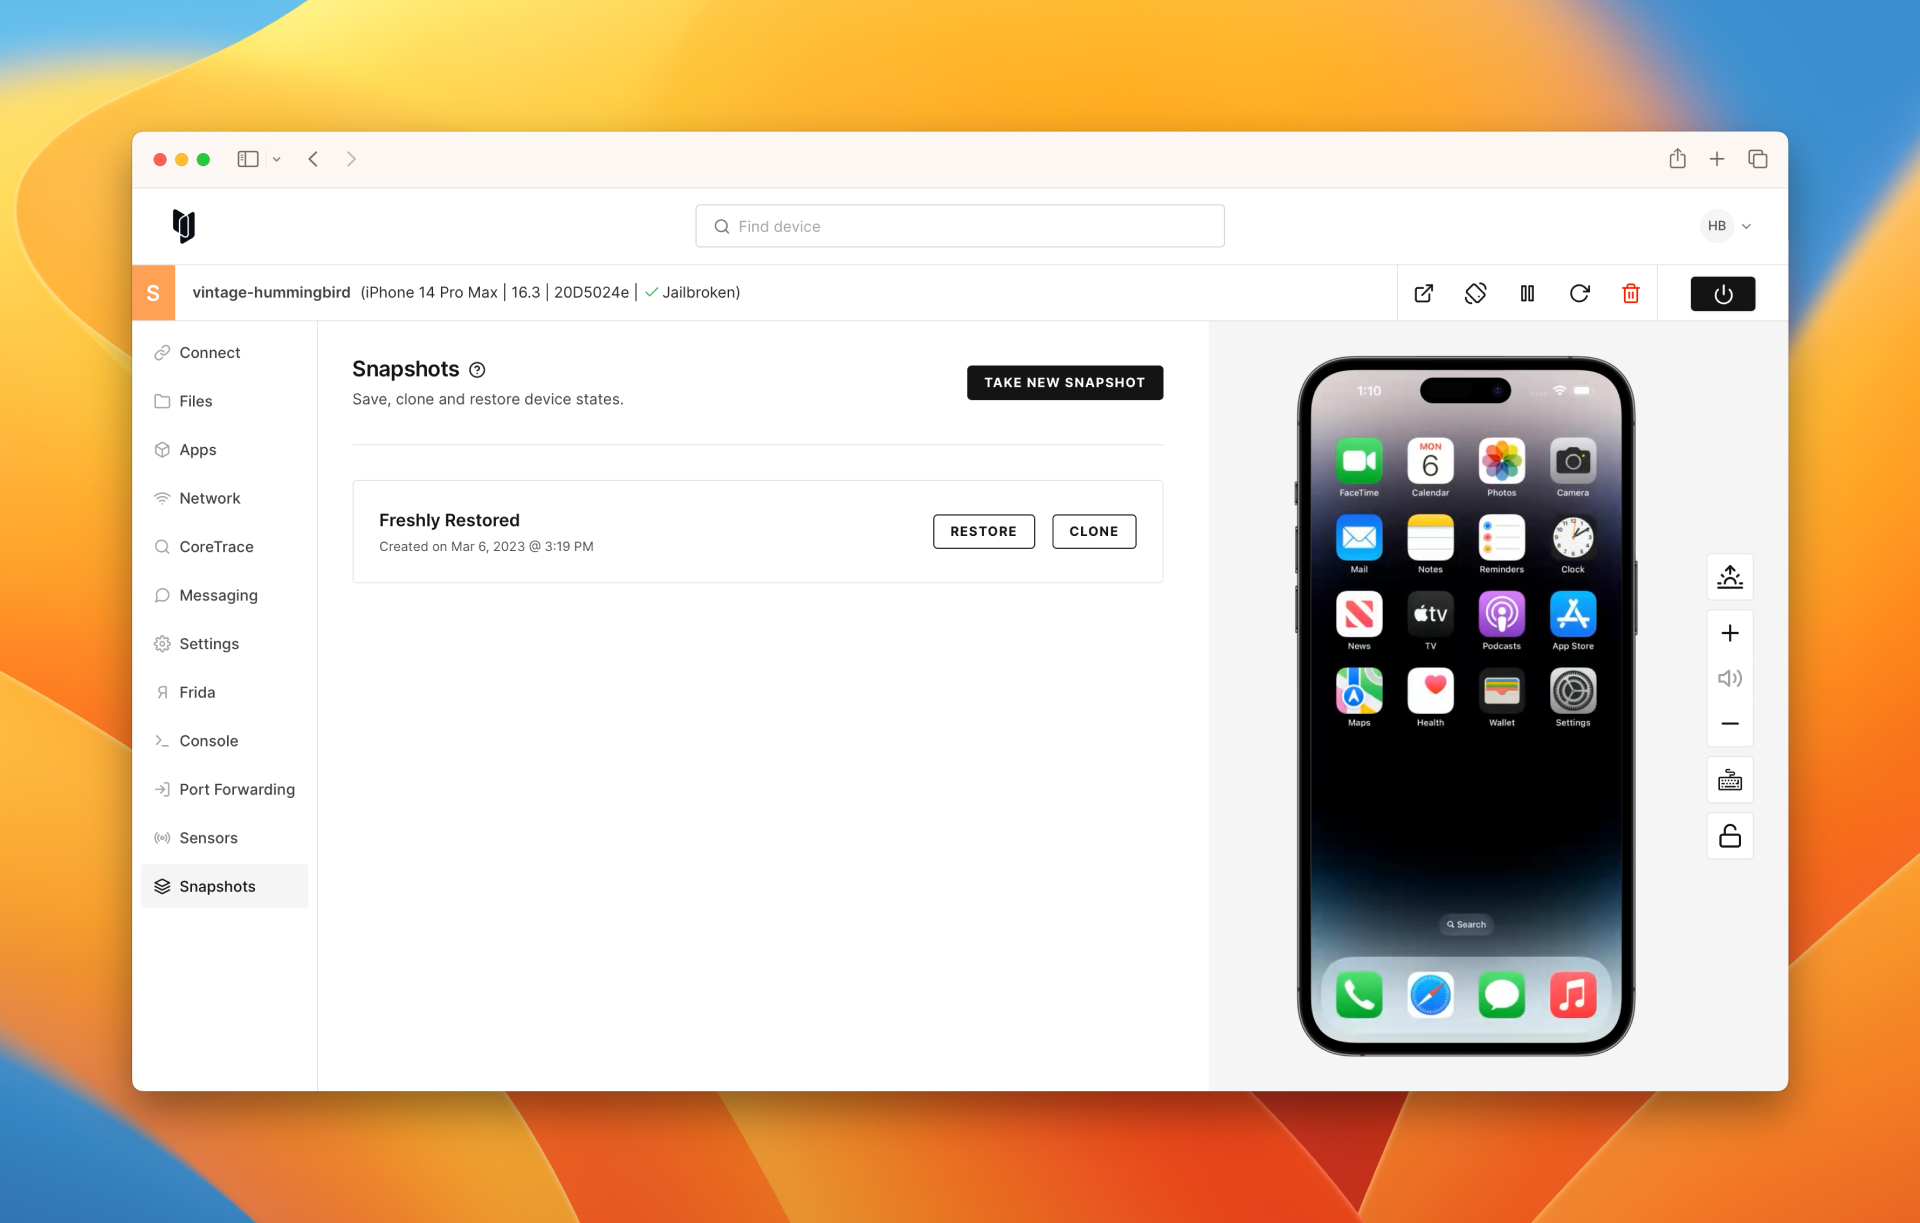
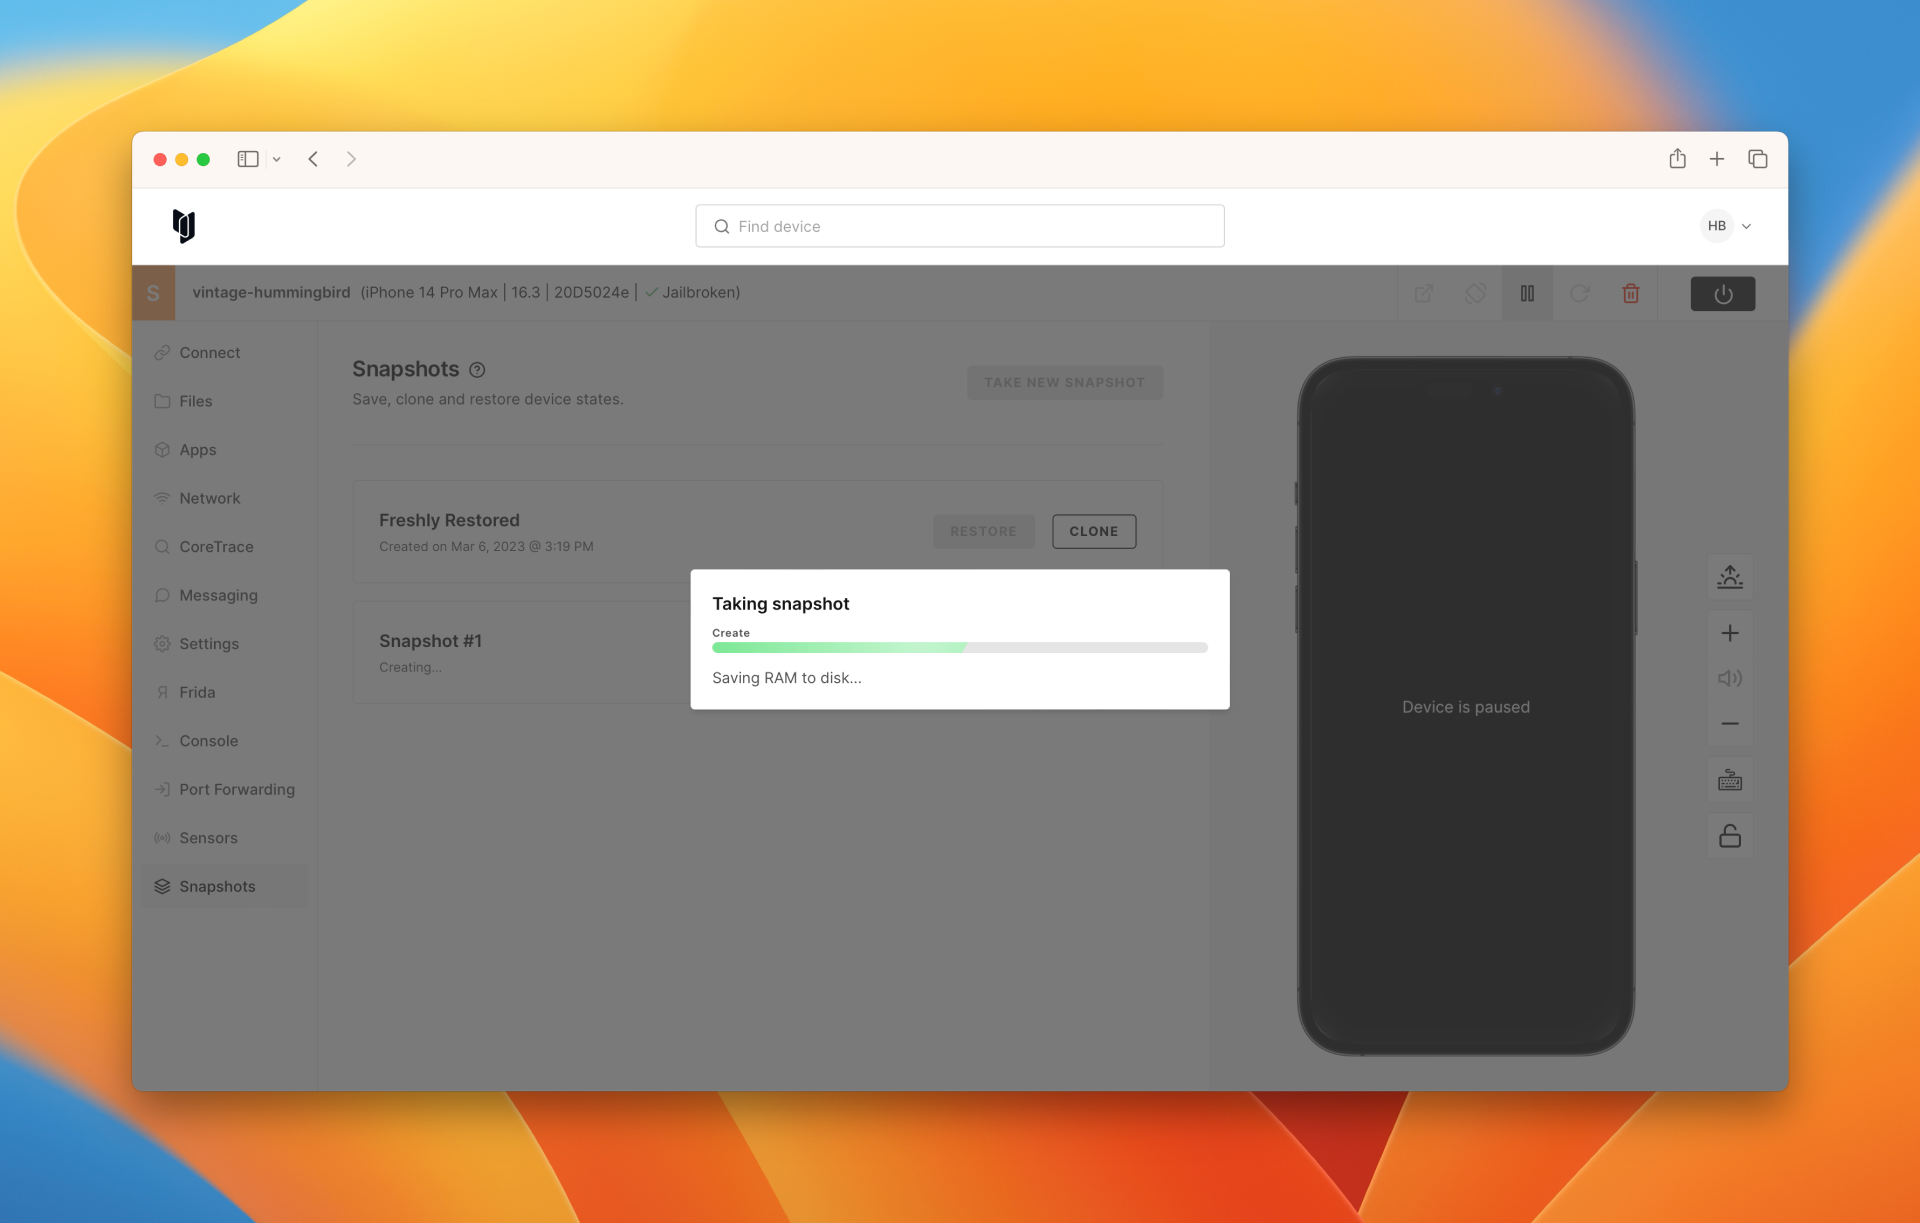
Every virtual device automatically captures a new snapshot right after the initial creation, providing a quick and easy way to revert to that fresh image.
You can take up to five snapshots per virtual device, including the initial "Freshly Restored" snapshot.
Types of Snapshots
Corellium offers two types of snapshots: Live Snapshots and Standard Snapshots.
Live Snapshots
Live snapshots include the state of the virtual device's RAM. Corellium can resume live snapshots in the same state when it was suspended, such as running apps. You can only take live snapshots when the device is powered on.
Live snapshots are useful for saving the state of a device in the middle of a test or debugging session. They can be used to quickly save the state of a device and then restore it later to continue testing.
When you create a new device from a live snapshot, the device file system is copied to the new device, but the RAM state is not. This means that the new device will boot up as if it were power-cycled but with the filesystem state of the snapshot.
As with hardware, care must be taken to ensure that the filesystem is in a fully consistent state before taking the live snapshot or the contents of the filesystem may not match expectations. In most cases running the commands: sync; sleep 5; sync before taking the live snapshot is sufficient. In certain cases this is not sufficient for all proxy port settings on iOS devices. The workaround is to reset the proxy port.
Standard Snapshots
Standard snapshots only include the state of the storage. Standard snapshots have to boot the device back up when powered on. You can take standard snapshots when the device is powered off.
Standard snapshots are useful for saving the state of a device when it is not in use. They can be used to save the state of a device before making changes or to save a clean state of a device for later use.
Take a Snapshot
This tutorial will demonstrate Snapshots by creating and restoring them.
-
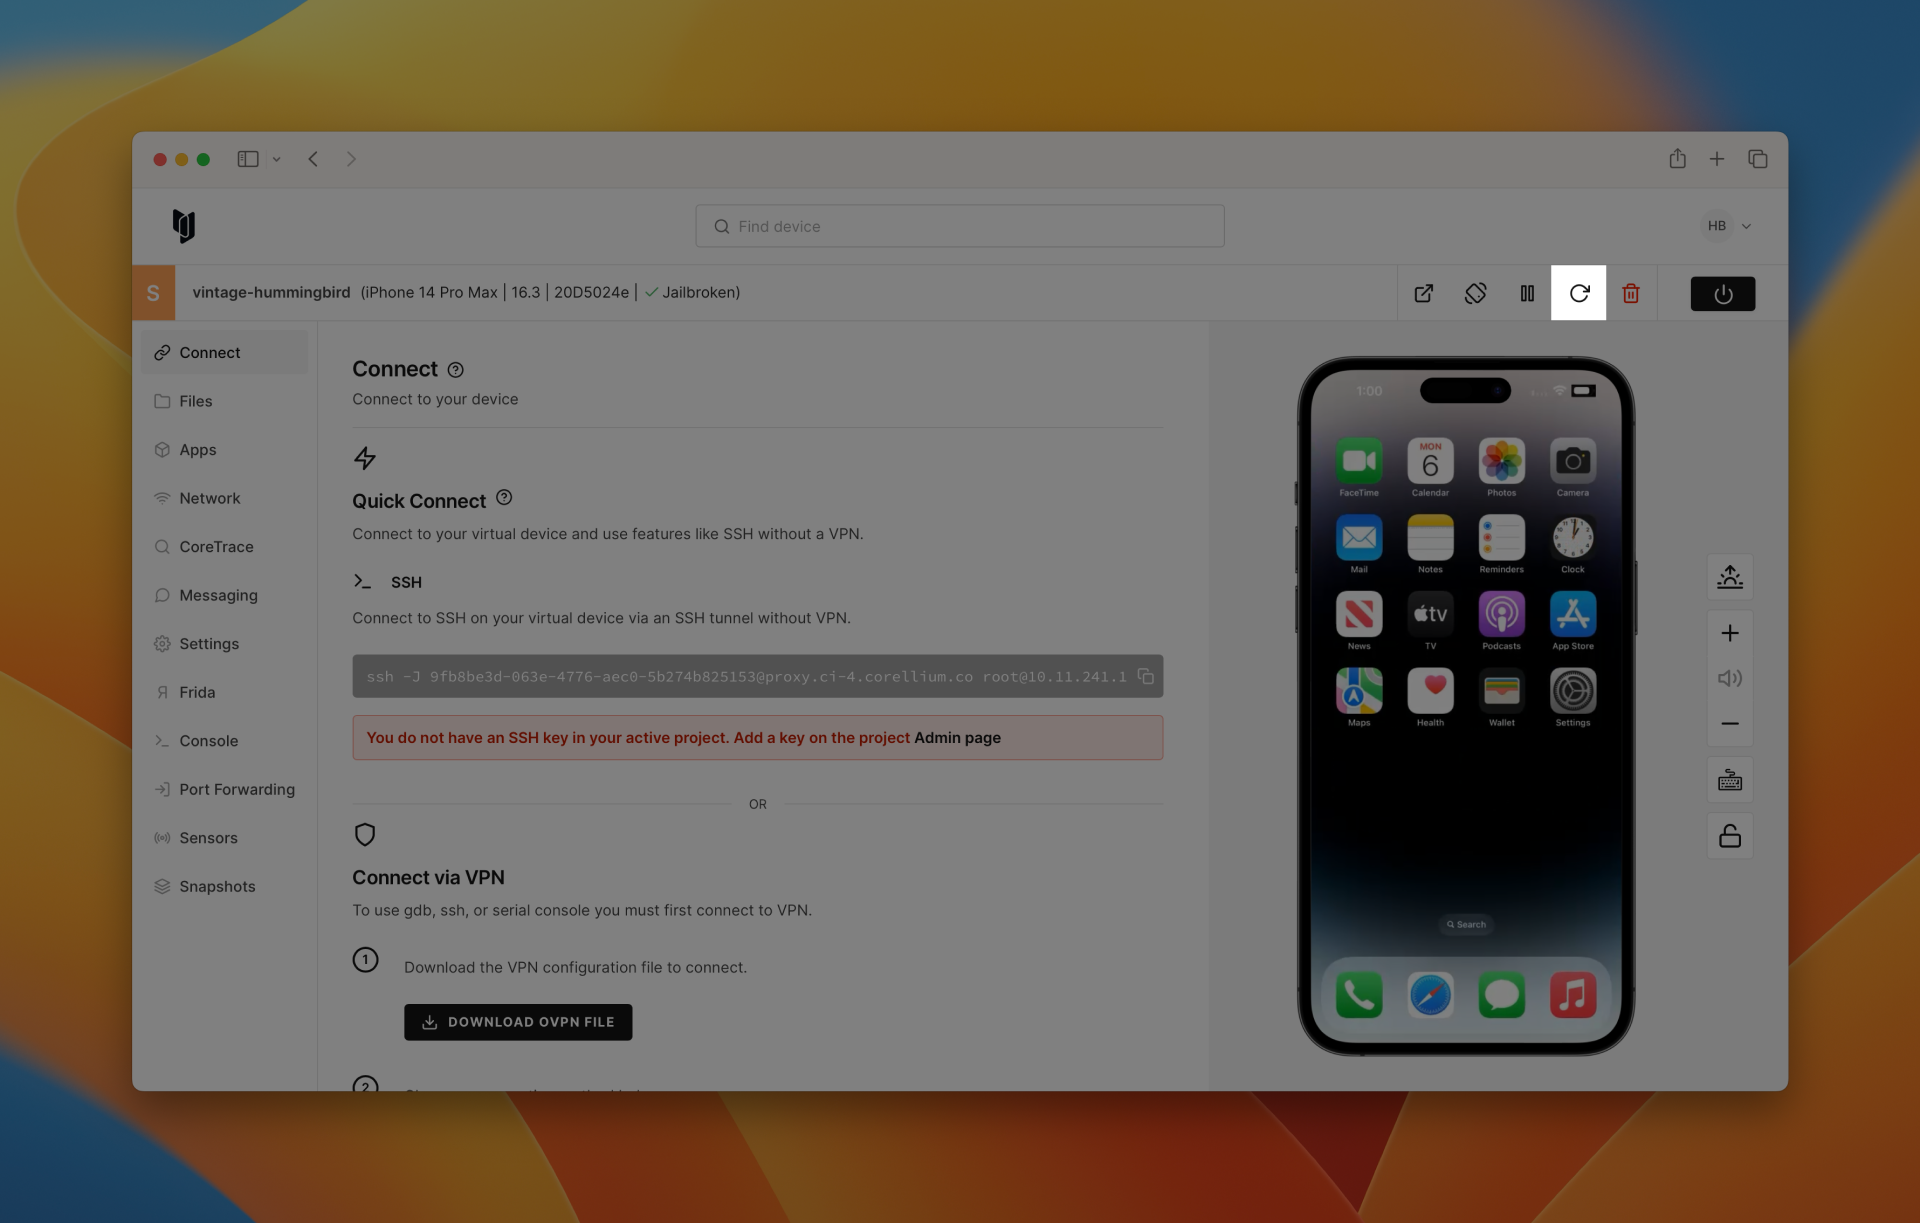
Go to the device created in the Quickstart for iOS tutorial.
-
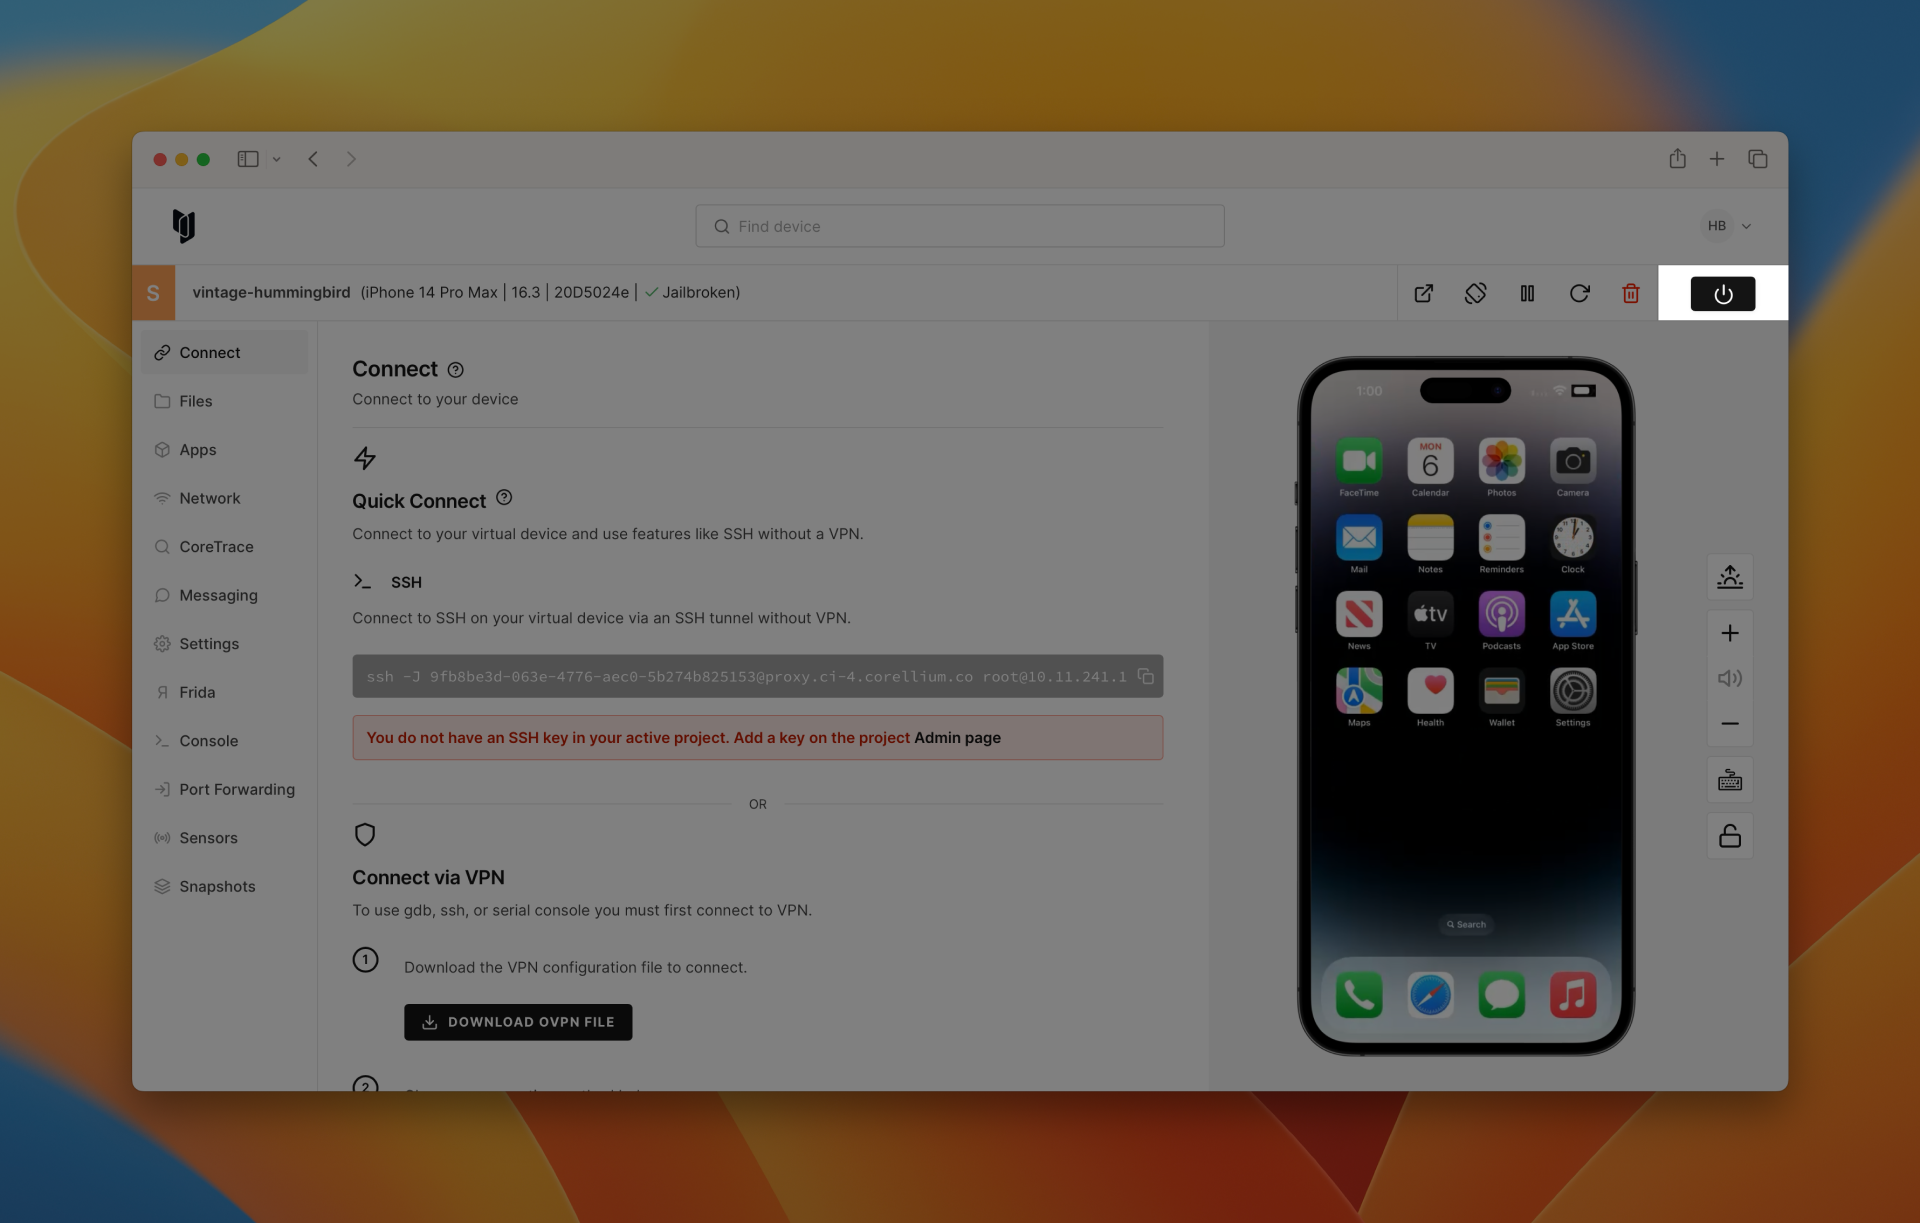
Power down the device by clicking the power symbol.
- Take a snapshot by opening the Snapshot menu and then clicking "Take new snapshot".
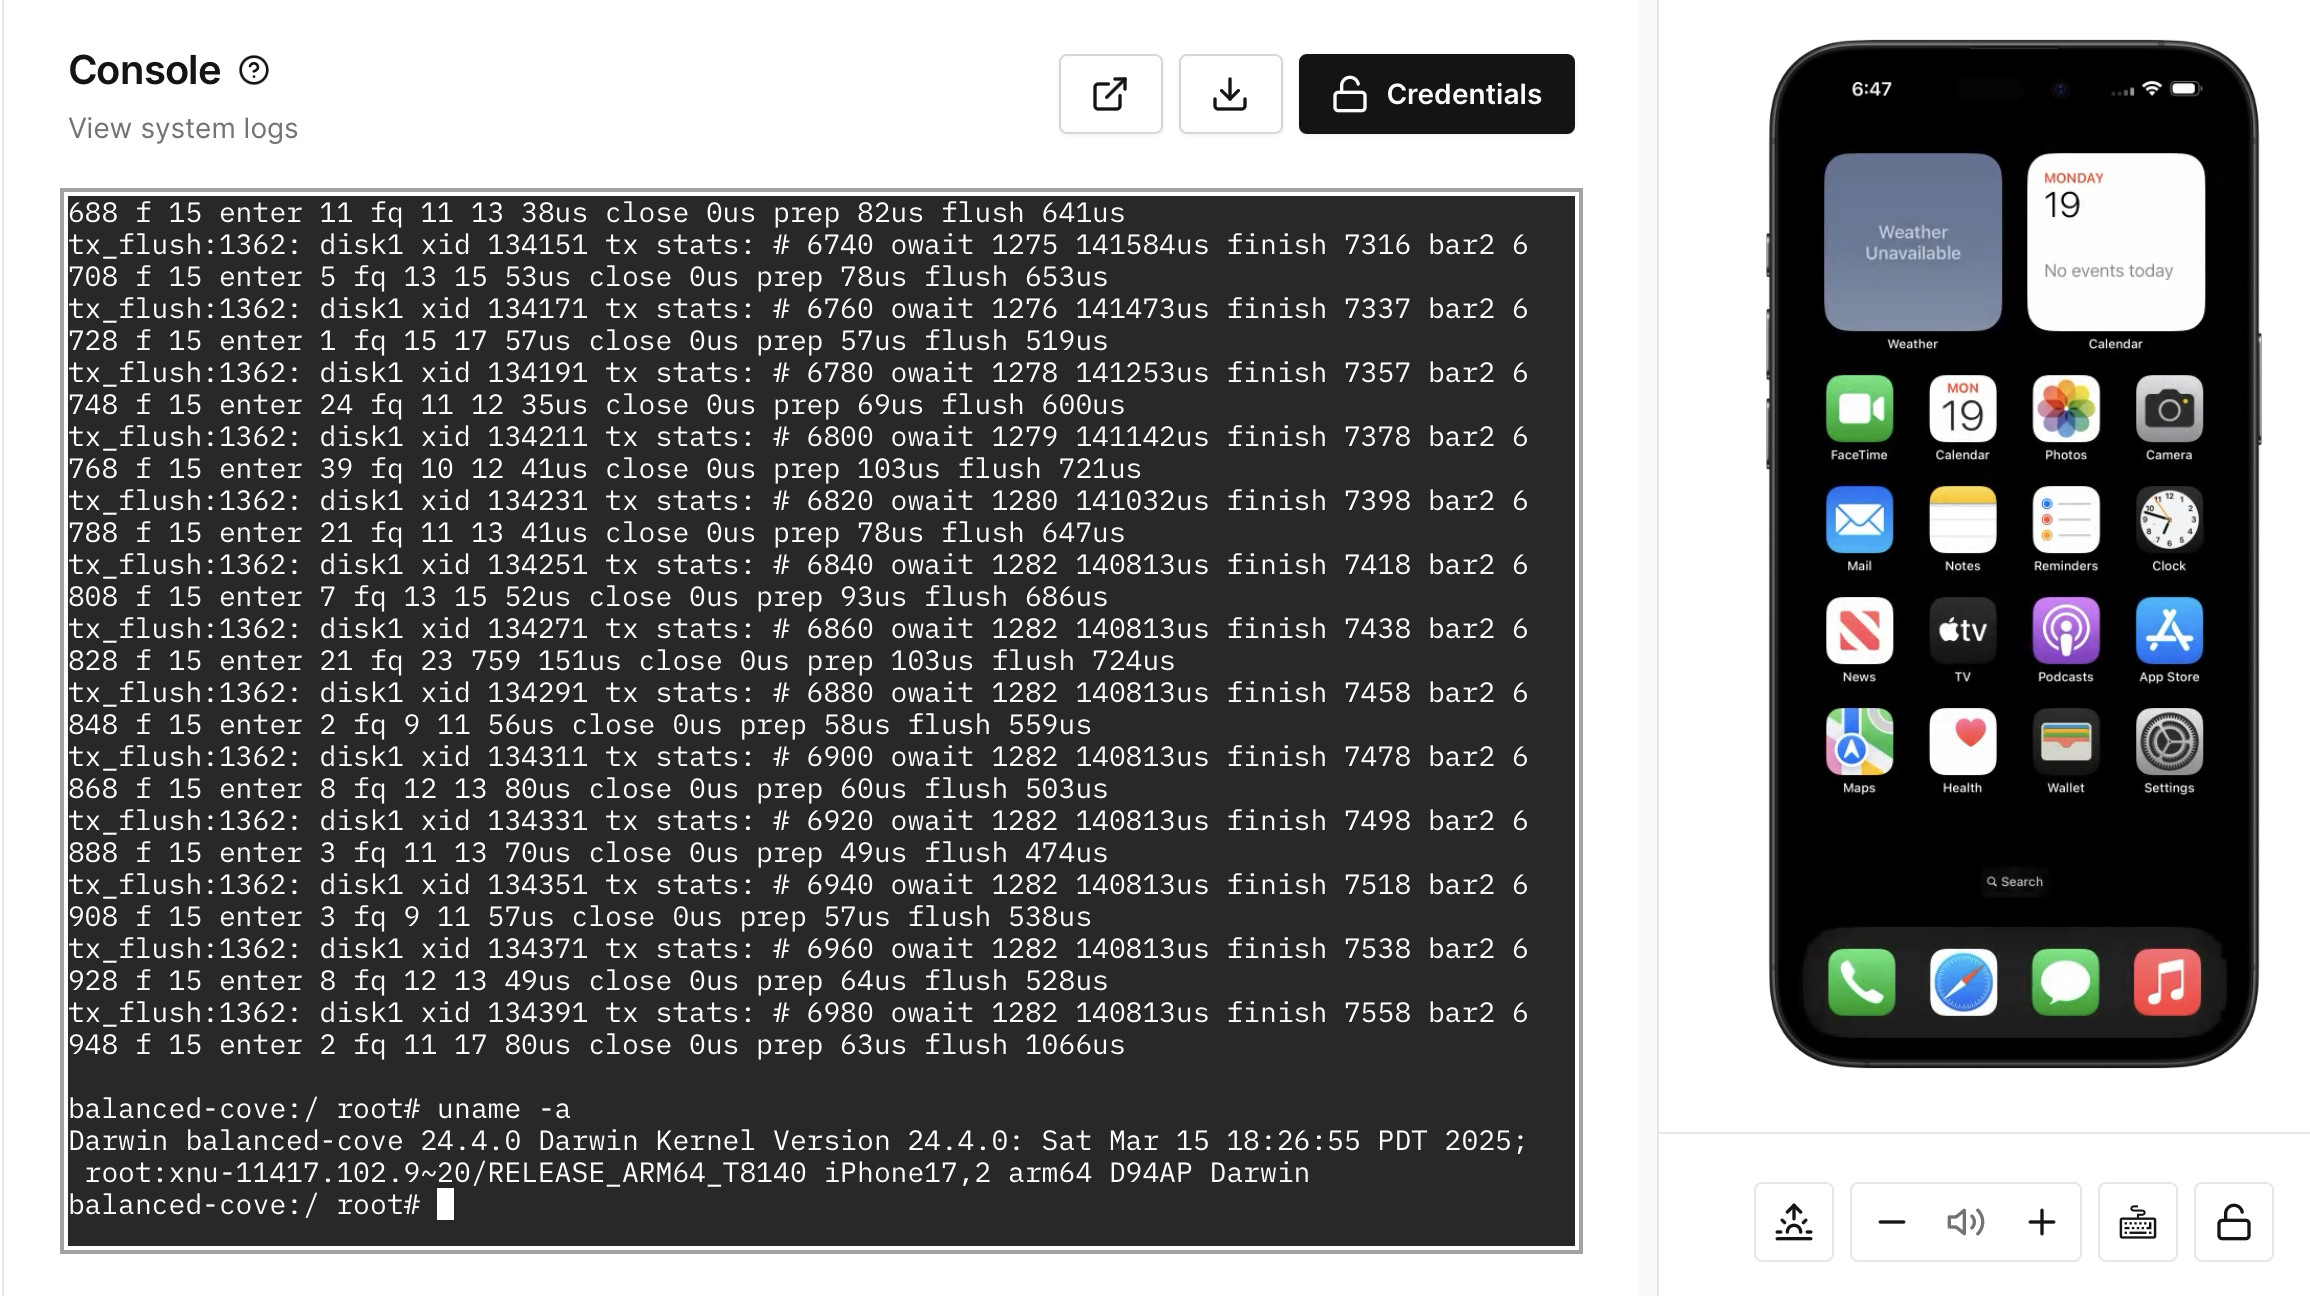
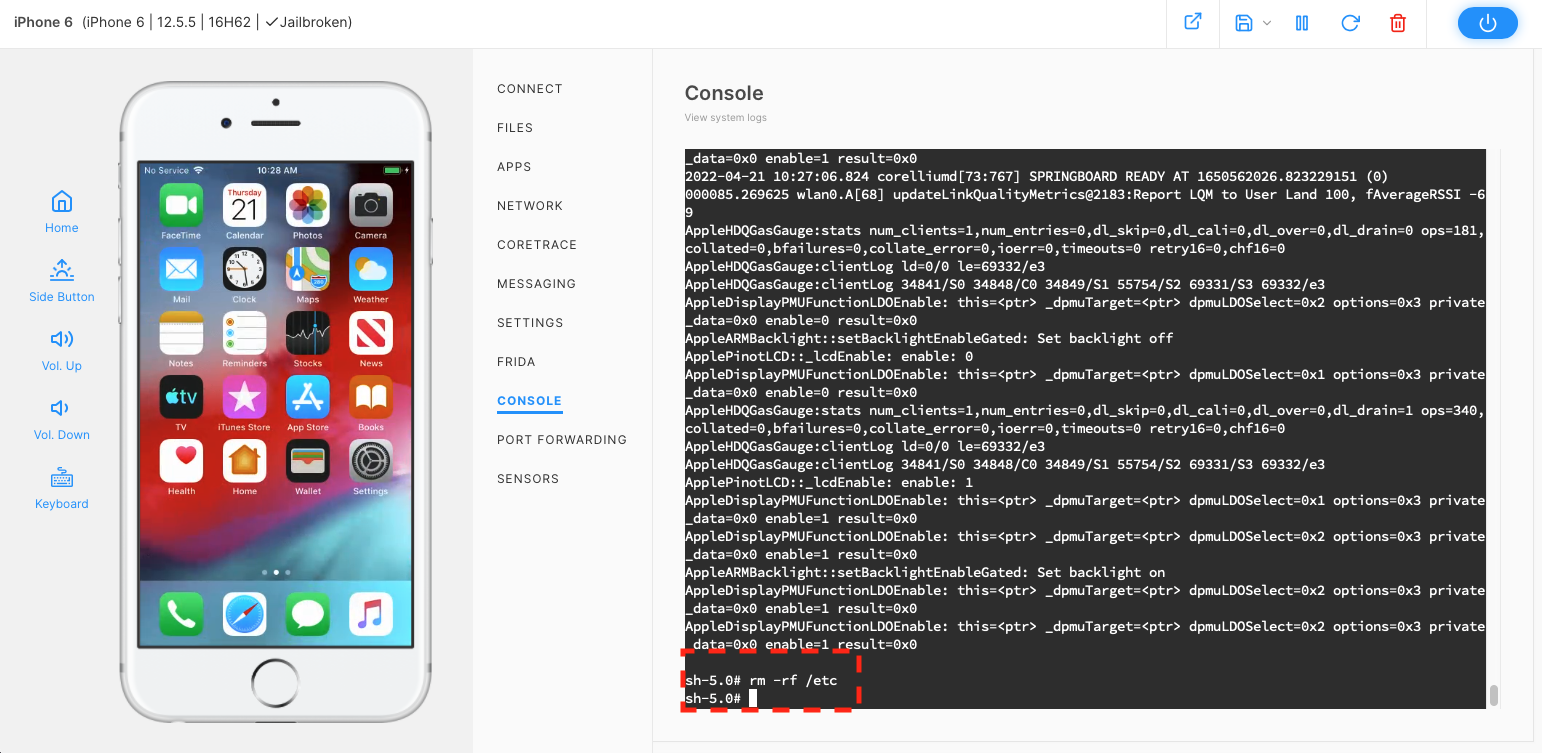
- Now we have saved a snapshot let's break the device. Click on Console.
- Power the device back on by clicking the power button.
- In the Console, push return to display sh-5.0 #, type
rm -rf /etc, then push return again.
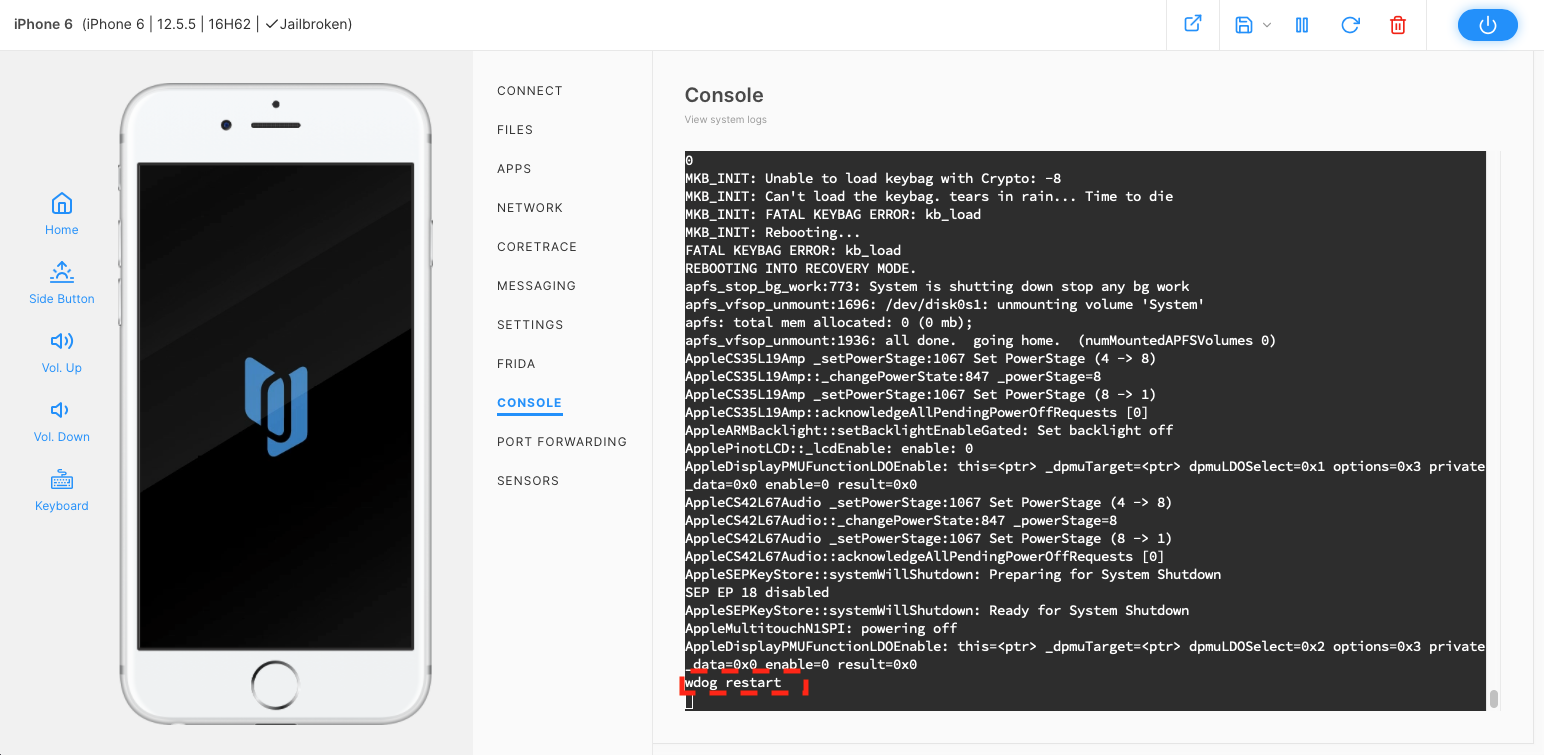
- Now restart the device.
- The device will fail to boot, and the console will periodically display
wdog restart. This will validate the device is broken as it cannot log in normally.
Restore a Snapshot
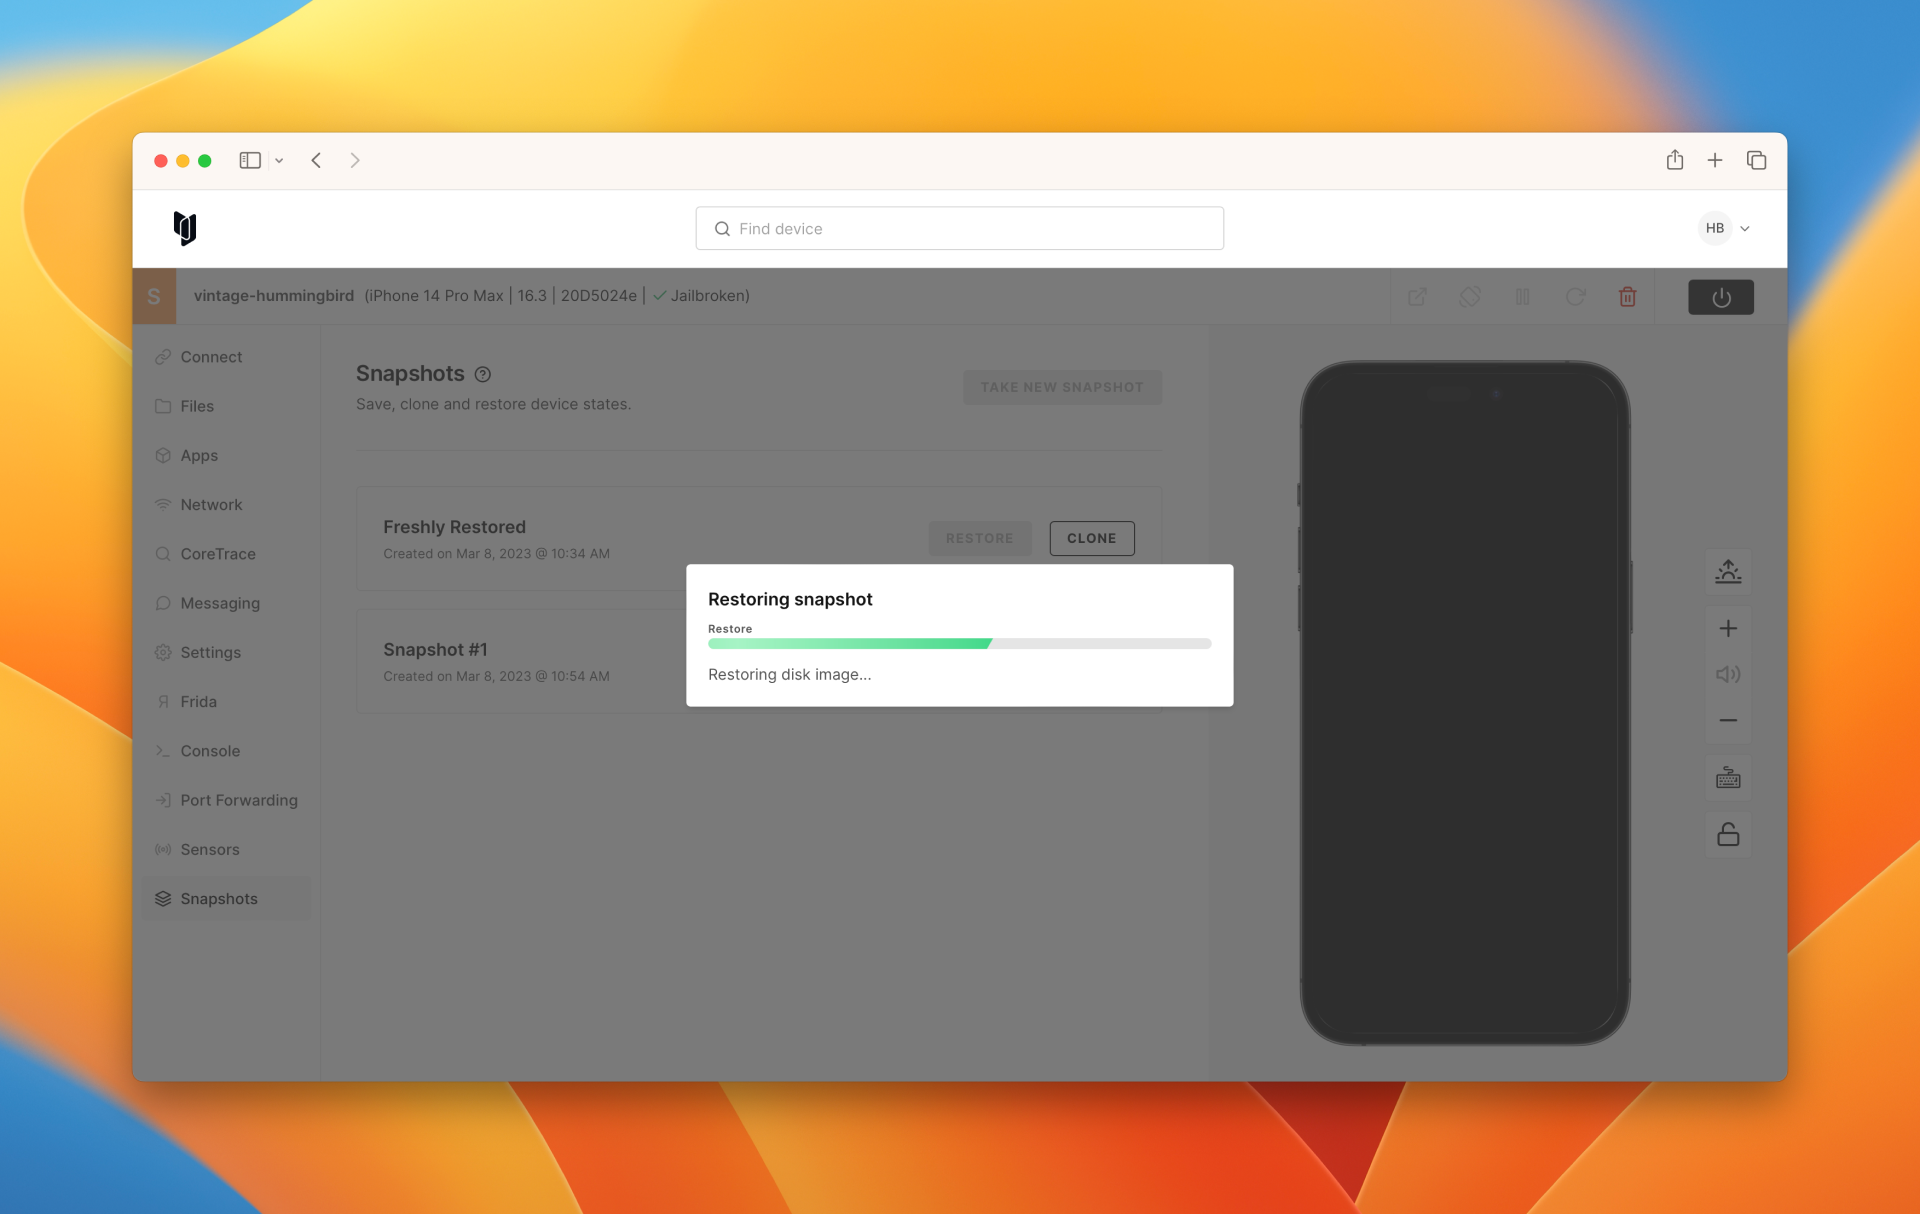
- Now we are going to restore the snapshot. Go back to the Snapshots page.
- Click "RESTORE" next to "Snapshot #1". The device will be restored. You will be able to validate the device is working by booting up to the home screen as usual.
Clone a Snapshot
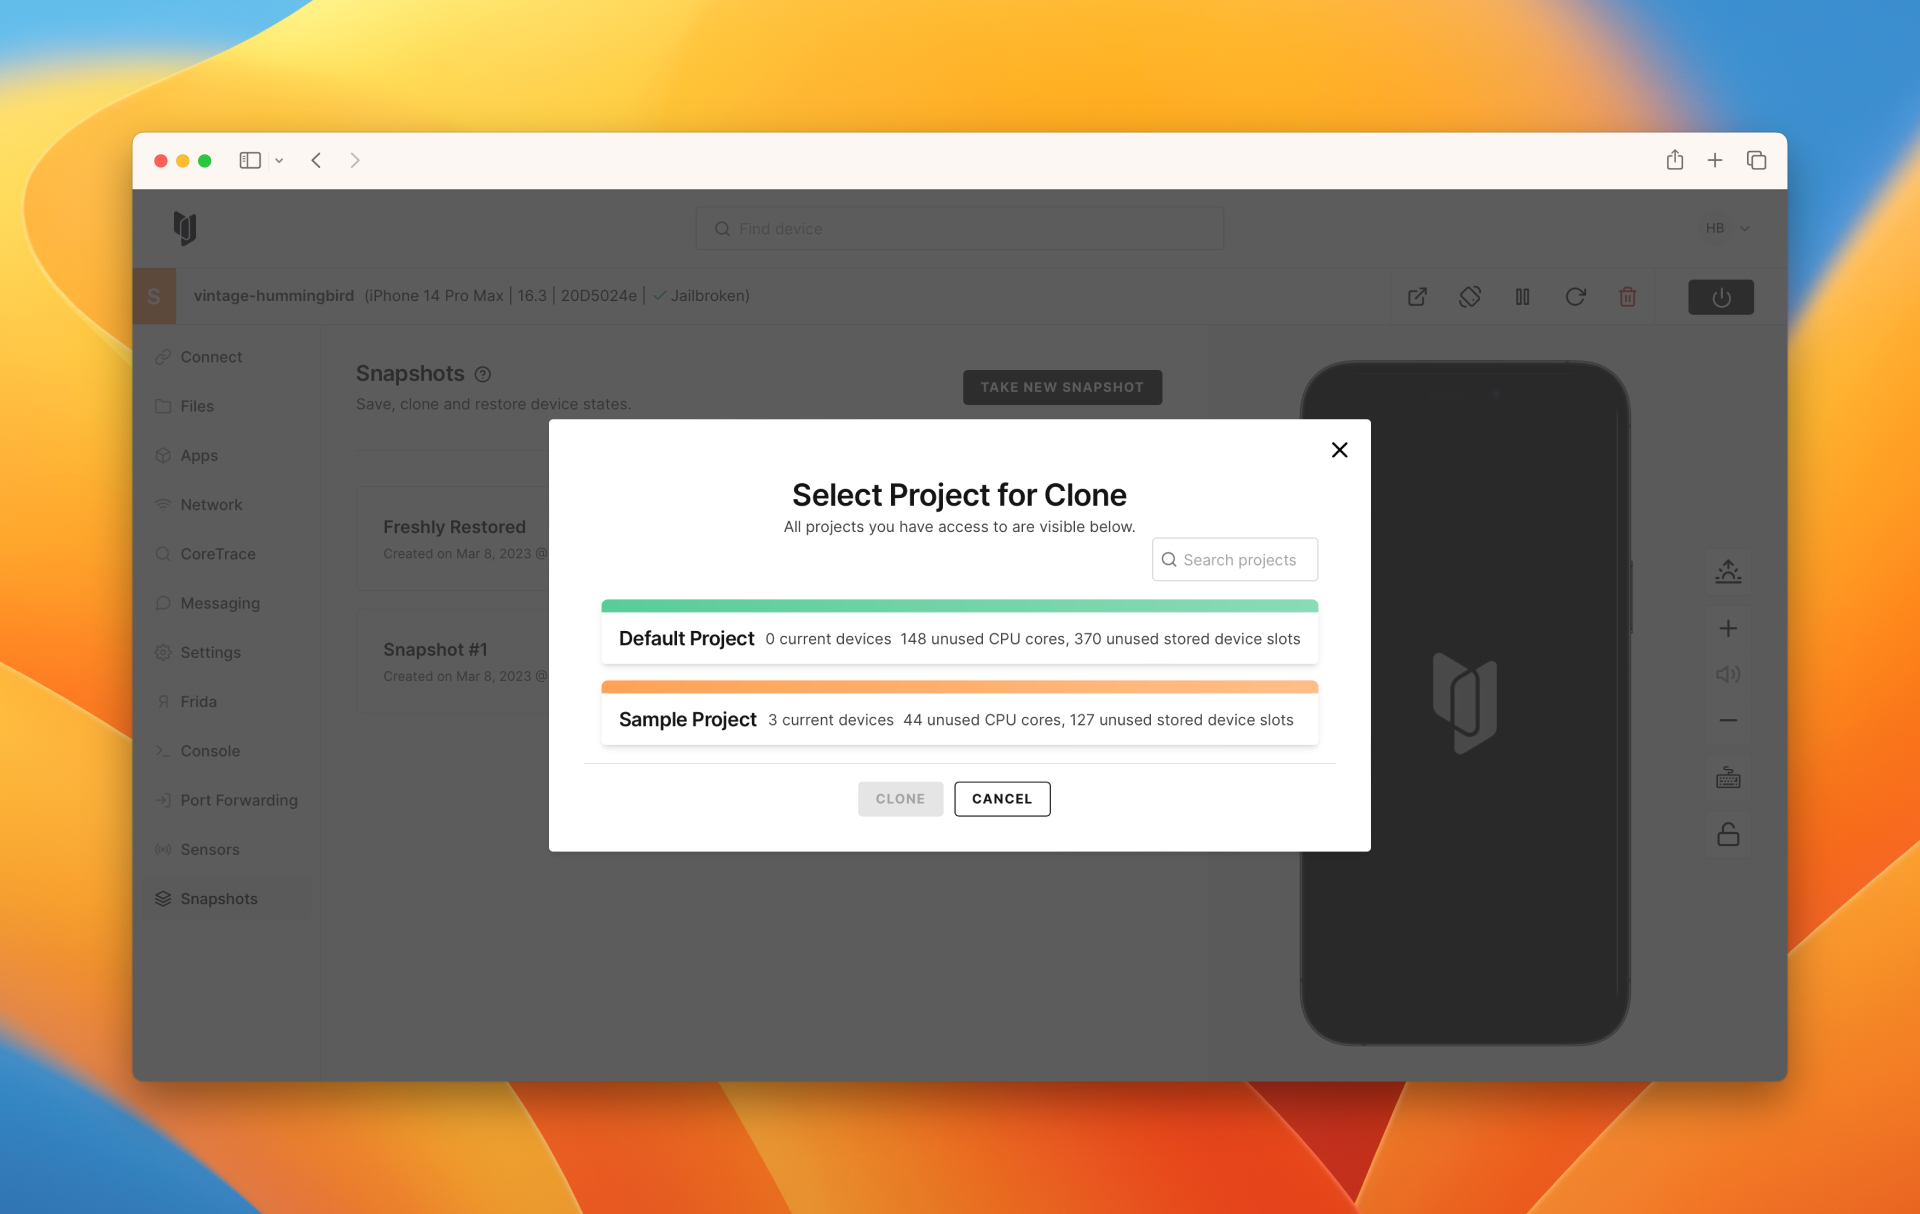
To clone a snapshot into a new device, simply go to your desired snapshot and press the "Clone" button. If you're a customer with an Enterprise domain, this will prompt you to select a project in which to create the new device.
Please note that when you clone a live snapshot, the device filesystem is copied to the new device, but the RAM state is not. This means that the new device will boot up as if it were power-cycled but with the filesystem state of the snapshot.
Snapshot Sharing
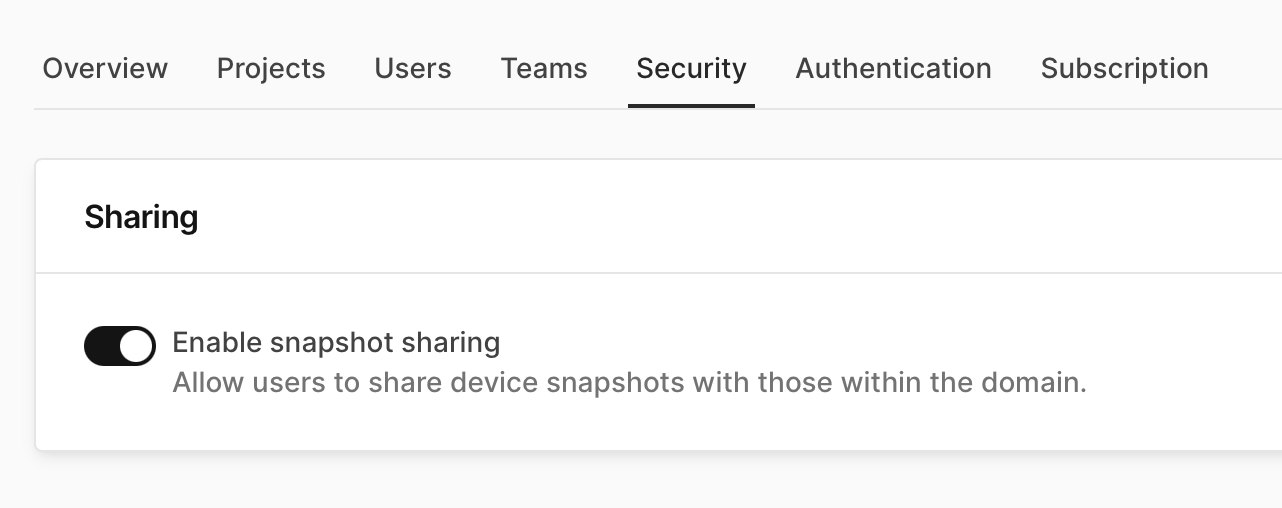
Snapshot Sharing is only available for our Enterprise Cloud customers, and not available with our onsite appliances.
Before users can share snapshots, the domain administrator must enable snapshot sharing on the Admin -> Security page. Once enabled, users can share snapshots with other users.
Access Codes
Access codes are unique identifiers used to control and manage permissions for shared snapshots. Each snapshot is assigned a specific access code, which must be provided by users to gain access. This ensures that only authorized individuals can use or share the snapshot, enhancing security and confidentiality. Make sure to keep access codes secure and share them only with trusted parties to maintain the integrity of the snapshot's security.
Share a Snapshot
-
Open the Snapshots page for the device with an existing snapshot, click the vertical ellipsis (
⋮), and click Share. (You can't share the 'Freshly Restored' snapshot.)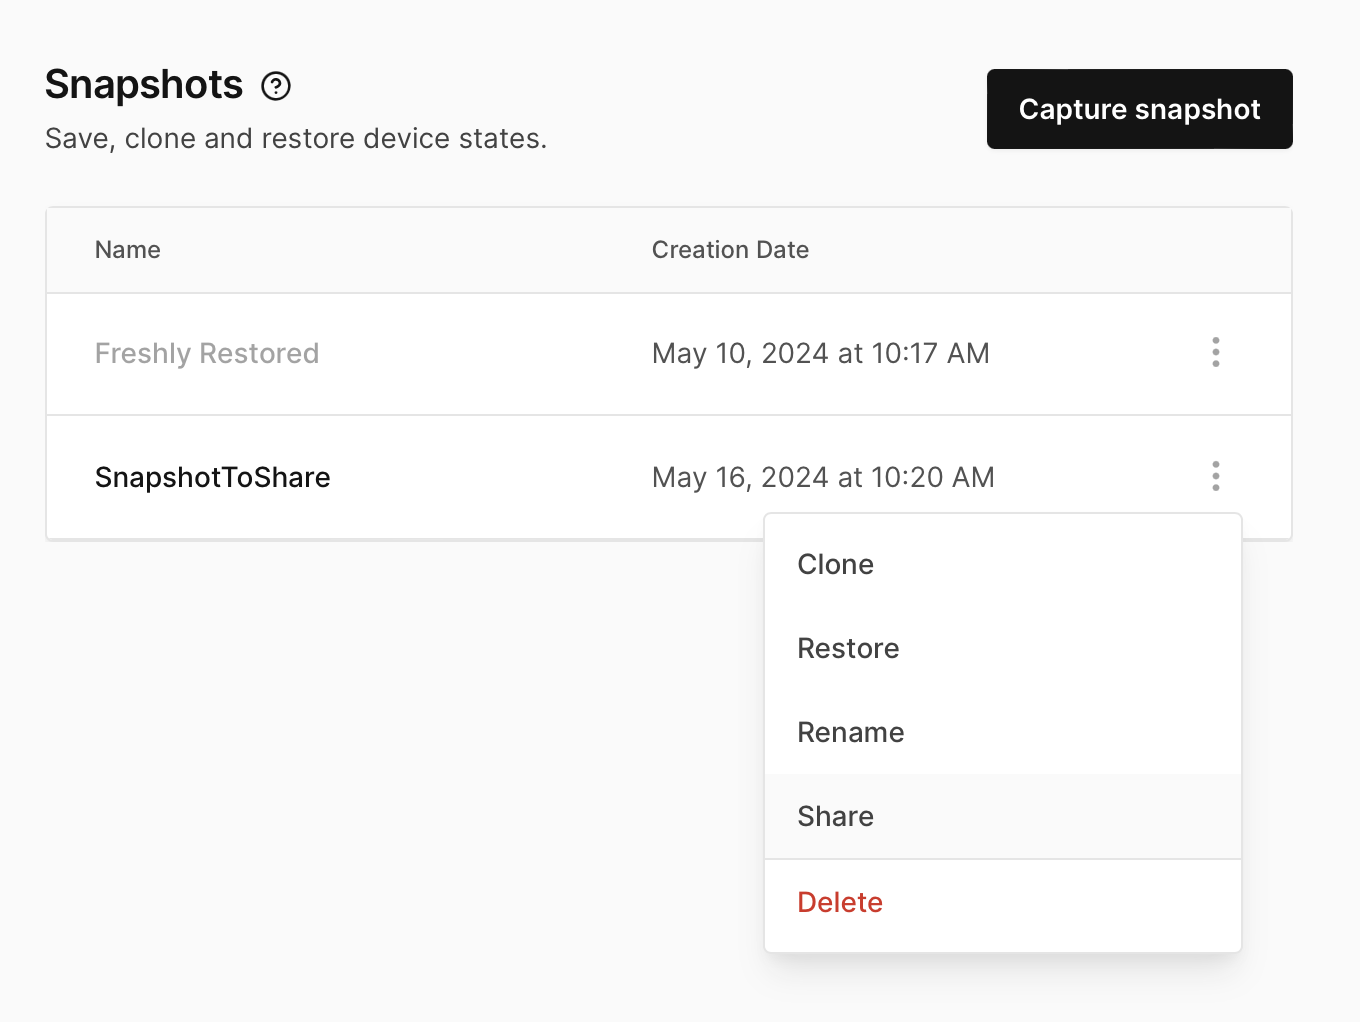
-
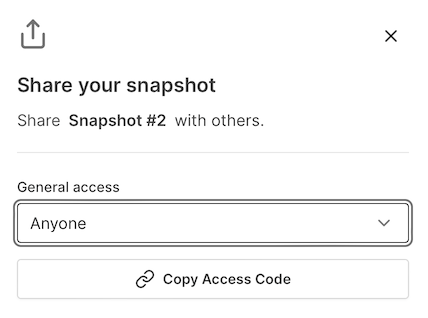
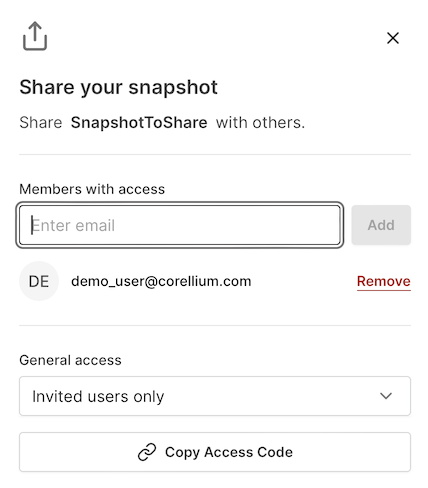
Choose the access level for the shared snapshot. You can choose from the following options:
- Anyone - Any user with the access code can import the selected snapshot
- Anyone with password - Any user with the access code and password can import the selected snapshot
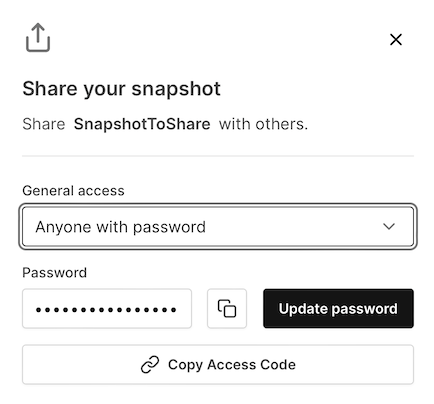
- Anyone in my domain - Any user inside the sharer's domain with the access code can import the selected snapshot

- Invited users only - Any user with the access code whose also been invited via email can import the selected snapshot (Note: The invited user will receive an email with the access code)
- Anyone - Any user with the access code can import the selected snapshot
-
Click Copy Access Code to copy the code to your clipboard.
Other users with snapshot sharing enabled will need this access code to import your snapshot into their account.
View and Modify Your Shared Snapshots
To see which snapshots you're sharing, open the Snapshots page in the top navbar then click on the Shared by me tab.
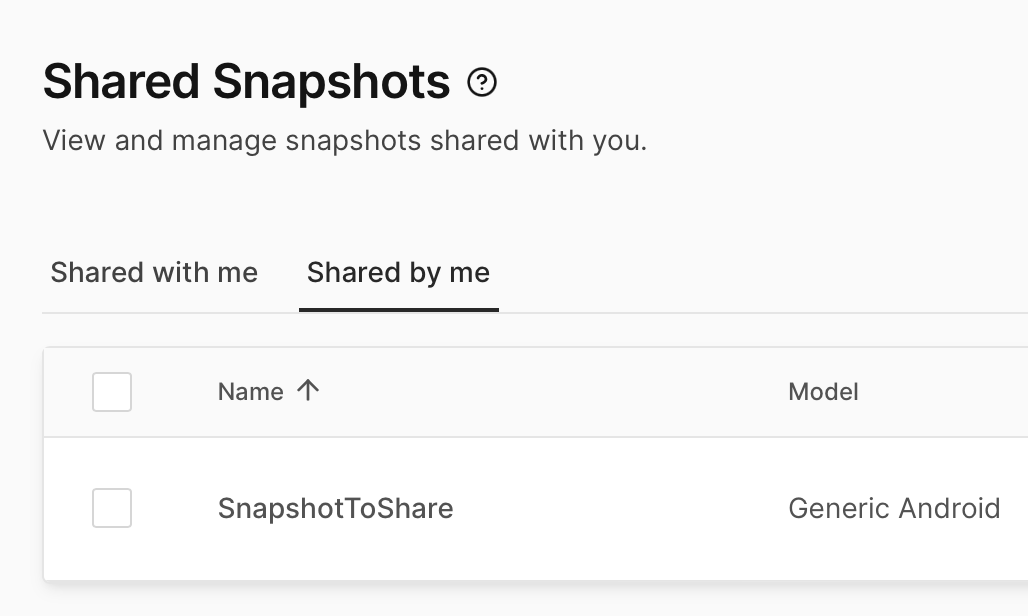
To edit snapshot sharing settings, click on the vertical ellipsis (⋮) to the right and choose Edit Sharing. The same access level options you set previously will be available to edit.
To stop sharing a snapshot entirely, click on the vertical ellipsis (⋮) to the right and choose Stop Sharing.
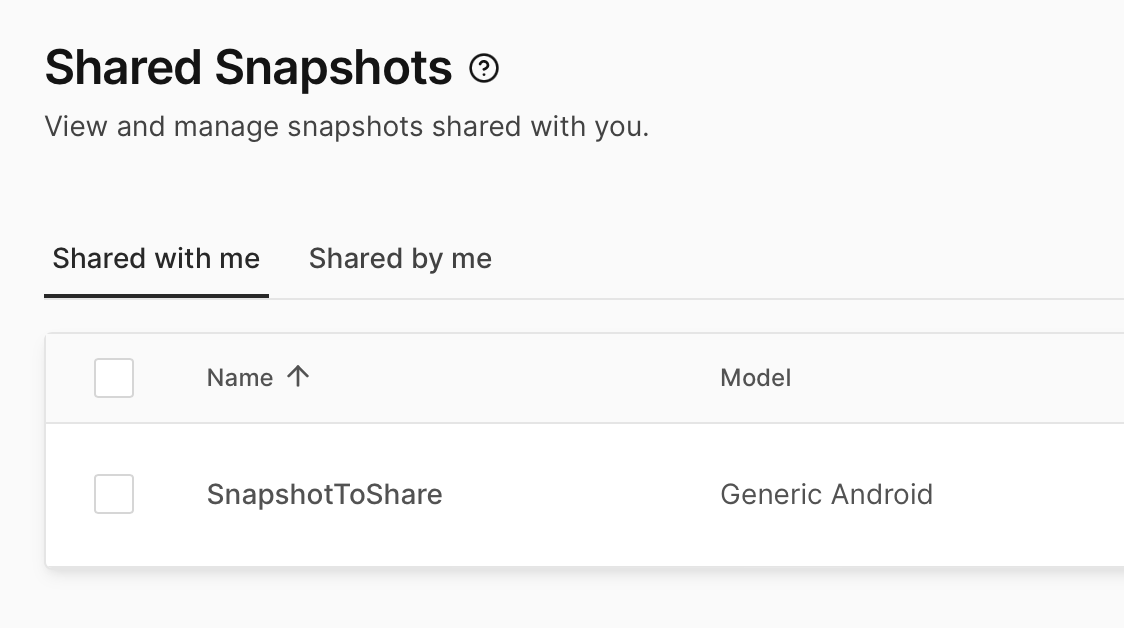
Import a Shared Snapshot
You can import another user's shared snapshot into your account by following these steps:
-
Open the Snapshots page in the top navbar, which defaults to the 'Shared with me' tab.
-
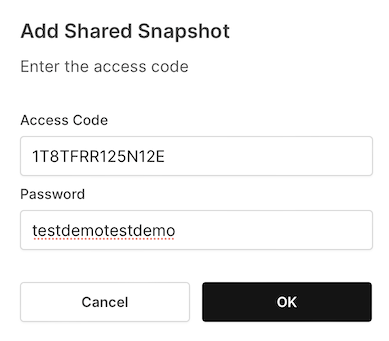
Click on Add snapshot, enter the access code and optional password, then click OK.
-
If you have snapshot sharing enabled, the shared snapshot will be added to your 'Shared with me' tab. You can now clone the snapshot into a new device.
-
To clone the shared snapshot, click on the vertical ellipsis (
⋮) to the right and choose Clone. -
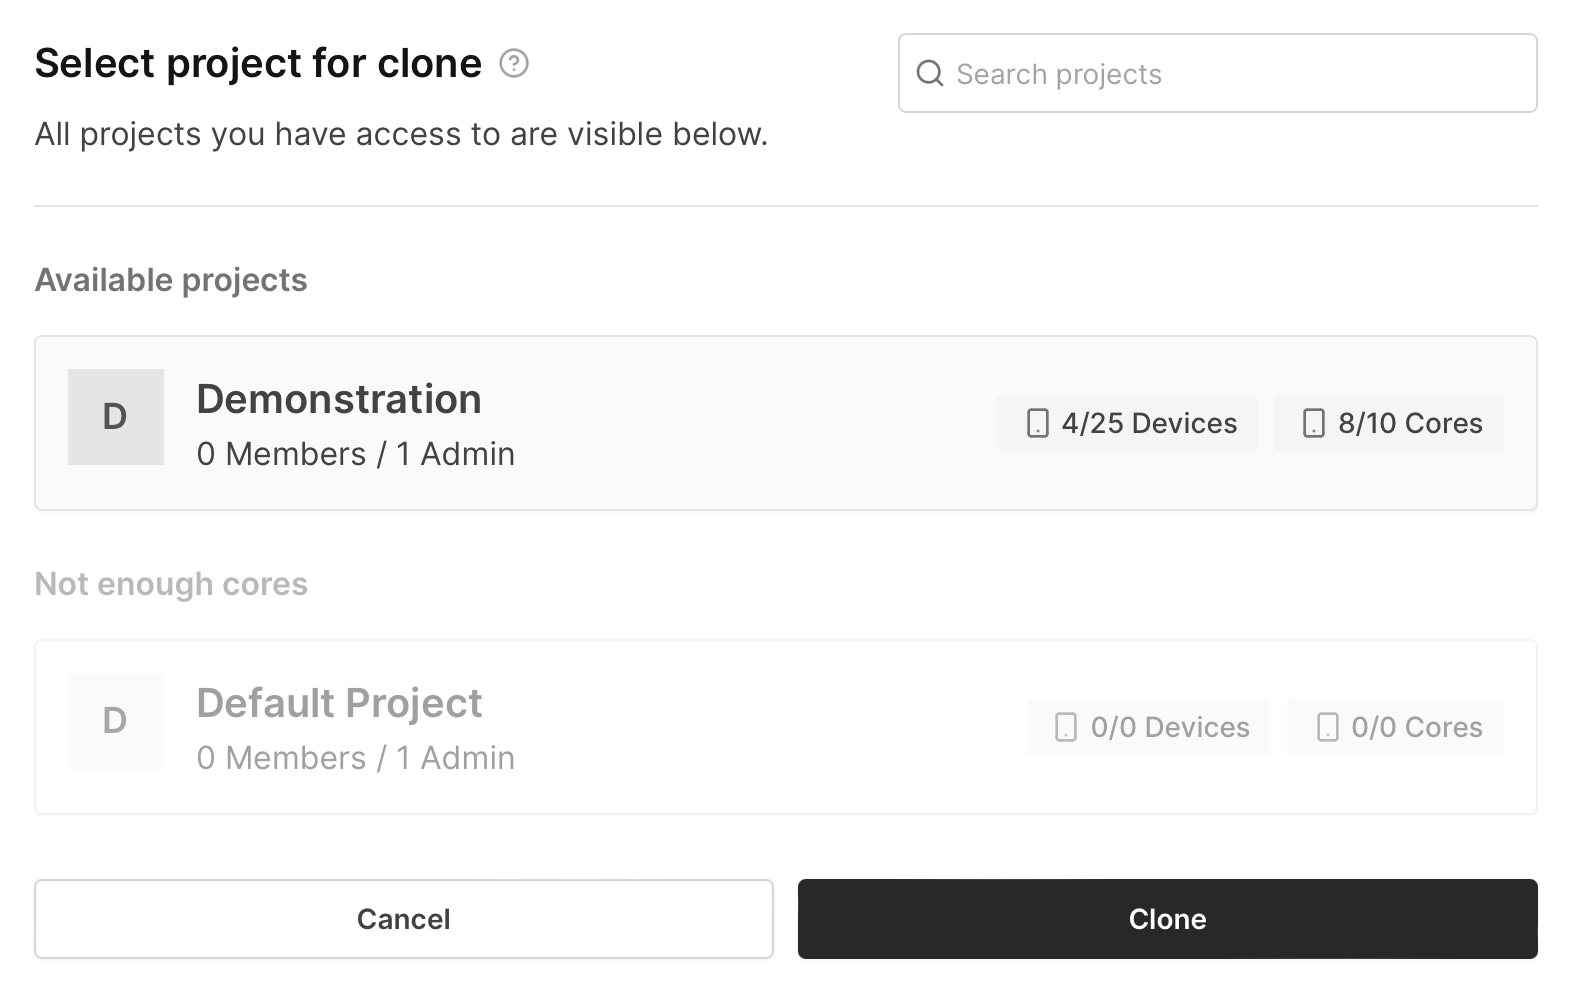
Select which project the clone should be created in, then click Clone. Any project with insufficient CPU cores will be unavailable for selection.
-
Wait for the snapshot to boot up.
Please note that when you create a new device from a shared live snapshot, the device file system is copied to the new device, but the RAM state is not. This means that the new device will boot up as if it were power-cycled but with the filesystem state of the snapshot.
Other Notes
Live Android snapshots are not currently available on our cloud environment.
We are aware of an issue when taking snapshots on Android devices where the web interface may go blank. If this occurs, please refresh the page. We are working on a fix for this issue.