USBFlux
The USBFlux app allows you to connect your virtual iOS devices to programs like Xcode using the USB protocol - just like plugging your physical device in with a USB cable. USBFlux is available for macOS and Linux users.
How USBFlux Works
Under the hood, the usbfluxd daemon redirects the standard usbmuxd socket to allow connections to local and remote usbmuxd instances so remote devices appear connected locally.
The code is available to review on Corellium's GitHub repo.
USBFlux for macOS
-
If you are using our cloud product, ensure that you are connected to the VPN. VPN profiles are per Project, so USBFlux will detect all devices within the Project that you are connected to.
-
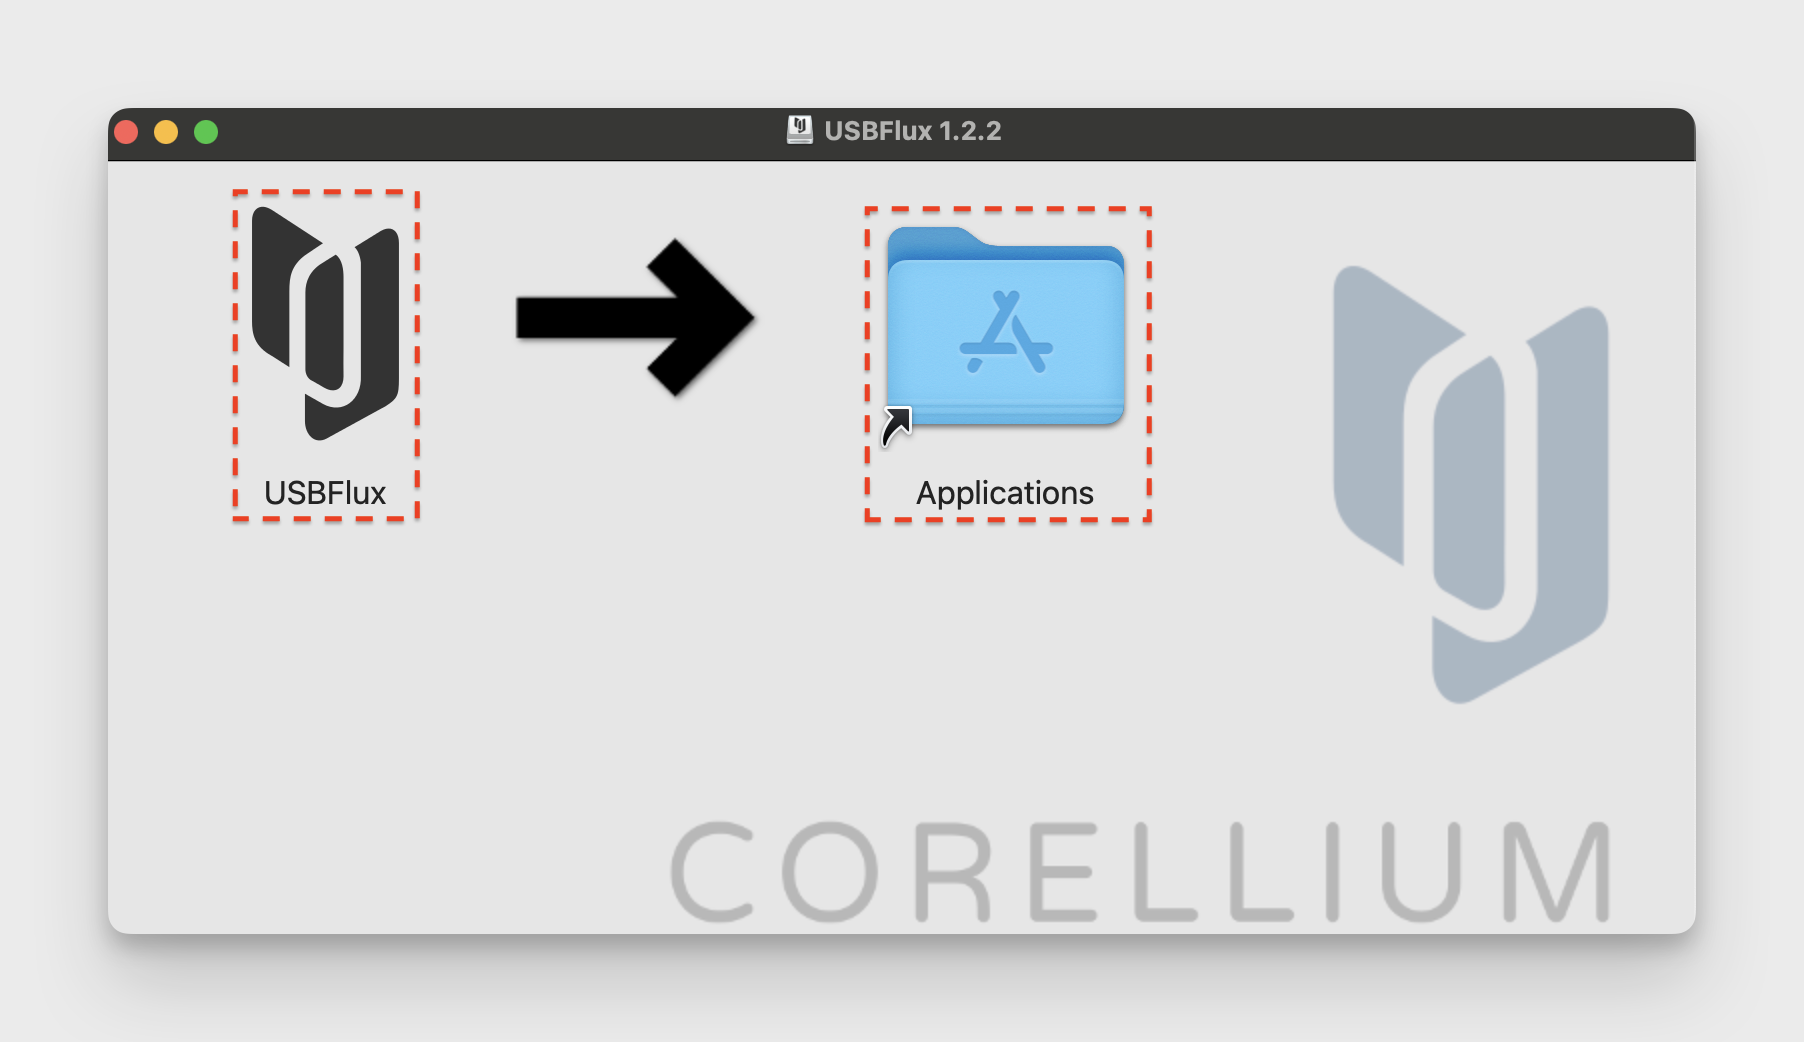
Download USBFlux using the button below or from the "Connect" tab of your virtual iOS device.
- Then, run the installer and drag the USBFlux icon into your Applications folder.
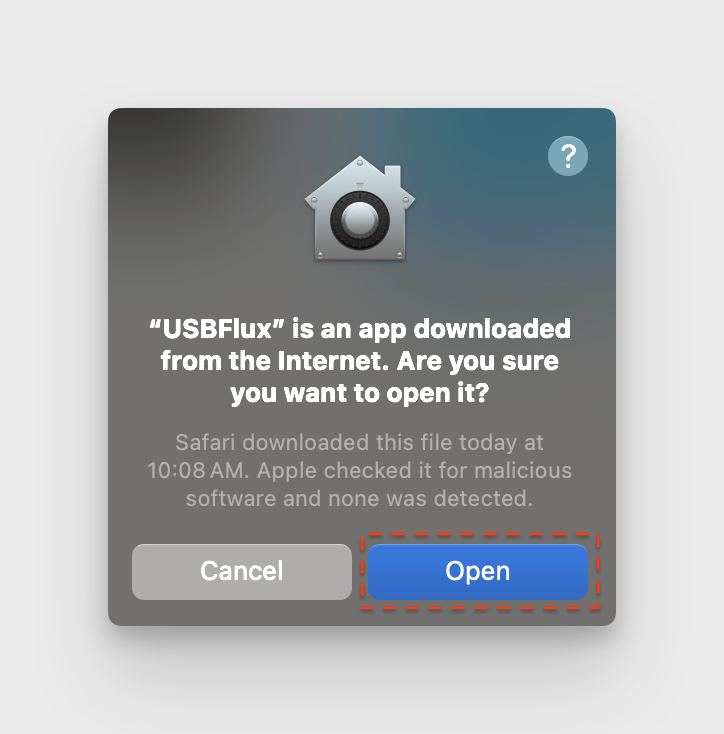
- Next, launch USBFlux.
- Upon opening the USBFlux application, you are presented with an additional check, click "Open" to use USBFlux.
-
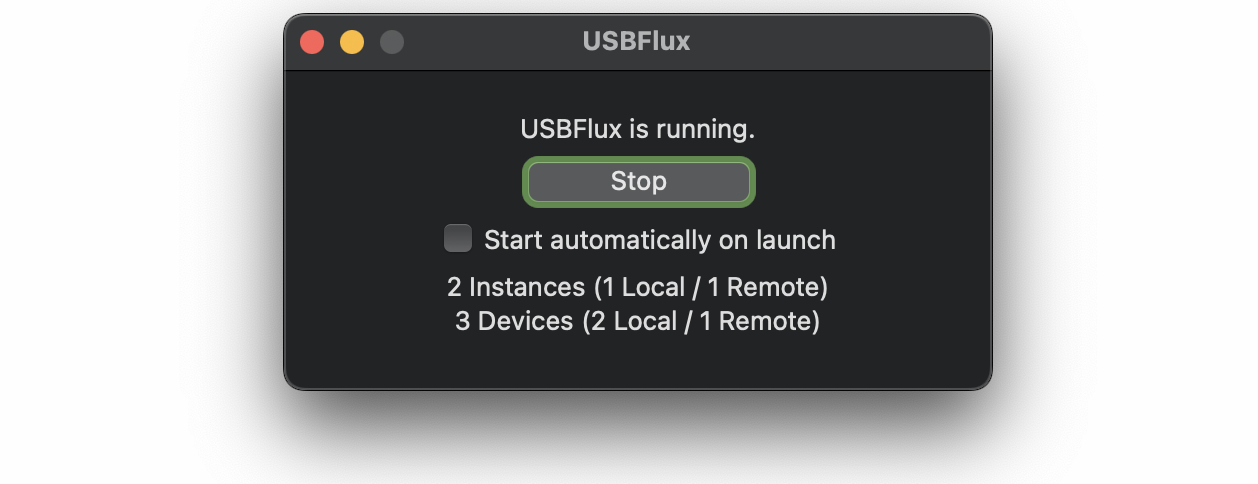
Now that USBFlux has launched, click "Start". If you are using the on-site version, you will need to enter your domain and credentials. The on-site version of USBFlux can be downloaded through the web interface of the on-site appliance.
-
USBFlux will automatically detect the number of "On" devices in your project. "Off" devices are not detected.
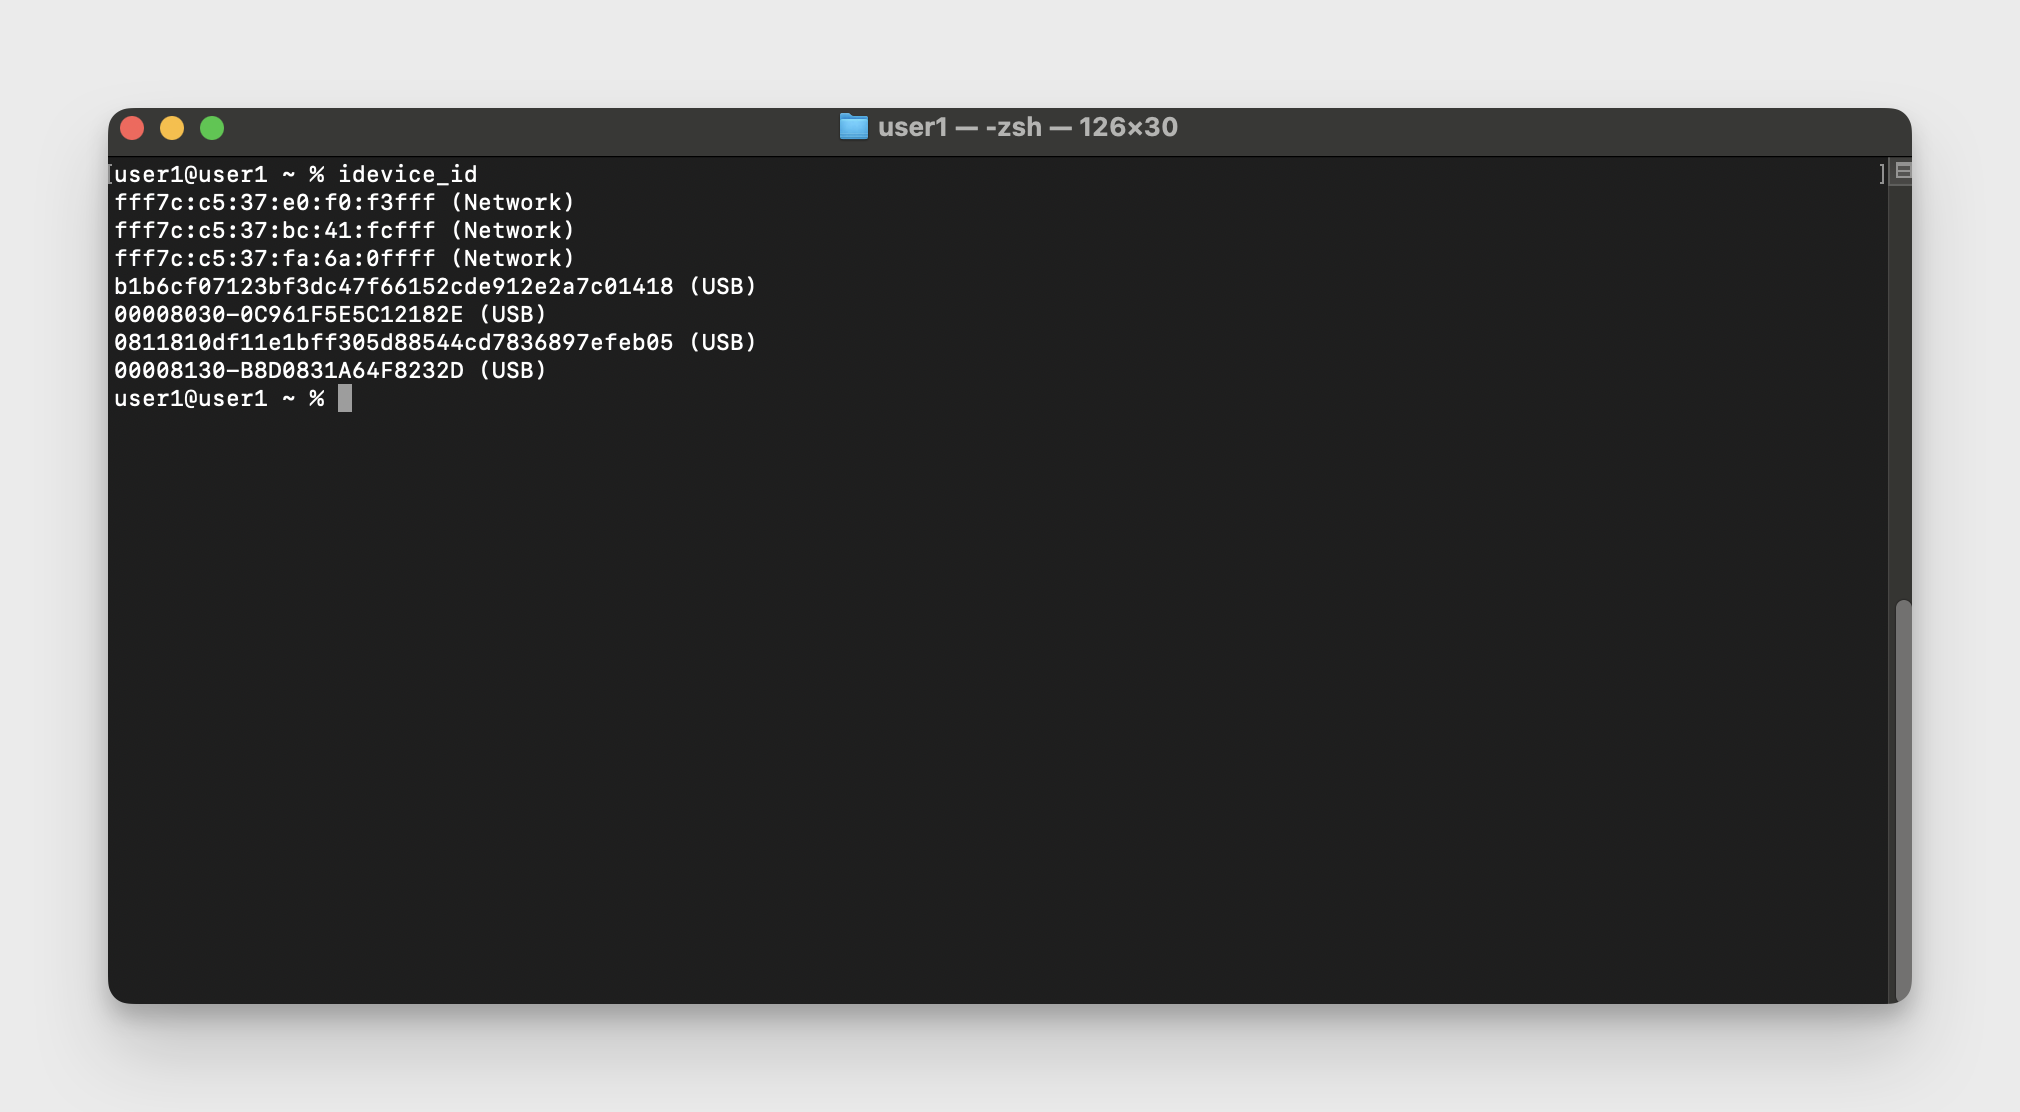
Verification of USB connected devices can also be done from the command line with idevice_id which is a part of libimobiledevice.
Shut down and restart any programs like Xcode or Console where you want to connect your virtual devices. Be sure to fully shut down any running processes and restart the program to pick up the USBFlux changes.
*** Please note: You must restart these programs every time you run USBFlux. ***
For additional troubleshooting, confirm that you've connected to the VPN using the correct OpenVPN configuration file for your project and have at least one active iOS device within the project. If USB-connected devices still do not appear, try running the provided commands to stop and start the internal USBFlux processes.
launchctl stop com.apple.usbmuxd
killall usbfluxd
launchctl start com.apple.usbmuxd
/path/to/usbfluxd
USBFlux for Linux
For Linux, you can download, build, and install USBFlux from Corellium's GitHub repo.
Build USBFlux on Linux
The following packages are dependencies:
avahi-daemonbuild-essentialgitlibimobiledevice6libplist(must be compiled)libtoolpkg-configpython3-devmakeusbmuxd
From a fresh Ubuntu 22 environment, run the following script.
# Install dependencies
sudo apt update
sudo apt install avahi-daemon build-essential git libimobiledevice6 libtool pkg-config python3-dev make usbmuxd

# Clone the repositories
git clone https://github.com/libimobiledevice/libplist
git clone https://github.com/corellium/usbfluxd

# Make and install libplist
cd libplist/
./autogen.sh
make
sudo make install
cd ../

# Make and install usbfluxd
cd usbfluxd/
./autogen.sh
make
sudo make install
cd ../
Run USBFlux on Linux
# Start the usbmuxd service
sudo systemctl start usbmuxd
# Start avahi
sudo avahi-daemon
# Run usbfluxd in the foreground
sudo usbfluxd -f -n
# Add the remote iOS device to become USB connected:
path/to/usbfluxd/tools/usbfluxctl add serviceip:5000
# Validate the remote device appears idevice_id -l
00008140-532C40F739330D94
USBFlux for Windows
USBFlux is not available for Windows.
Notes
- Please be aware that latency can significantly impact USBFlux connection speed. Even under normal local speeds, whenever a new device is first connected to Xcode, a large
dyld-shared-cachefile must be synced, which can take an average of 15-20 minutes. Checking the box for "Connect via network" in Xcode -> Devices and Simulators -> Device View may optimize that speed. To optimize creating device caches for Xcode locally, check out this awesome tool. - USBFlux connections have much higher latency that most tools are designed for, since USB is designed to be a physical connection. If you're using a tool that relies on low-latency, you may need to adjust the timeout settings. For example, if you're using
cfgutil, you can increase the timeout setting to 3 seconds to see if it addresses the issue, for example:cfgutil --timeout 2 list.